Evening in the Garden Quilts

Adventures in Fabric Art


6 Comments

Finished Baby Quilt

2015-09-07 08.27.17
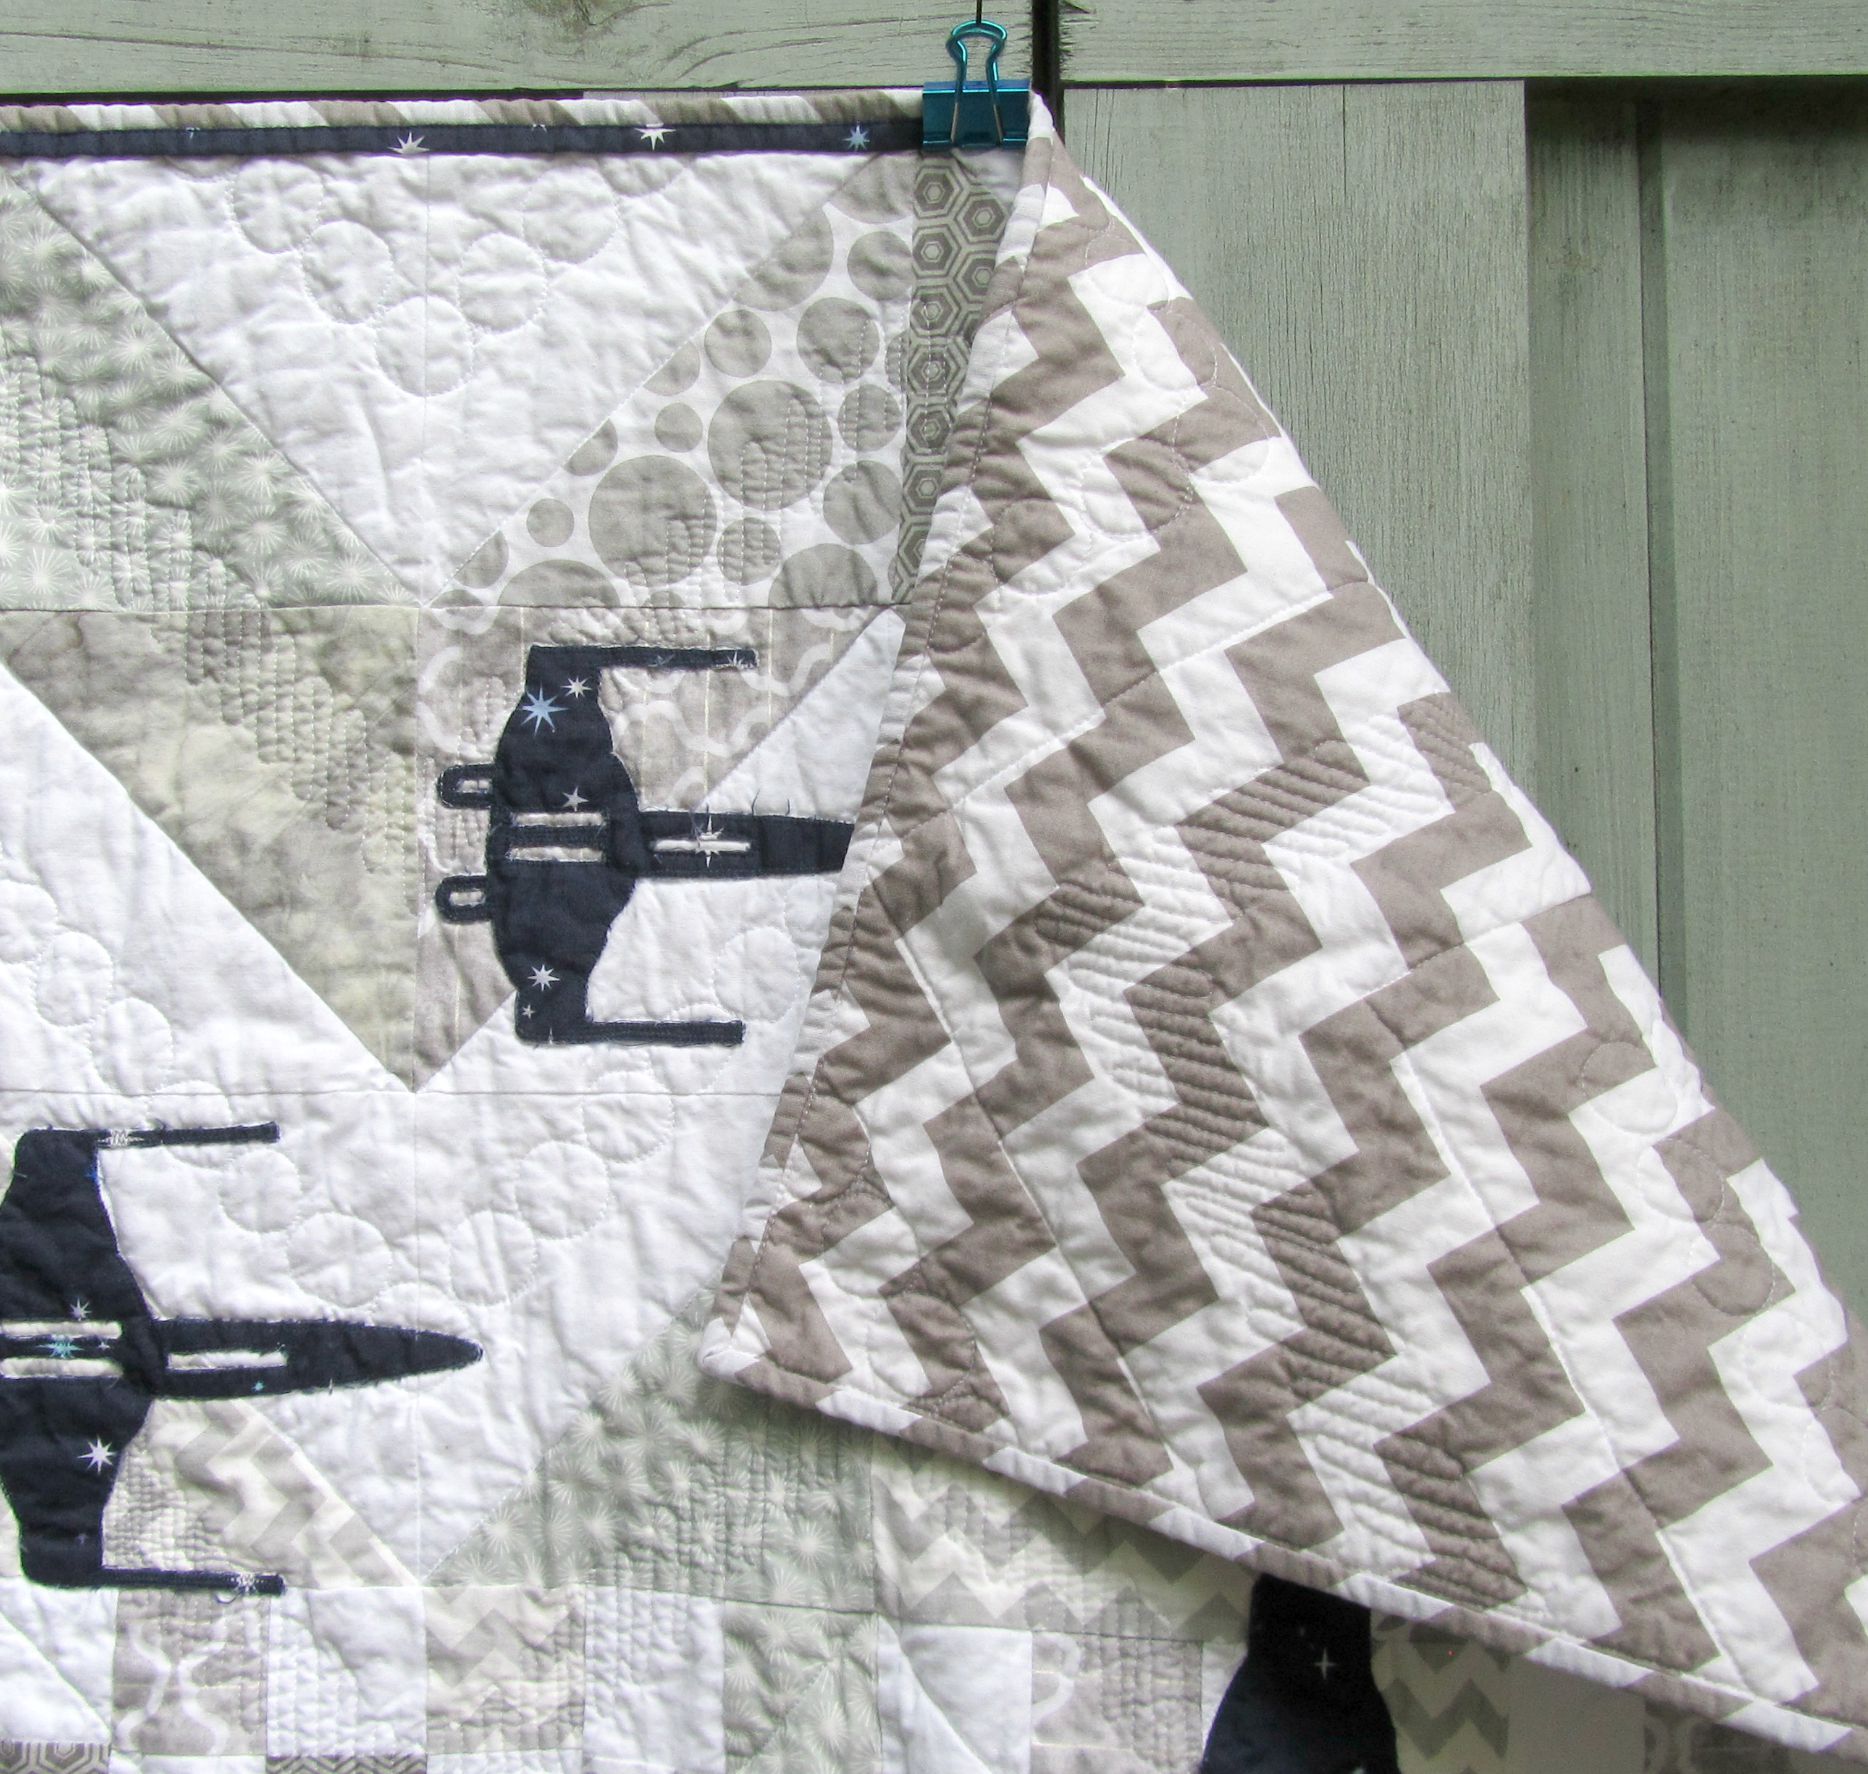
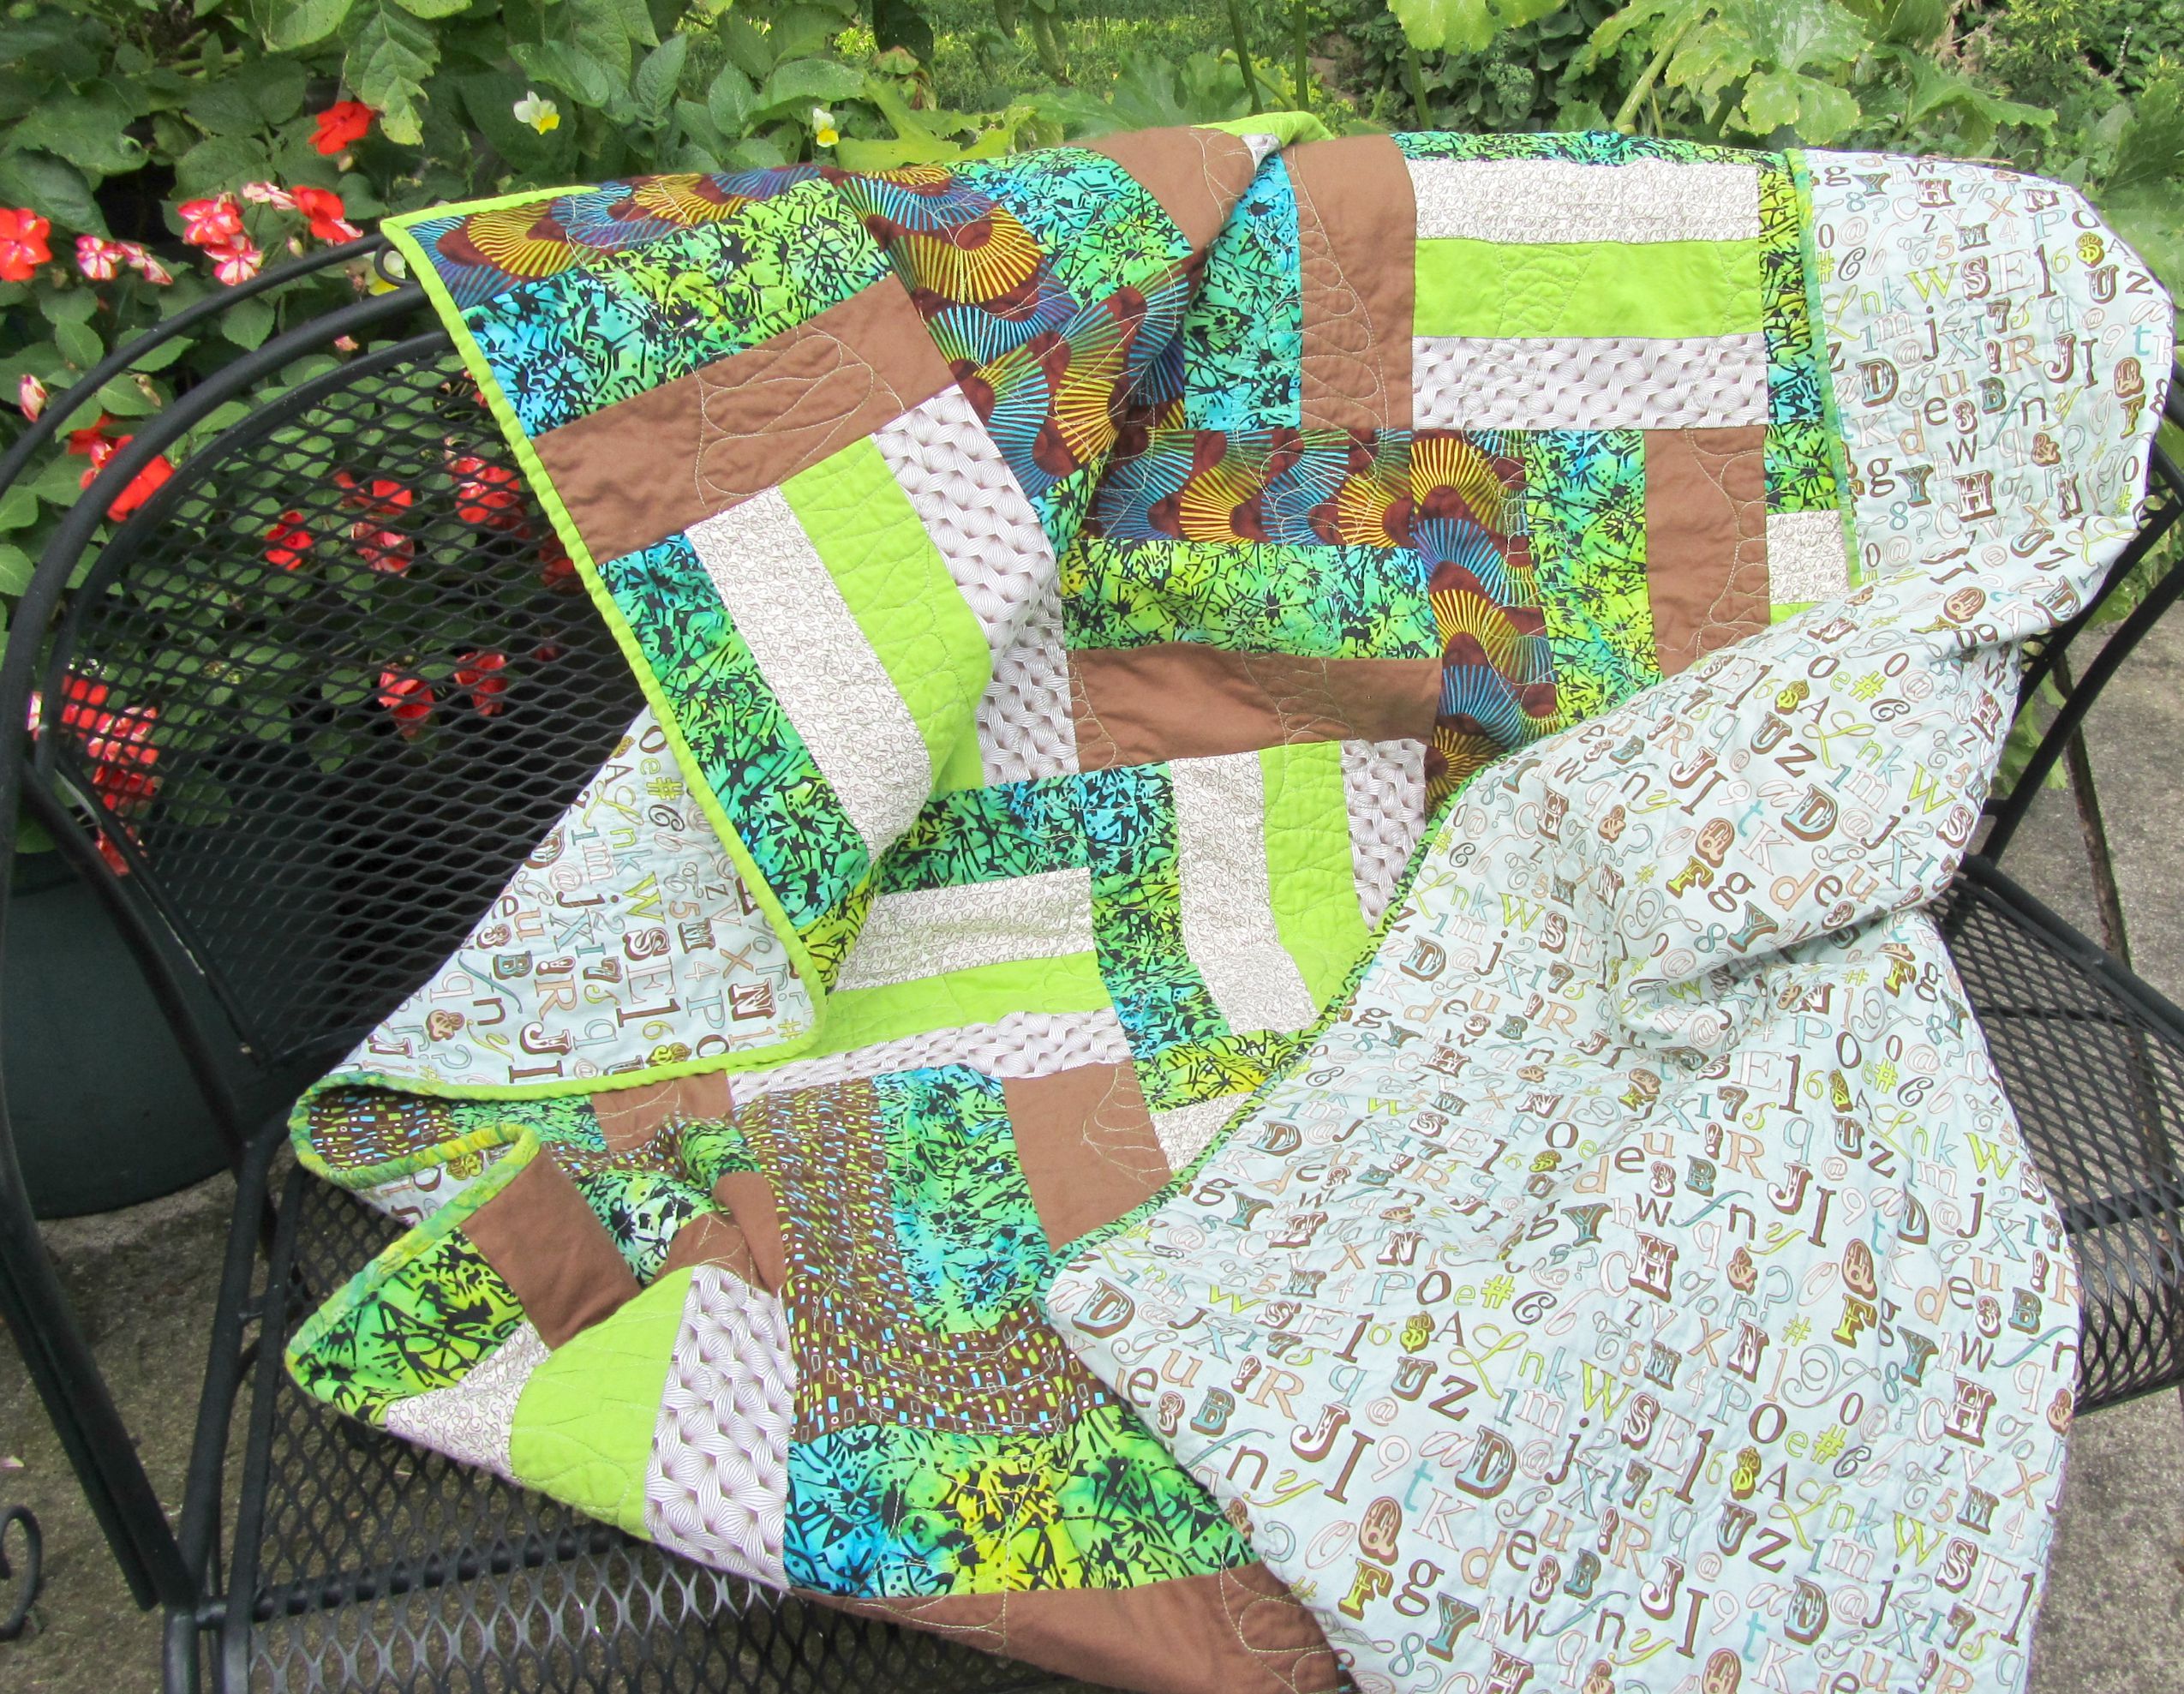
This quilt began with rummaging though my 6.5″ scrap bin.  I pulled together these pretty florals and semi-solids.  Some were more recent, but some were OLD and needed to go.  It is nice and square, even though it didn’t want to hang flat for the photo.

2015-09-07 08.28.22Yes, I cut the four-patches different widths.  That was a… design choice!  I kind of like it.  I was originally going to use all twelve Disappearing Four Patch blocks for the top, quilt it, bind it, and be finished.  No matter how I turned the blocks on the design wall, they looked like…well, not good.

2015-09-02 09.26.00
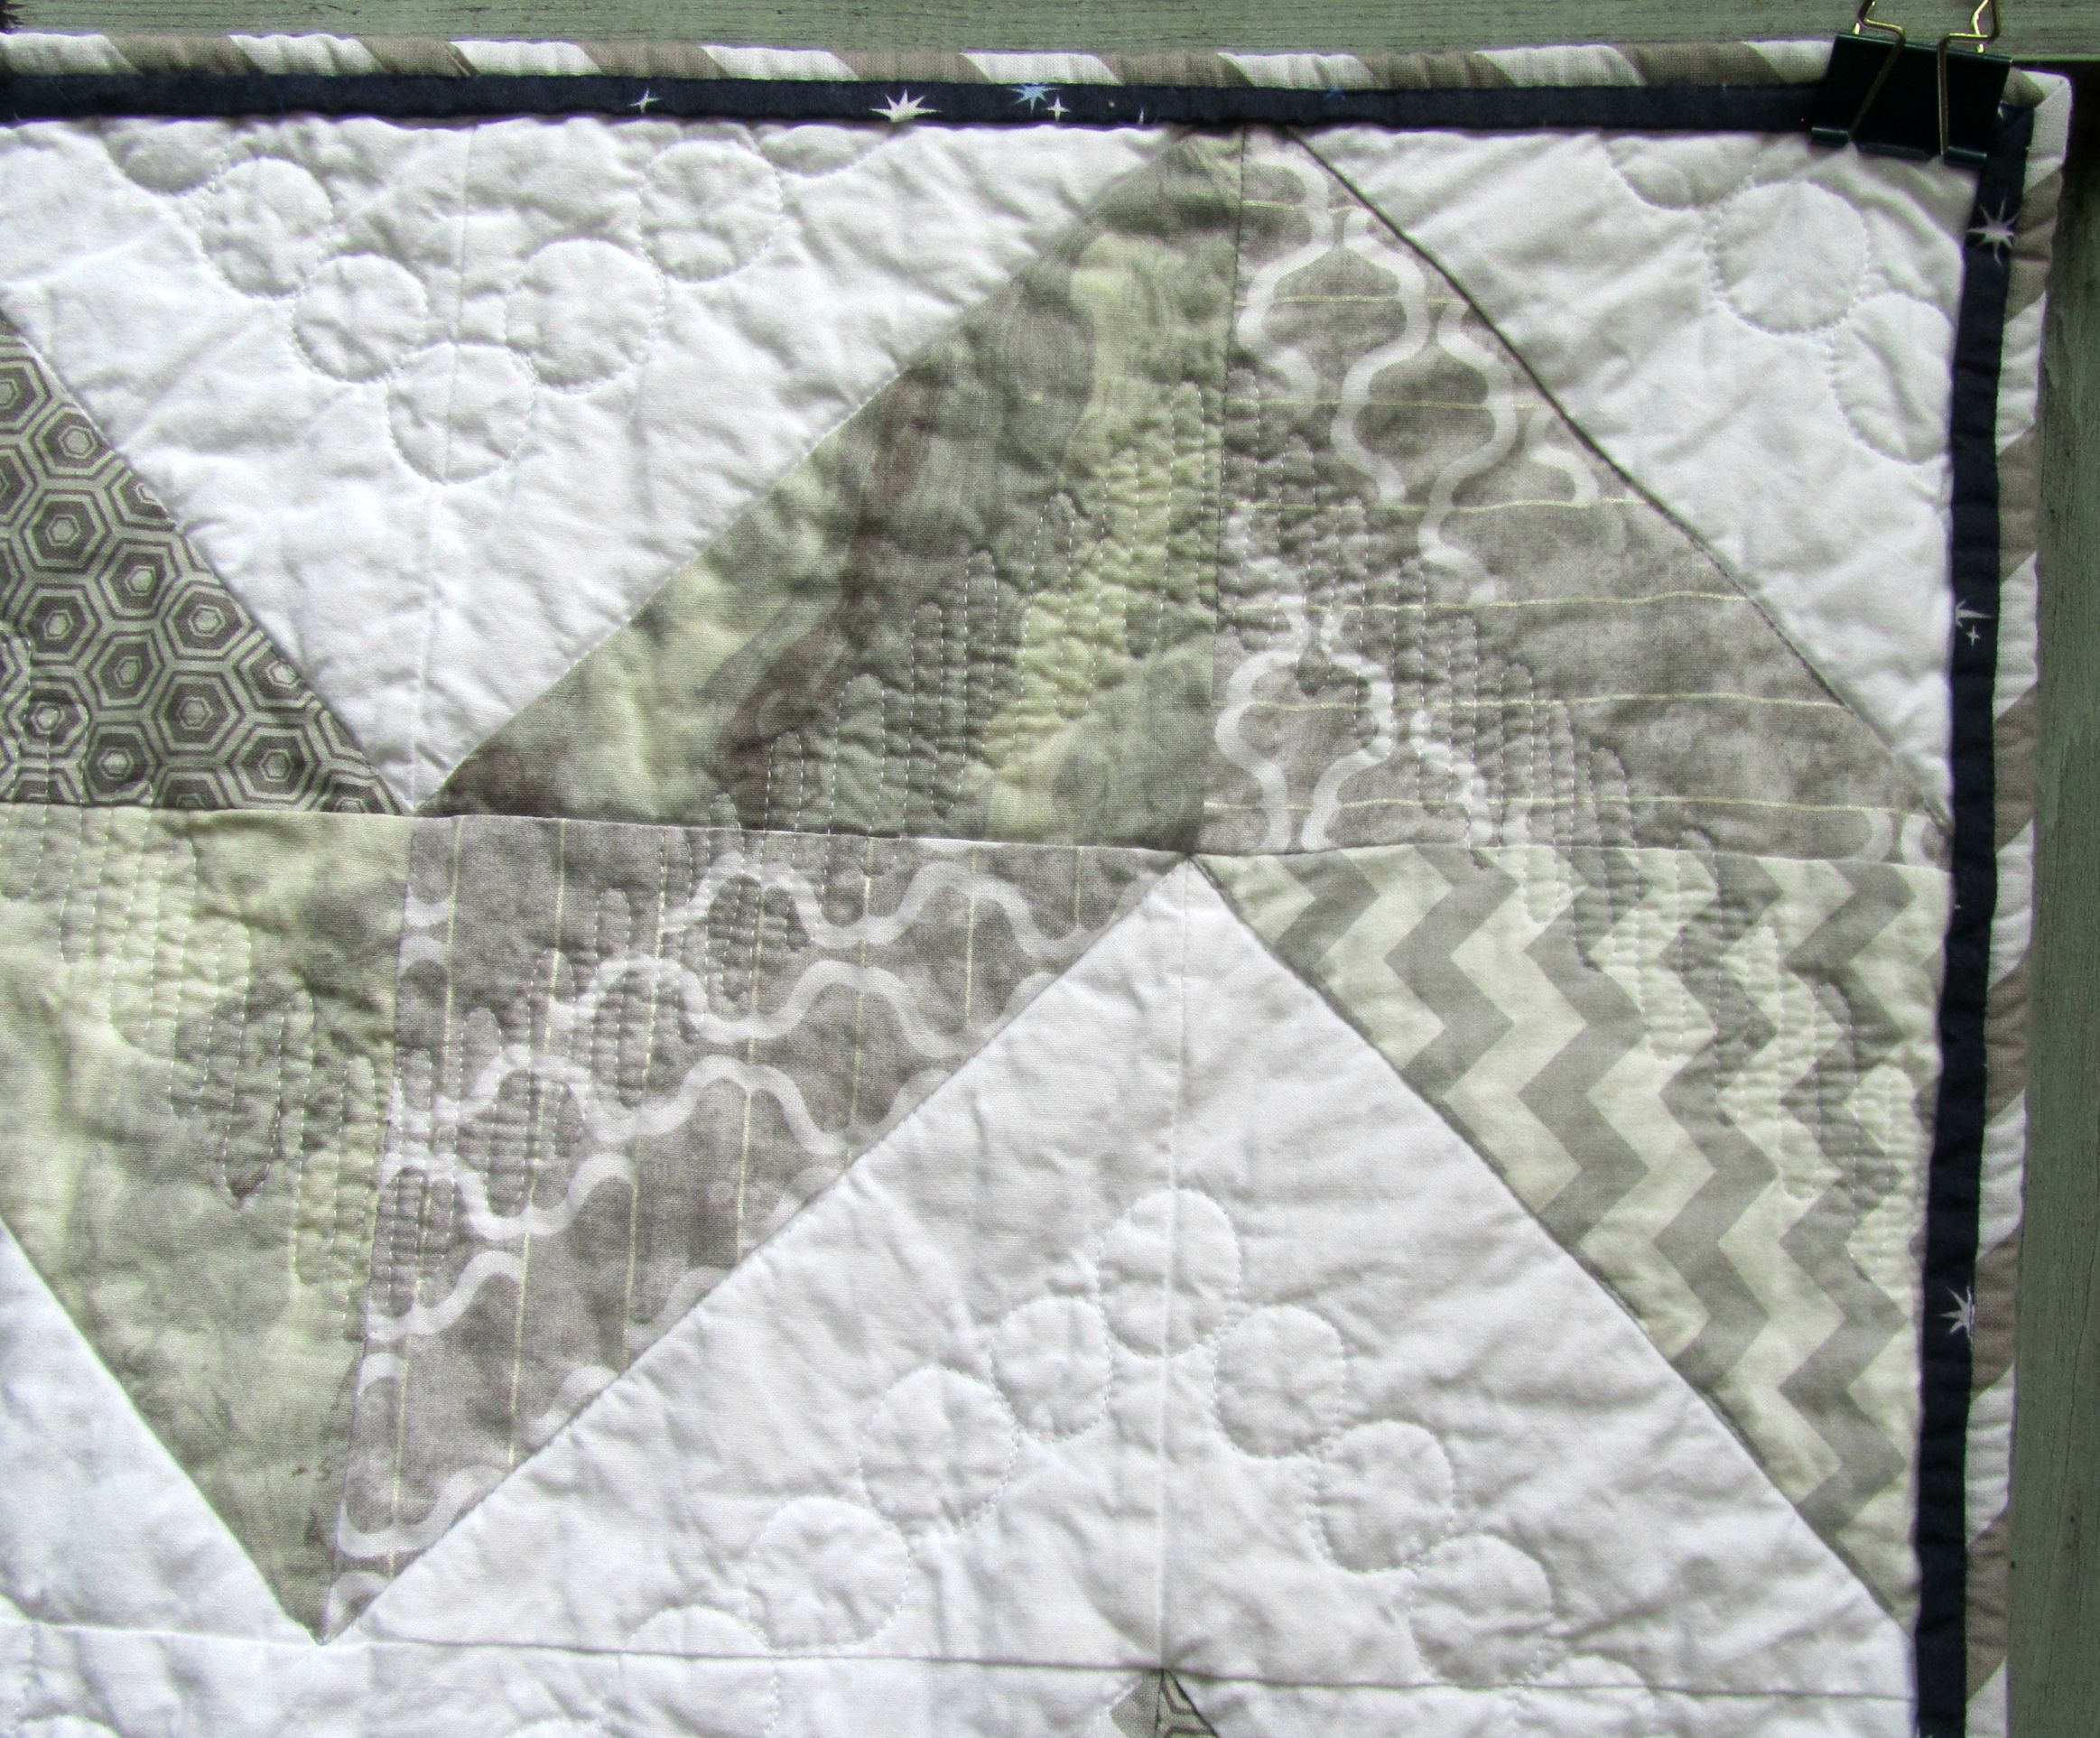
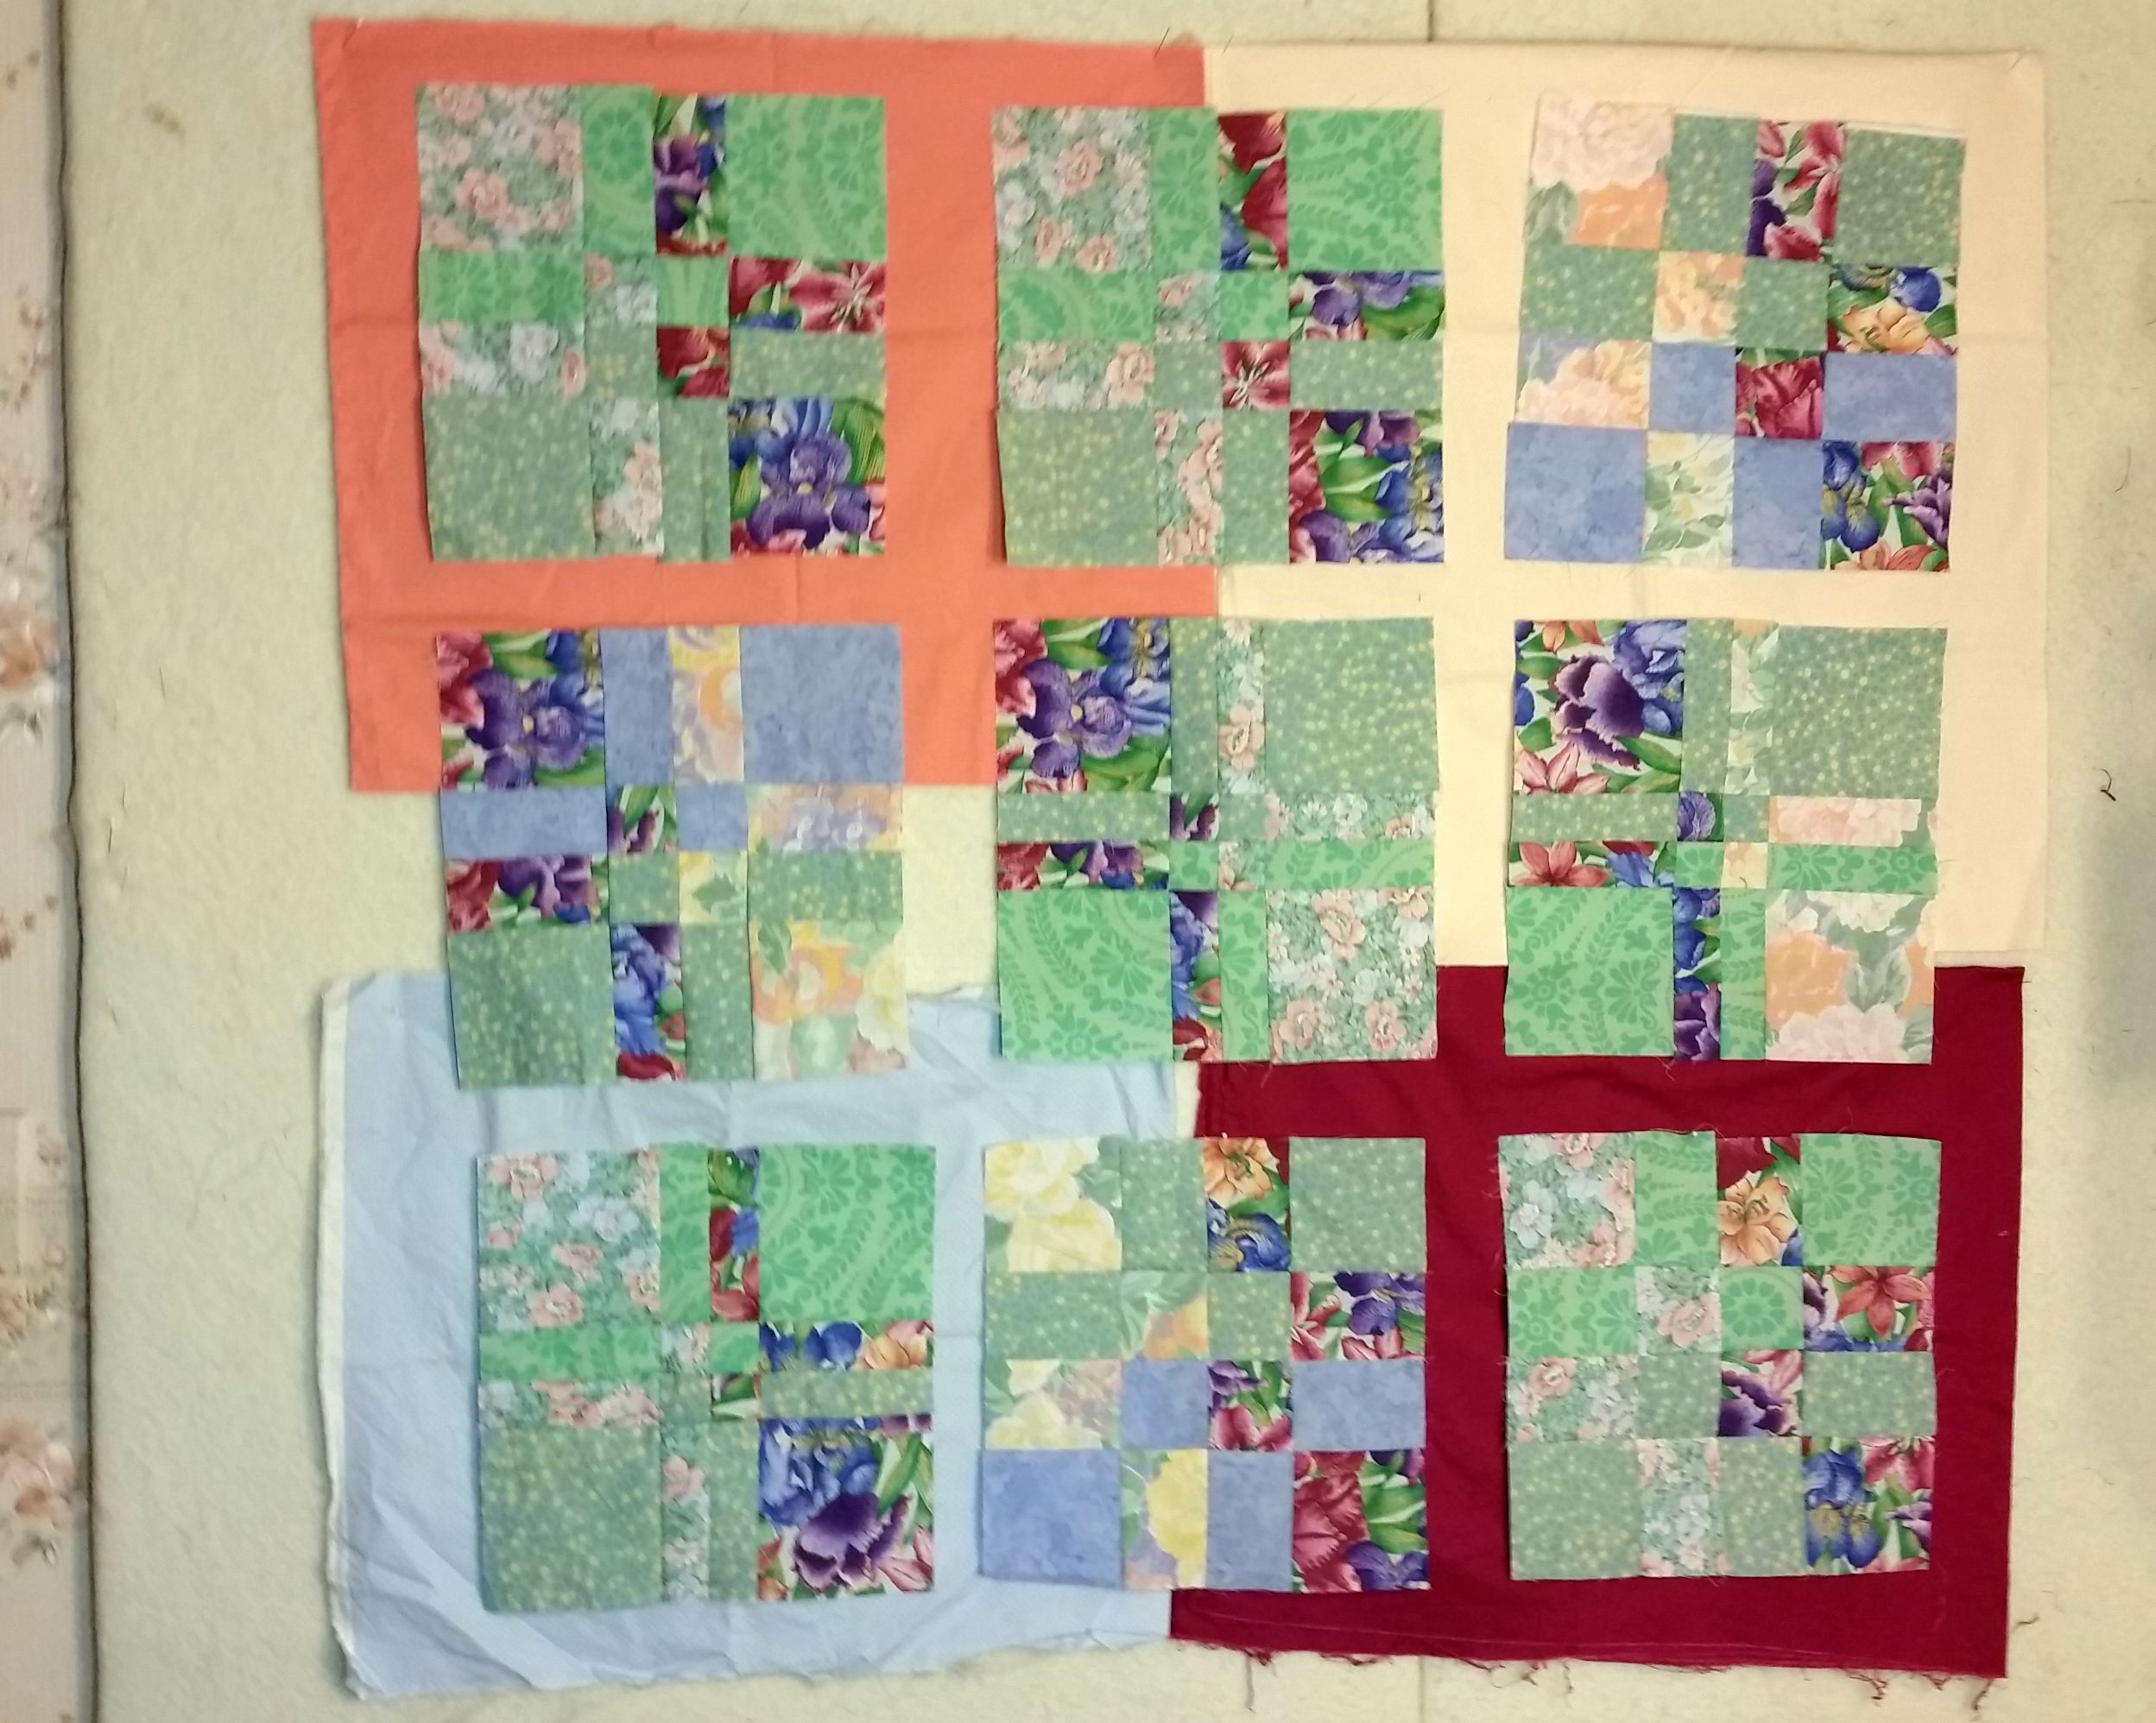
Sashing was in order.  The #Twilters and I looked at a number of choices.  The deeper ones were appealing, but not soft for a baby quilt.  In the end, I went with a soft blue dot for sashing and a two-tone green for borders.

2015-09-07 08.27.44Quilting was lots of vines and flowers, with minimal marking.  The largel-scale quilting left it nice and soft.  I used a variegated So Fine by Superior for all the quilting.  It shows up, but echos the soft colors.

2015-09-07 08.29.15A special thank you to my photography asisstant, Yuri.

2015-09-07 08.30.34This is headed for Project Linus.

Linking to Michelle’s Let’s Make Baby Quilts and Free Motion Maverics at  Lizzie Lenard’s.

Baby quilts


1 Comment

Sunday Stash Report: 9/06/15

image

Got a couple of things finished this week, and no new fabric came in!  I used three and a half yards for this baby quilt (currently in the dryer, more pictures later), and about half a yard for the PEI wall quilt.

image

This week:  + 0 yards,  – 4 yards
This year:  + 91.75 yards,  – 123.25 yards
Net fabric destashed  in 2015:  31.5 yards

So, creeping along toward my goal of 50 yards for this year.  How are you doing?

I’m linking up to Judy’s report at Patchwork Times.


5 Comments

Prince Edward Island Art Quilt

IMG_2441Early this week I finished the little art quilt I’ve been thinking about for a long time, and working on sporadically for the last few months.  This was taken from a photo I took of traps (lobster?  crab?)  on P.E.I.  when we visited a few years ago.

QA1012I used a photo-transfer process from an article by Liz Kettle in Quilting Arts, Issue 48.  It involved making an ink jet print on water-soluble stabilizer (Paper Solvy by Sulky) and transfering it to the fabric (Kona Snow) using matte gel medium.

2015-07-26 10.30.17The process was messy and didn’t go flawlessly, as you can see in this picture.  It is forgiving, though, and I was able to straighten out and adhere most of the image, and to wash off the remaining paper.  Next time, I would apply medium to the fabric only, not the print.  For the bits that were missing, I worked back into it with fabric markers.  I have a print-making background, and was excited about the transfer process. I did find myself wondering what was the advantage of this method over simply printing on ink jet fabric.  Do you have any thoughts on this?

2015-08-27 16.01.23IMG_2442I used a number of variegated and solid threads to add dimension and definition, especially to the traps, which had gotten a little muddy.  I liked the random effect of the variegated So Fine from Superior.  I did not like that when I shaded in the side of a white float, it became flat from the close stitching.  I have a lot to learn about working with thread.

IMG_2444I’m very happy with the fabrics I found to use for the borders and the way I quilted them.  You can see it better from the back.

IMG_2440I think this was pretty successful.  It has some personal meaning to me, so I may keep it and make another version to sell.  We’ll see.

I’m linking up to WIPs Be Gone at A Quilting Reader’s Garden.


2 Comments

That’s No Moon!

2015-08-26 11.22.23 pmA long time ago… no, I won’t go there.  But this is the saga of the baby quilt commission that occupied a lot of August for me.

2015-08-26 11.19.20The order was fine.  It took a number of emails back and forth to work out the design and fabrics, but that was no problem.  Neither was the construction.  I had made the basic design three times before, so all went well.  Then I washed it.

wpid-2015-08-19-11.14.20.jpg.jpegI always prewash my fabrics, with Color Catchers.  I always wash the finished quilts with Color Catchers.  I so seldom have a bleed…  I checked the front to be sure that all my Crayola Washable markings had come out.  I forgot to check the back, and I dried it.  Big mistake.

I tried Shout and two different approaches with Oxi Clean.  I never made it to the blue Dawn, because the Oxi took all the color out of my silver light saber.  Sigh.  I’m ready to do the bleach-on-a-Qtip thing before donating it, but I’m just leaving it sit for a while.  Sigh.

2015-08-26 11.21.05So, I remade it with different blue fabric, different silvery fabric, and no blue ink jet ink on the applique sheet.  Whatever it was, it didn’t happen this time.  And the finished quilt has reached it’s destination.  Whew.

2015-08-26 11.19.54I will say that my quilting improved on this last one (#5 of this design!).  And I like how the trimmings of the chevron backing fabric made a striped binding.

2015-08-26 11.21.59Anyway, stay safe out there, and watch your backs.


1 Comment

Sunday Stash Report: 8/9/15

image

I’ve been sewing up a storm, but the only thing I’ve finished are these six blocks to donate to Kat and Cat Quilts for her block drive.  I love the colors she chose.  About a yard, all acraps.  Some fabric has been acquired, but most will go out on a commision I’m making.

This week:  + 3.5 yards,  – 1 yards
This year:  + 85 yards,  – 112.25 yards
Net fabric destashed  in 2015:  27.25 yards

Good luck on your destashing!
I’m linking up to Judy’s report at Patchwork Times.


1 Comment

July and August Goals

Wow, almost August already!  Those of you who are teachers (and parents!), there will come a time when August is no longer a frantic countdown to school, but opens up as a pleasant time for sewing, travel, and deck-sitting, I promise!  We are doing a little traveling, a little entertaining, and helping return DS to college, so my goals are modest, but I will enjoy the month.

2015-07-26 10.30.17

July Goals

1.  Finish the blue and gold quilt.  Yes, this one!  Really like how it turned out.

2.  Attempt a photo transfer technique for a Coastal wall hanging.  Yes.  First attempt is pictured.  We’ll see.

3.  Get another leaders and enders project organized so that it is available when I’m piecing.  Yes!  And, see, I wrote a note, because it will be months till this is done and I have no memory.

4.  Make a baby quilt from an animal panel I purchased.  Yep, right here!

Yes, I made these goals!  And this bonus quilt for donation/stash reduction.

2015-07-20 13.43.29

August Goals

1.  Complete coastal wall hanging.

2.  Work on UFO geometric wall hanging.

3.  Make a top from my new Christmas fabrics.  Looking at these tutorials:  Four-Patch Stars  and Big Star Quilt  from Missouri Star.

4.  Source little zippers for earbud pouches.

How did you do on your goals this month?  Eh, it’s summer!  Cooler, more productive days are around the corner.  Enjoy!


1 Comment

Sunday Stash Report: 7/26/15

IMG_2427This rail fence quilt used 7.5 yards, and I didn’t buy any new fabric.

This week:  + 0 yards,  – 7.5 yards
This year:  + 81.5 yards,  – 111.25 yards
Net fabric destashed  in 2015:  29.75 yards

How did you do this week?

I’m linking up to Judy’s Report at Patchwork Times.


2 Comments

Rail Fence and Ribbon Candy

IMG_2424Today I finished this quilt, destined for donation.

IMG_2428I made it to use this backing, which I like a lot but for which I have never found a use.  I also wanted it to be in “boys” colors, since I have plenty of florals to donate.

IMG_2425I quilted it with wavy lines, but I didn’t think they were enough, so I added these flowing lines between each set of vertical waves.  I knew they had a name, and my friends supplied it:  ribbon candy!  Even more fun than quilting them.  I used Superior’s So Fine thread in a variegated light green.

IMG_2427There are two different blocks, one with three patches, and one with four,  just because I wanted to mix it up a bit.  I still think that has potential, though it isn’t great here.  Doing this again, I would use the same fabrics (yum!), but mix up the values more.

I still like it, and I hope the recipient will, too.


4 Comments

Thoughts on Sandwiching

image

I just spent ten minutes basting my newest quilt, and, as always, I gave thanks to the inventor of spray adhesive.  Without it, I wouldn’t be making many quilts.  My back just won’t take leaning over a table, never mind a floor, for the time it takes to pin baste a quilt.  I have jars of the right kind of pins, but haven’t used them in years.

I know some people can’t use spray baste because of allergies, and I’m really sorry.  If you just don’t care for the smell or residue, I have some suggestions.

image

I’ve tried three or four brands, but my favorite is June Tailor.  Its cheap (50% off at JoAnn at the moment!), it has less odor than some, and its not as sticky.  It doesn’t gum up my machine needles, which I hate.

The other important thing is that I don’t use much.  Lately, I’ve read bloggers talk about using a whole can for one quilt, or for three.  I think that’s craziness!  I can’t tell you how many quilts one can will baste if used lightly, because I use one for so long I lose track.  My guess is fifteen to twenty.  I shake well, then make a single light, zig zaggy pass over the backing or the batting.  That’s all it takes, and I don’t have problems with shifting.  Today when I picked up my can, it was very light and I wondered if I had enough.  Yep.  Can probably do the next quilt, too.

Also, I don’t handle it a lot.  I’ve read about basting, then turning the sandwich over to smooth the back.  I don’t understand why that’s necessary at all.  I tape the backing down to the table (floor), putting it under a little tension, so there are no wrinkles.  I spread out the batting, pull half of it back, spray the backing with spray baste, smooth the batting back down, do the other half.  Then I carefully arrange the top over the batting.  I pull half of it back, spray the batting, pat, not smooth, the top into place, then do the other half.  Then I remove the tape from the back, and consider where I will be starting the quilting.  I won’t have another place to spread it out like this again, so I use the opportunity to roll it up from each end.  Then I carry the “sausage” up to my studio and lay it on the sewing table.

And, I love my ping pong table!  I know a lot of you work in very small and/or crowded conditions, and my hat is off to you that you get anything made.  My knees and back are long past getting down on the floor for any length of time.  If I didn’t have my table, I guess I would cultivate a relationship with a community center, Y, church, etc., and push some of their tables together.  But you can often get a used ping pong table at a garage sale, and they fold and stand upright, so you can keep it in the garage and open it in the driveway when you need it.  Mine is in my unfinished basement, which has good ventilation.  Did I mention I don’t use much spray adhesive?  I’m still breathing.  Really.

Thanks for listening to my two cents on this.  Now I have some quilting to do!


7 Comments

Adventures in Cuteness (a finish)

IMG_2412This week I made a quick baby quilt from a panel and it turned out awfully sweet.  There is no applique on this, it’s all printed.

2015-07-05 11.03.45picI started with this panel.  I don’t remember where it came from,  but I must have felt sorry for it and took it home.  I added two rows of patchwork (from my scrap bins) to make it wider, put a Kona Ash border around it, then bound it with a two-tone charcoal binding.

IMG_2416

There is an extra layer of cotton batting under the center to make it a little poofy.  I quilted on the printed lines, and added a few extra details.

IMG_2414

To quilt the background, I drew in bunches of leaves using my new “Leaves Galore” ruler (Sue Pelland), that I bought last month.  It’s meant for cutting leaf shapes, but I traced along the curves, moved it, and traced again to form continuous leaves that were easy to quilt.  That’s how I drew the leaves in the border, too.

IMG_2422The back is pieced from my stash.

2015-07-15 20.00.35This was fun to make.  Now it’s headed for my Etsy shop, unless I can convince someone to decorate their nursery in a woodland theme…

IMG_2423I’m linking up to Whoop Whoop Friday at Confessions of a Fabric Addict, and WIPs Be Gone at A Quilting Reader’s Garden.

wind_dandelion3

wpid-cooltext-whoop-whoop.png.png