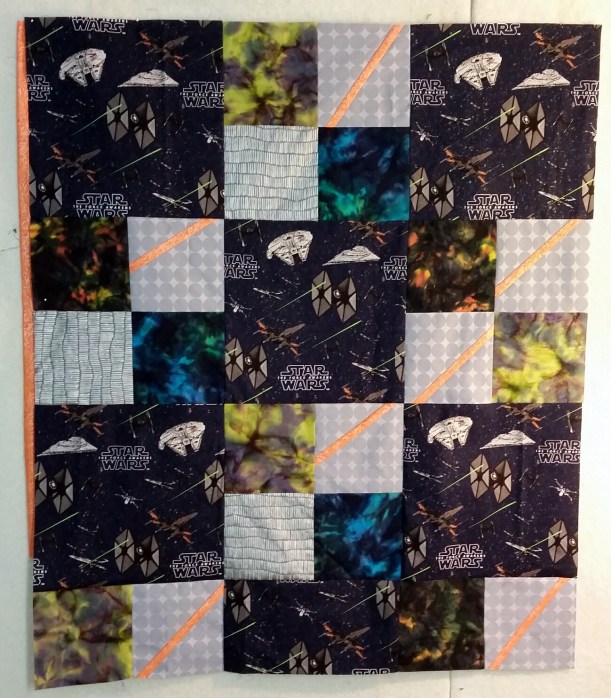
I reworked some of the blocks in the Star Wars baby quilt, and here is the finished top. I inserted strips of orange Fairy Frost into some of the silver blocks, and I think it gives it some pop.
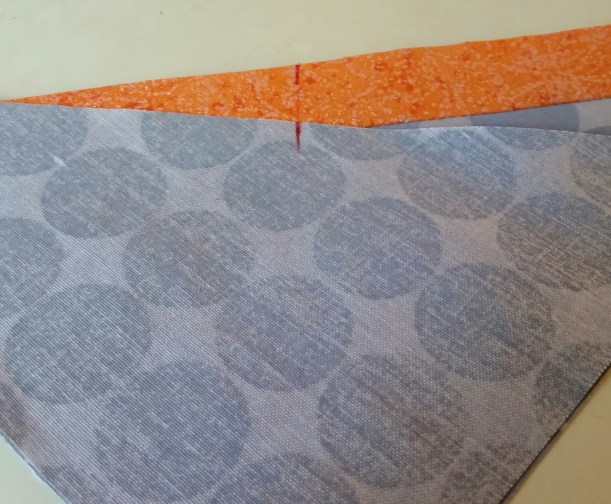
Let me begin by telling you not to make your blocks this way. The best way to do it is to plan ahead and cut your blocks over-sized, then trim them after you’re finished. I didn’t do that. My blocks were already cut 6 1/2″ square, and I had limited fabric to remake them. So I used the ones it had, sewed them carefully, and they worked.

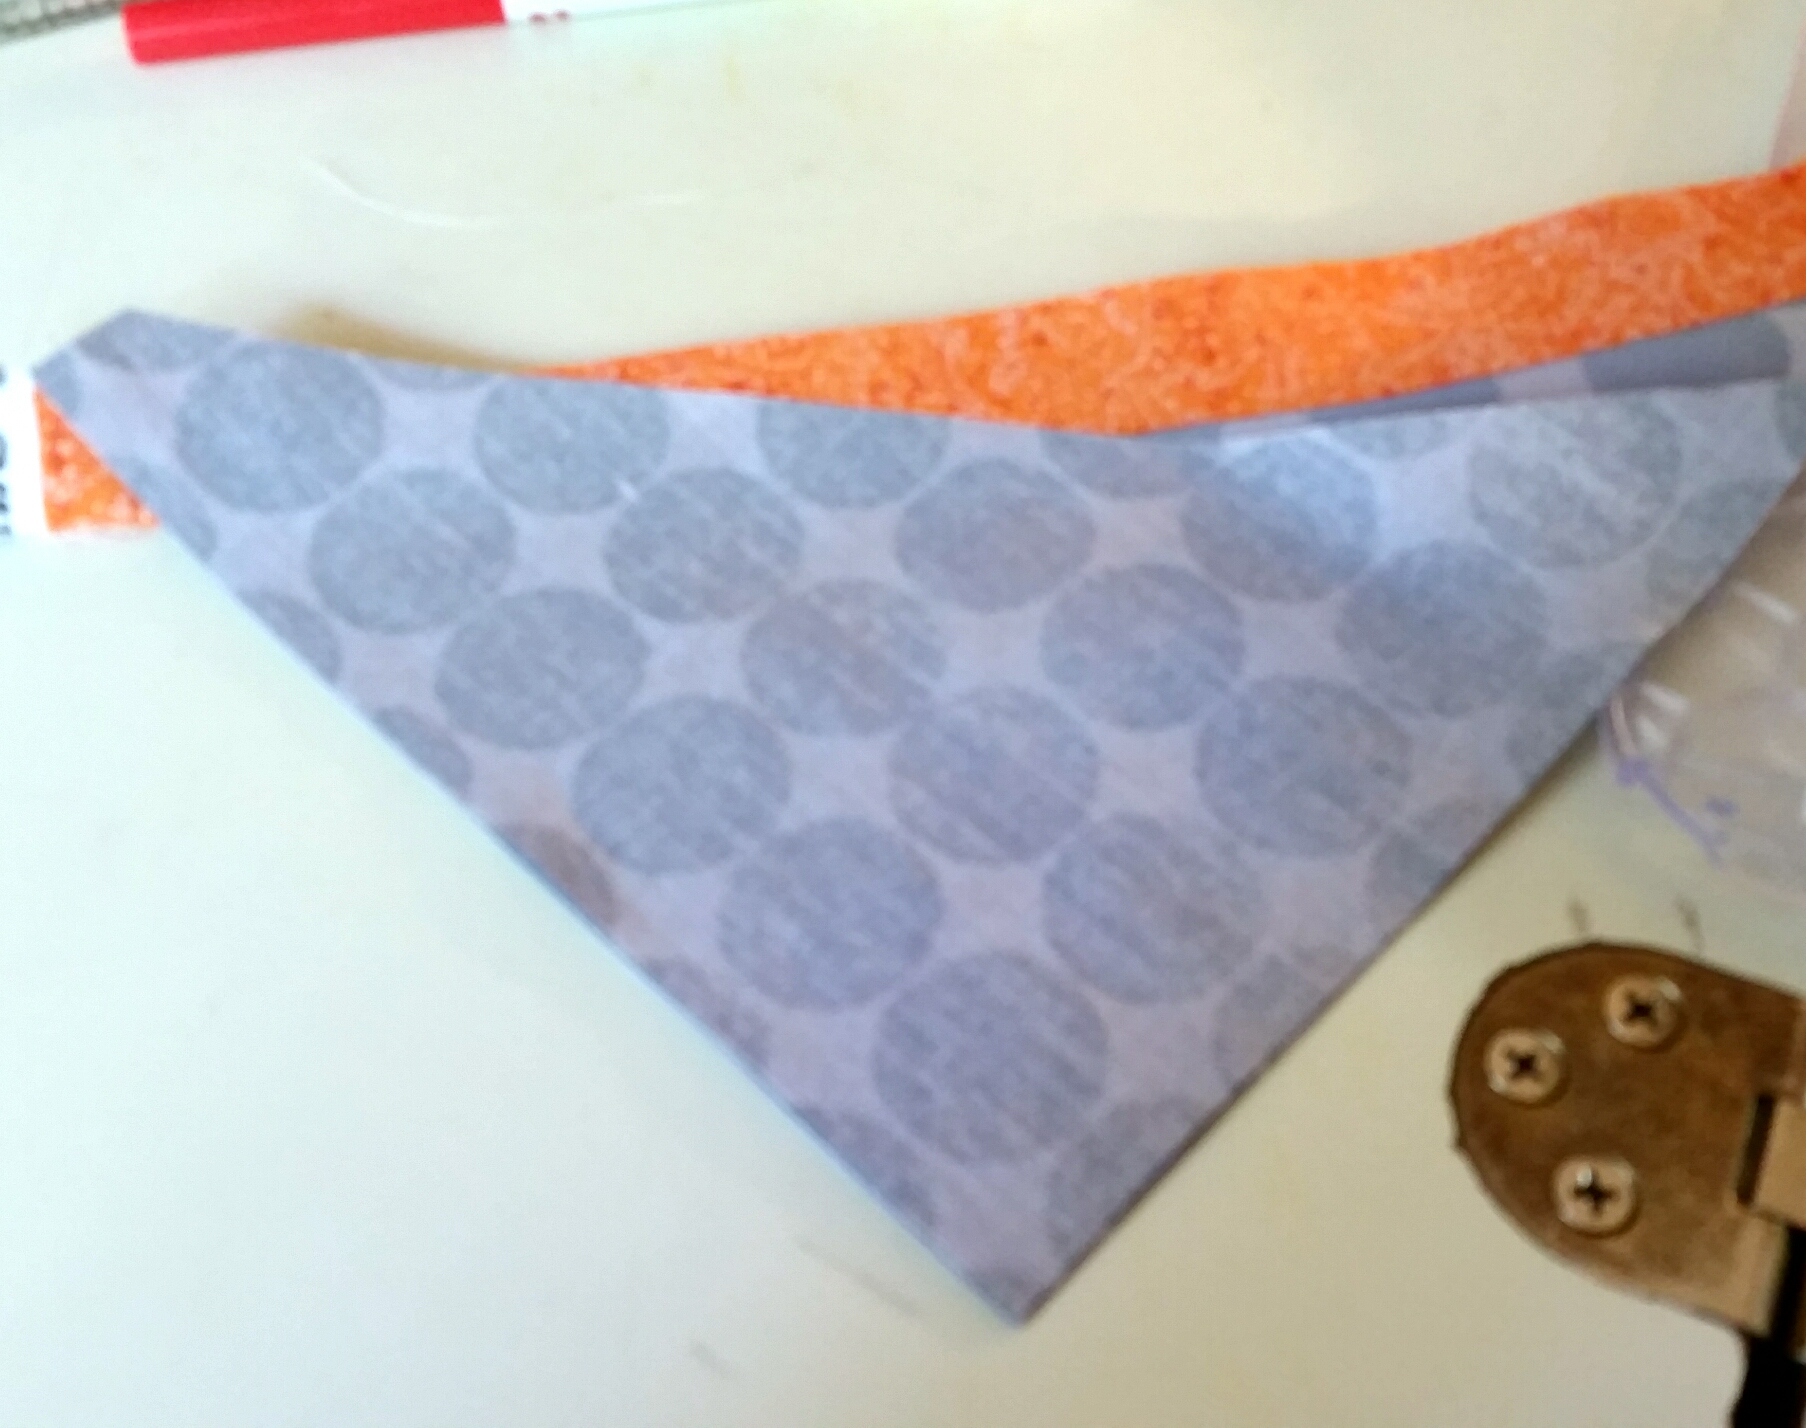
After slashing your block on the diagonal, sew your insert strip to the largest piece of your block, right sides together. My strip is 1″ wide, so that it finishes at 1/2″.

Press the seam toward the insert.

Place the remaining piece on top of the block, right sides together, matching the corners.

Place a ruler across the pieces at a 45° angle (it might help to use a ruler with the angle marked). Use some type of marker to make a tick mark at the top of each piece.

Reposition the smaller block piece along the insert strip, matching the marks. Pin, then sew.
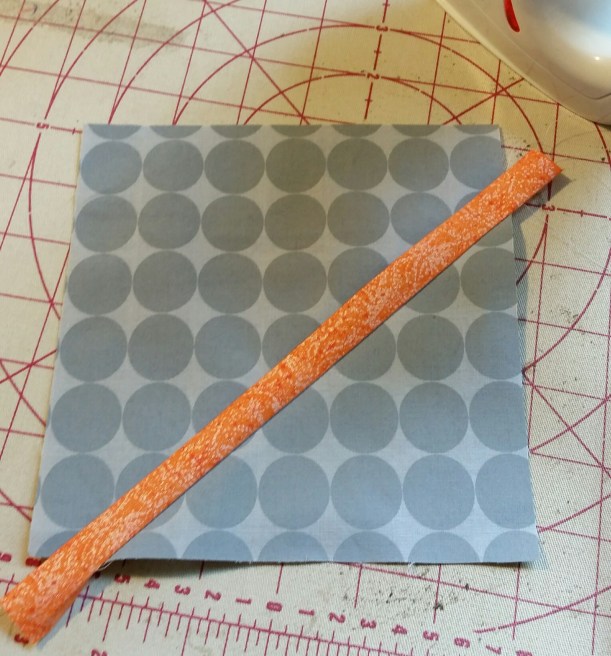
Also press this seam toward the insert. The result should be close enough to your original block size. Or right on, like this one! Just trim the ends of the insert.
I’m going to finish this with some diagonal quilting, then bind it with the orange. The Force Awakens!


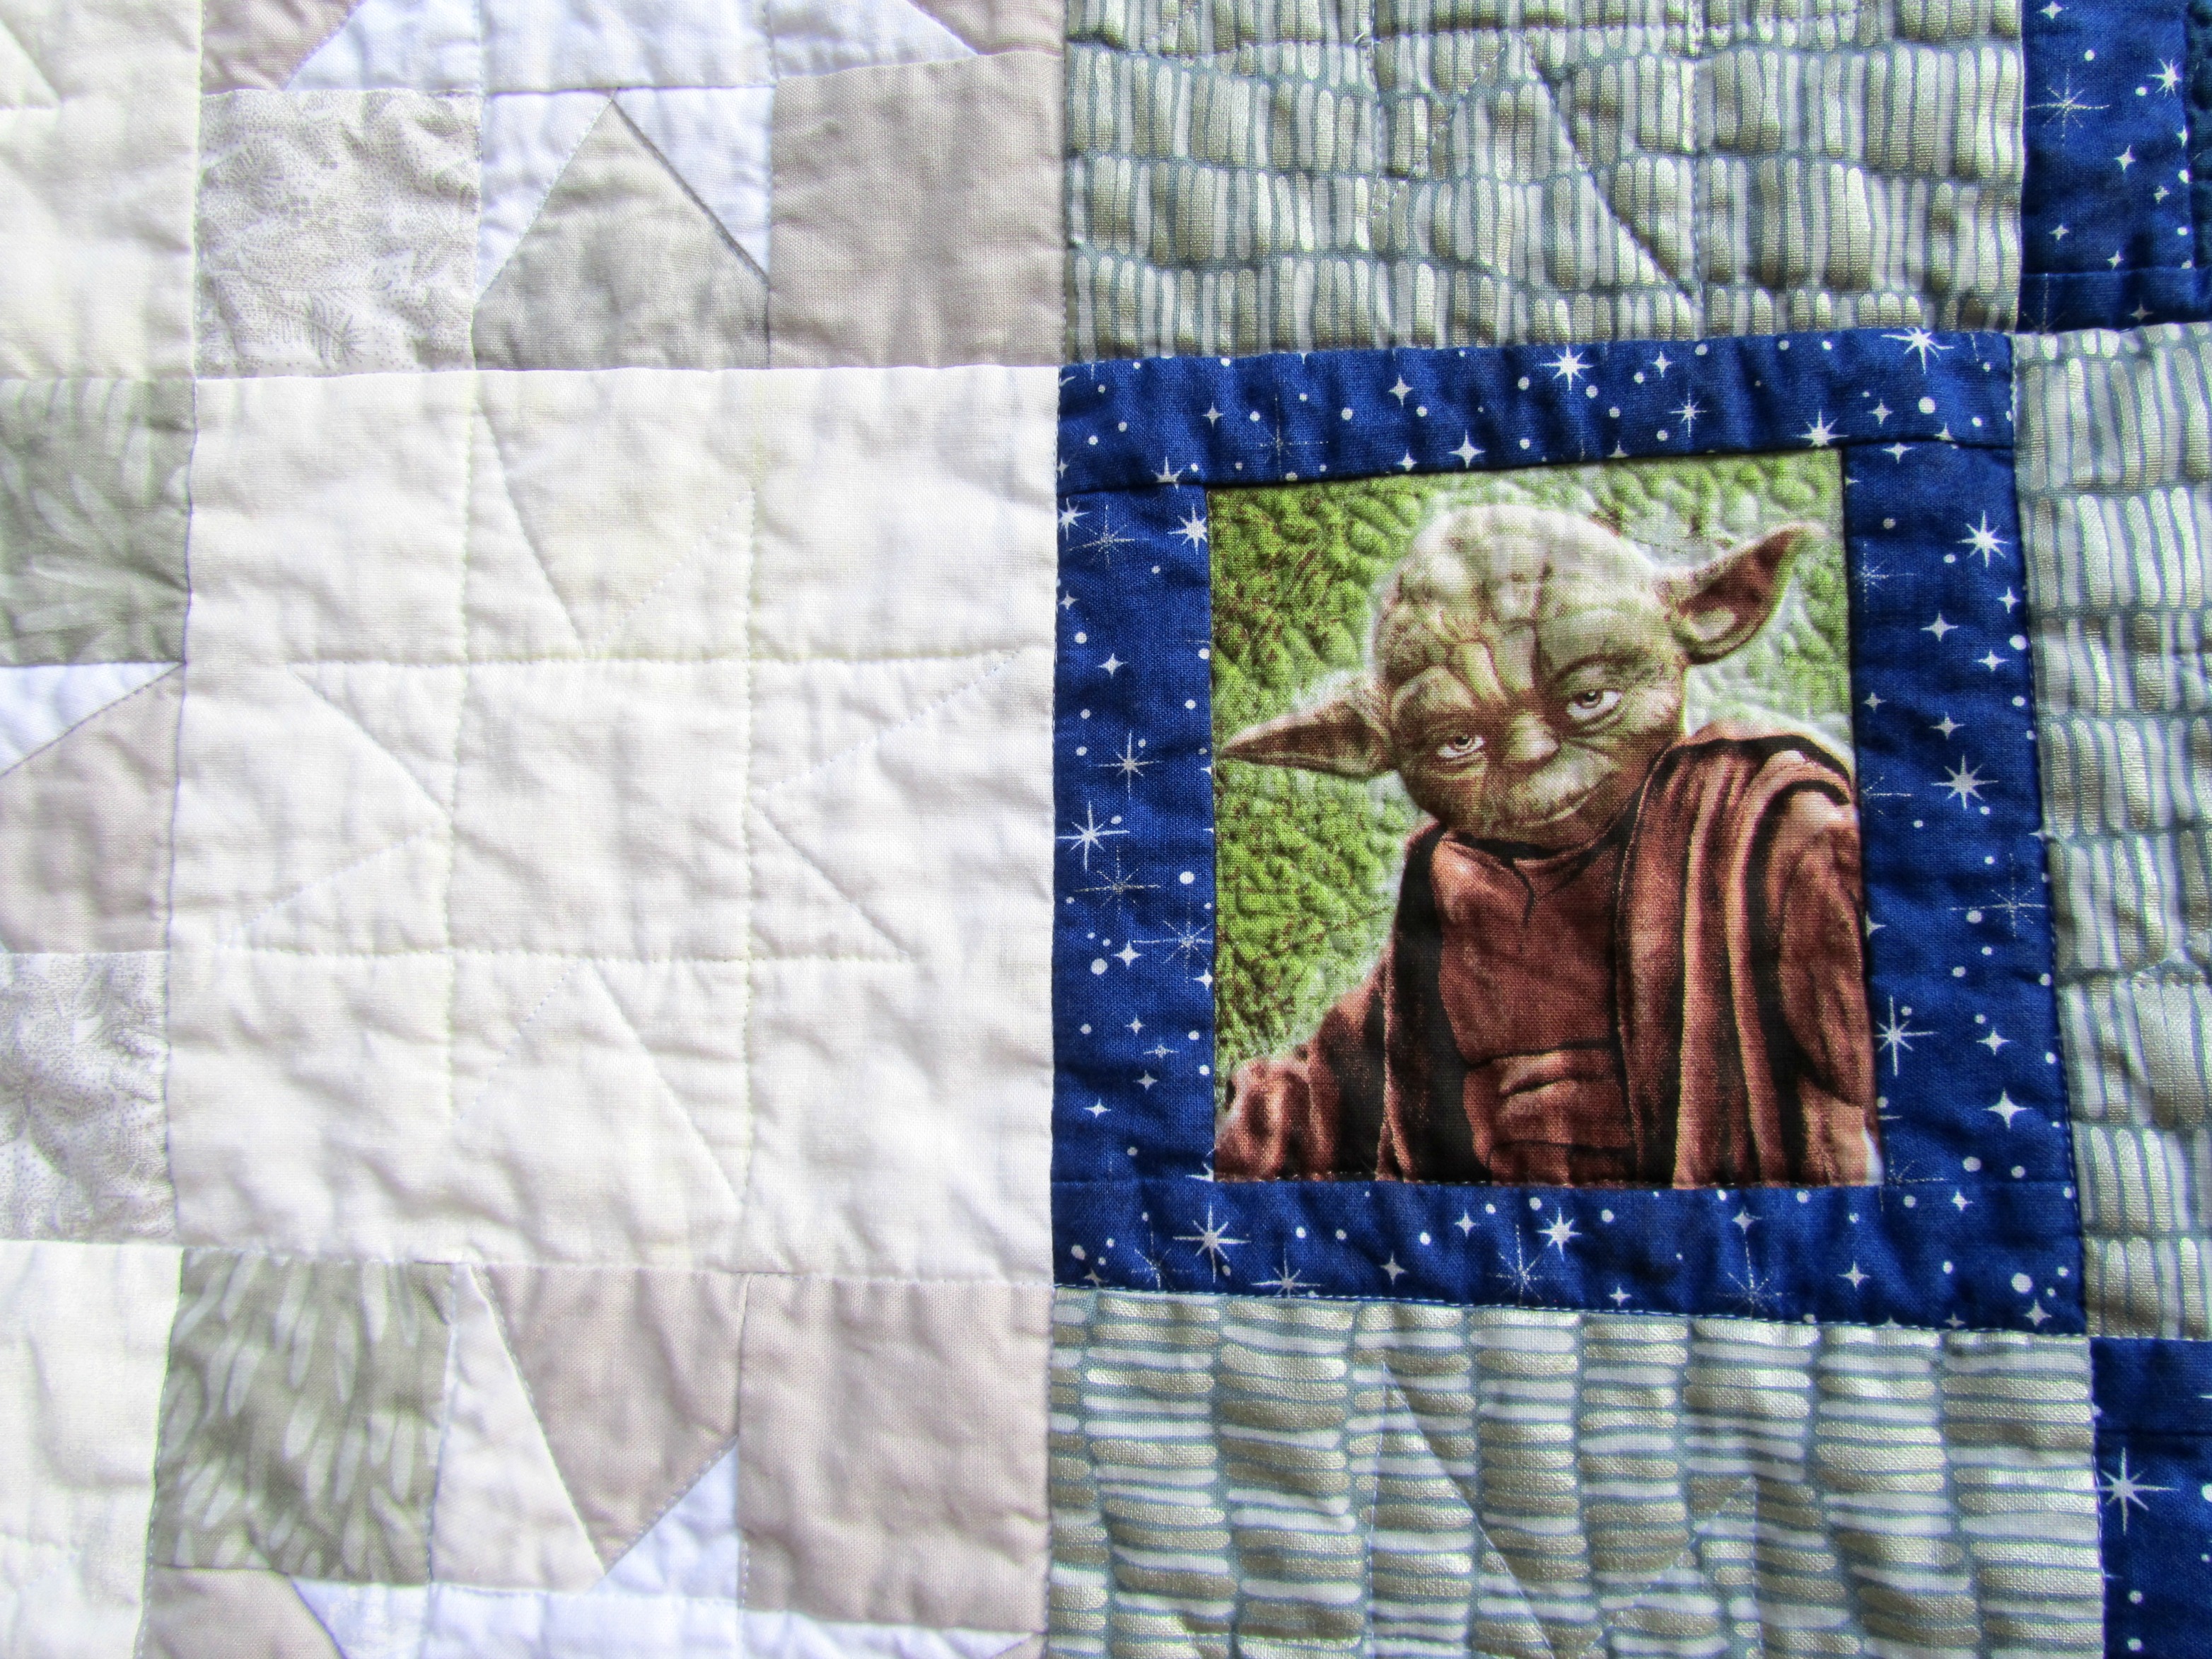
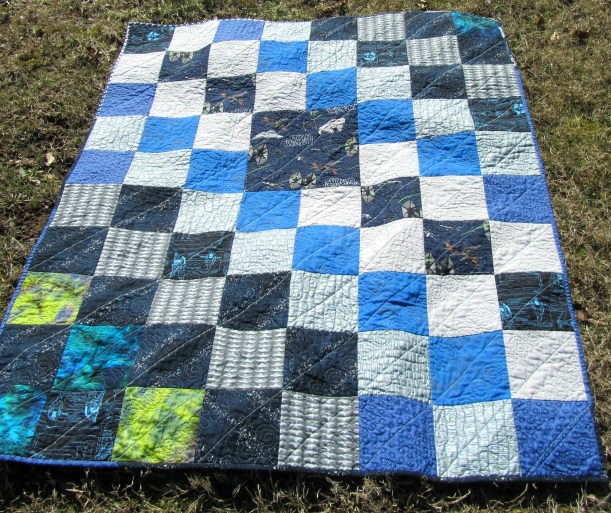 Here’s my latest finish. It’s a fun size (48″ x 60″), and was quick and easy to make. It includes two Star Wars fabrics, some batik, some metallic print, another gray print, some blue Grunge, a blue geometric, and some Kona Ash. I found these scraps while straightening some of my fabric drawers and decided to make them up for donation.
 How do you keep your blocks in order for assembly? Usually I number them using Crayola Washable marker. This time the blocks were too dark, metallic, etc., for the marker to show up on most of them. Instead, I used numbered bits of blue painters tape, which was really more work than I wanted to do. These stuck long enough to get the blocks to my sewing machine, and it went together properly. However, the tape started to come off as I was sewing and stuck to everything else in sight. I wore a few numbers to dinner that night, and I am still finding them. Please tell me a better way!
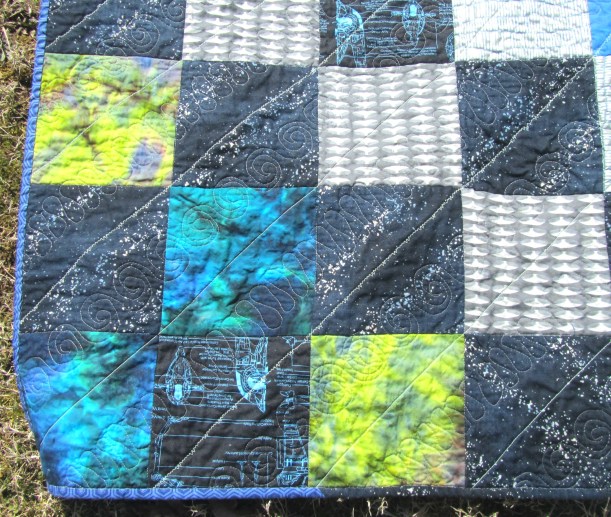 The quilting was a lot of fun. The light-colored diagonals are sewn with Superior NiteLite (glow-in-the-dark) thread, and I experimented with some decorative stitches to put a little more thread on there. I use gray Bottom Line for the swirls and ribbon candy.
 I pieced the back with more of the scraps.
 I haven’t decided where I’ll be donating it yet, but I have a few ideas.
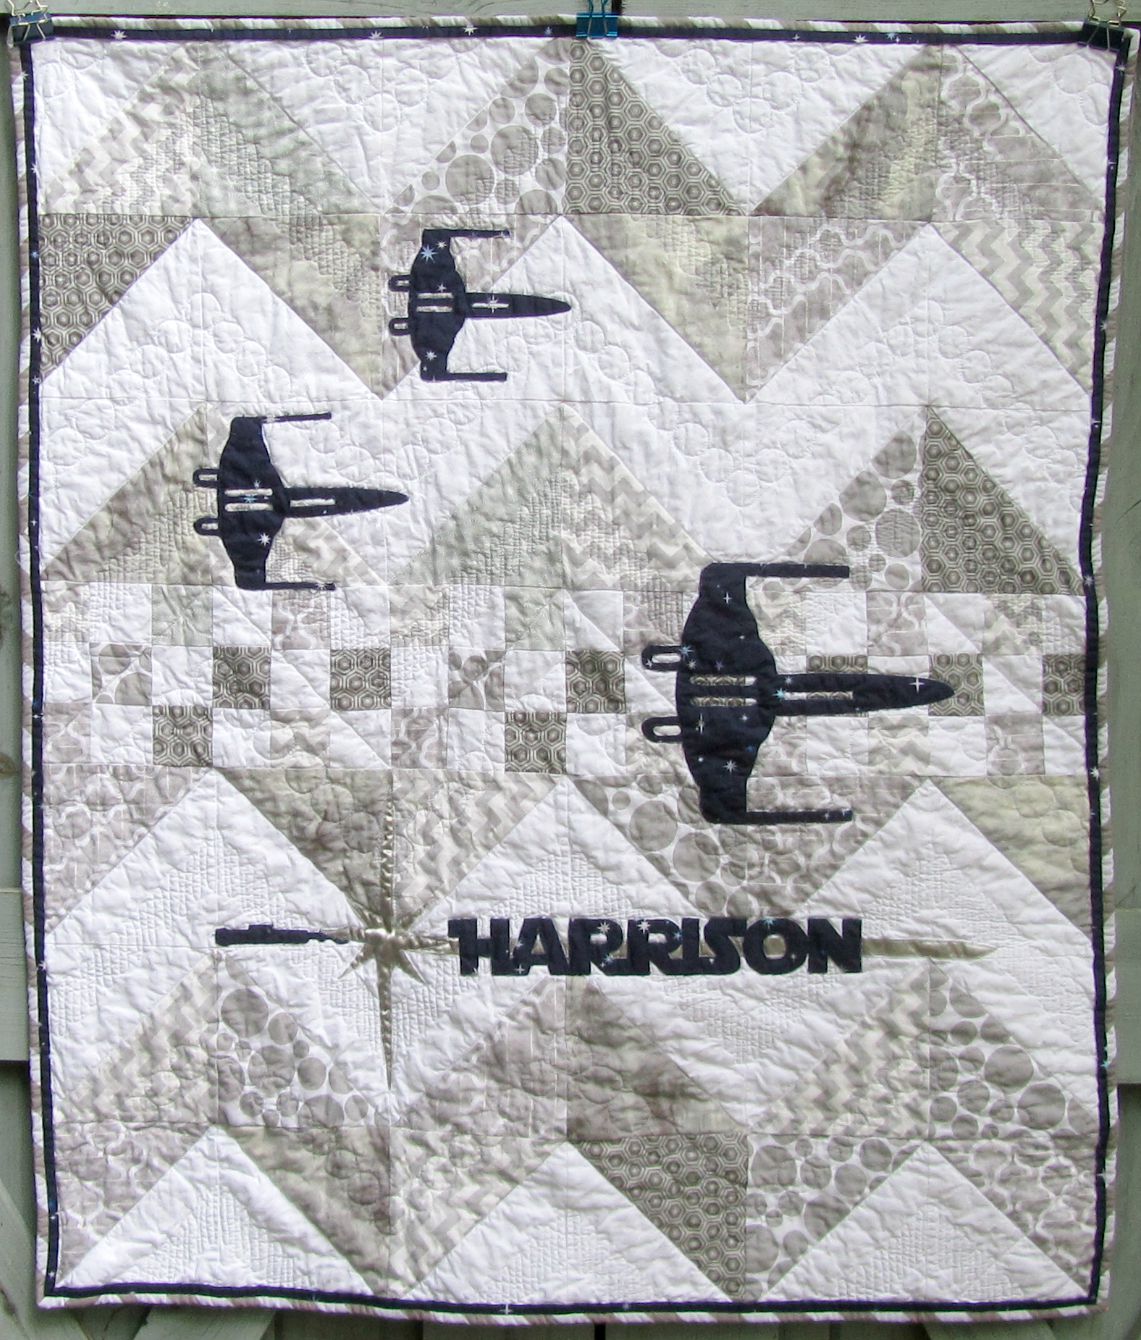
 Today I finished the little Star Wars quilt I worked on this week. It evolved a lot since my first concept, but I like the way it turned out. And I have a lot of left over fabric that I cut along the way, so there will be a sequel. I wrote a
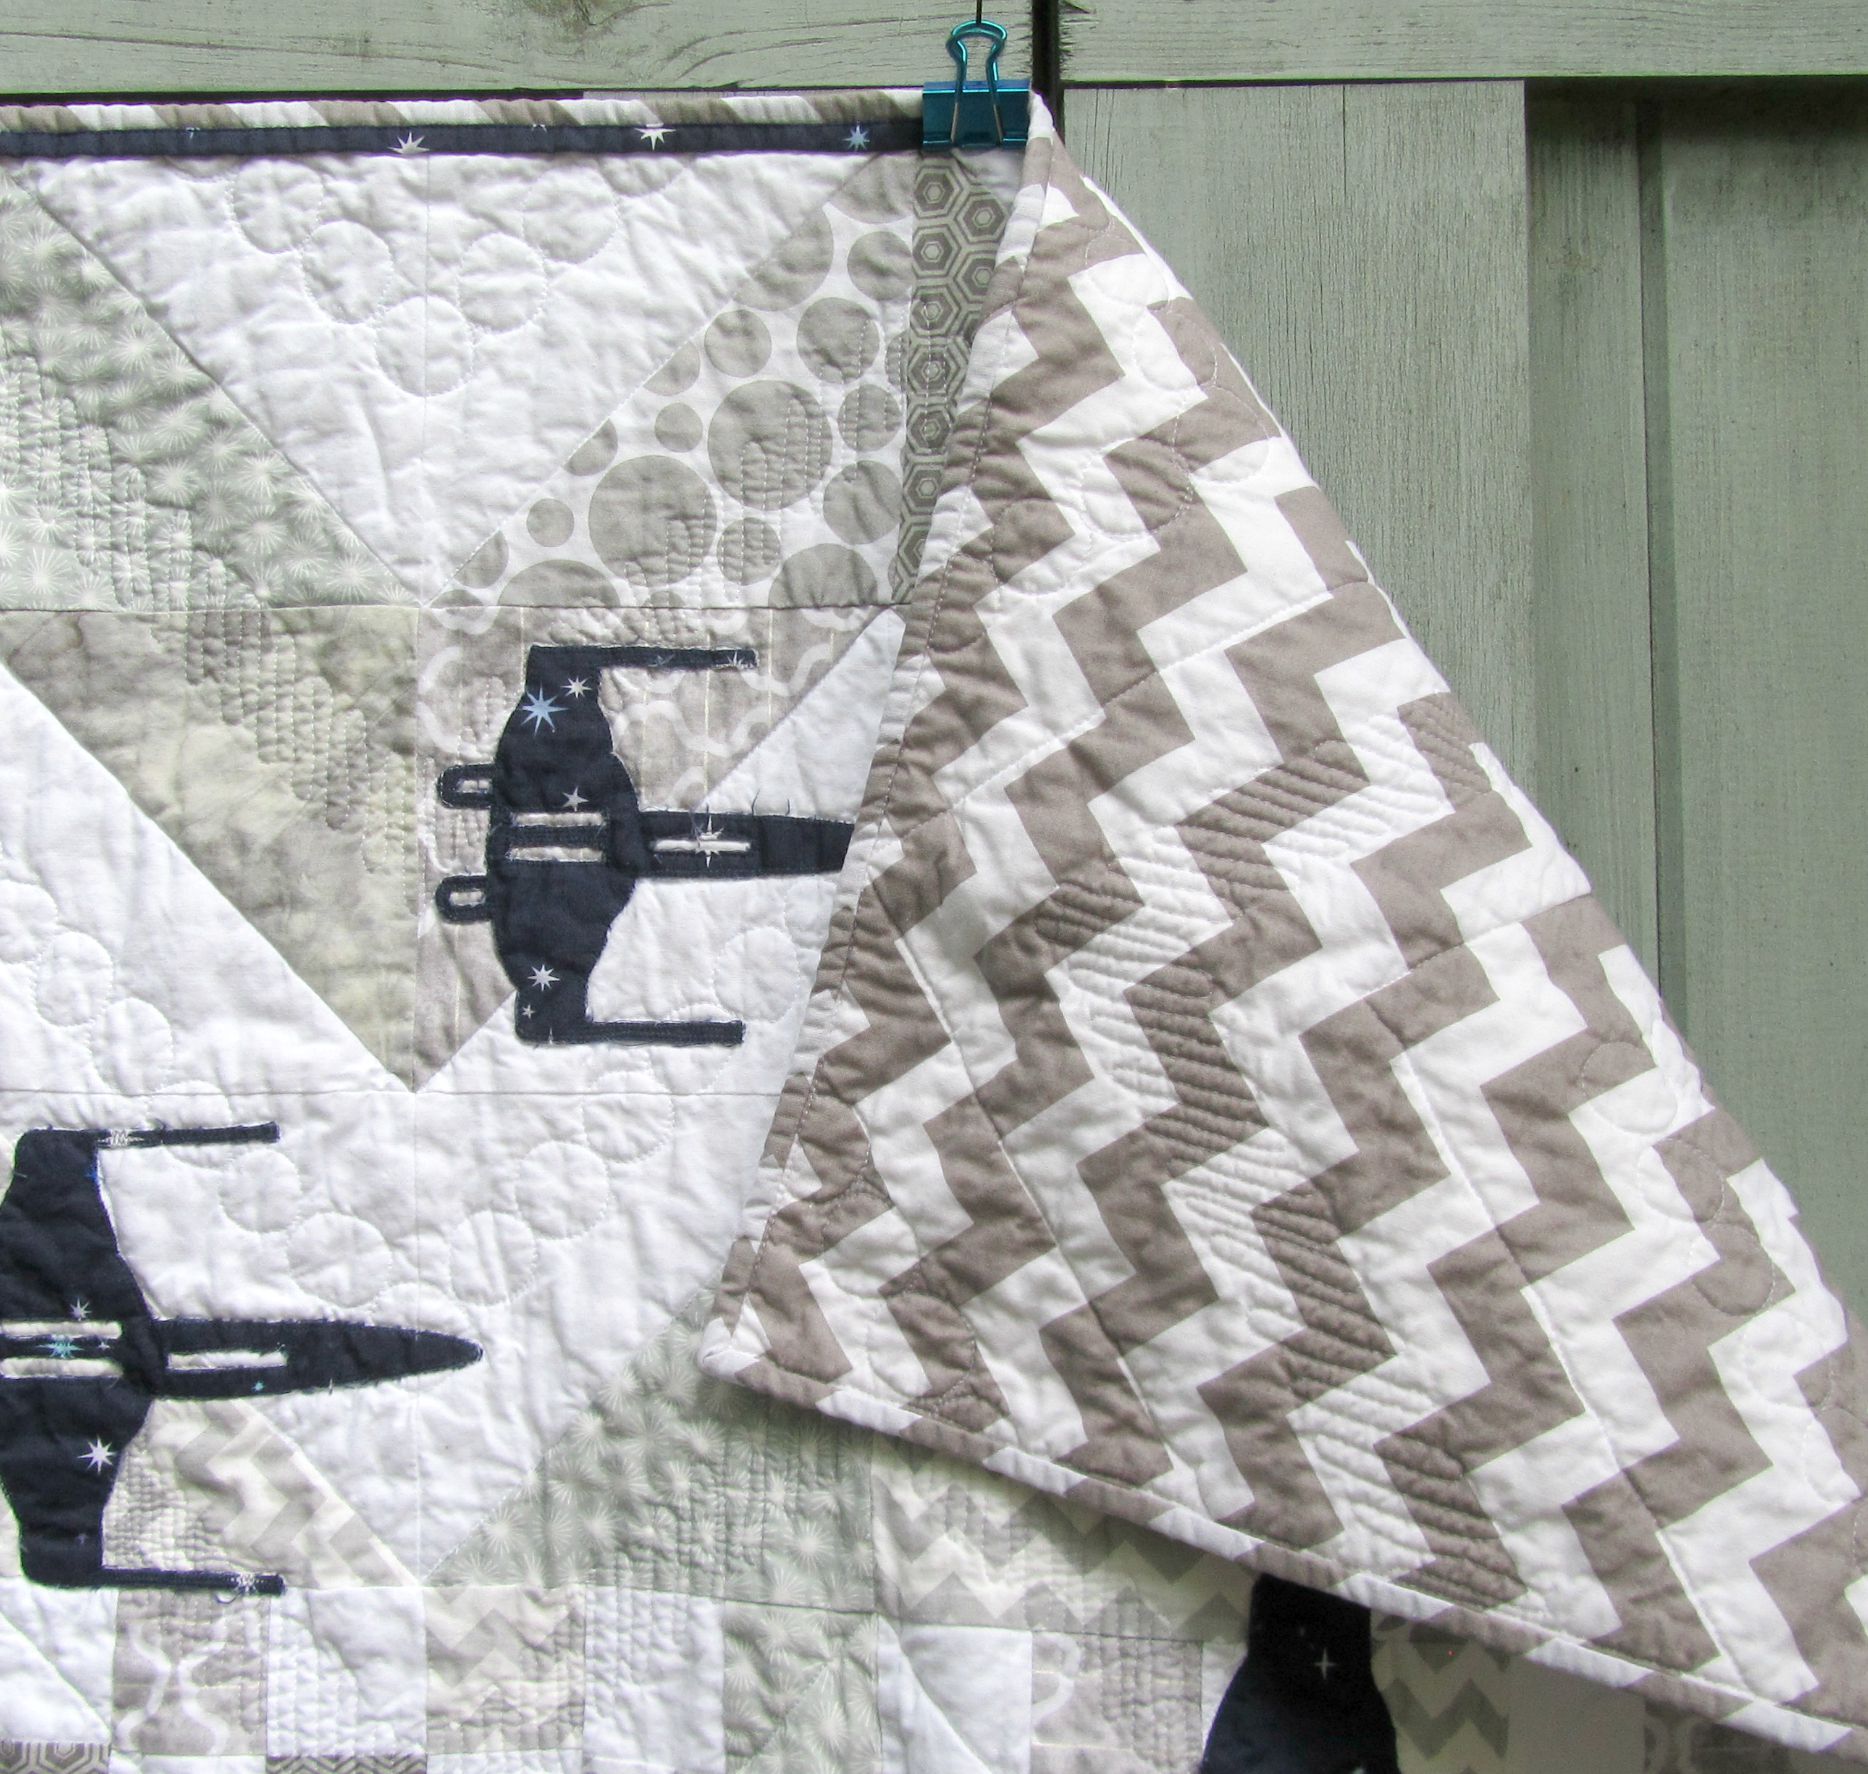
  The back is a blue geometric, a band of of orange Fairy Frost, and a section of gray moonscape.
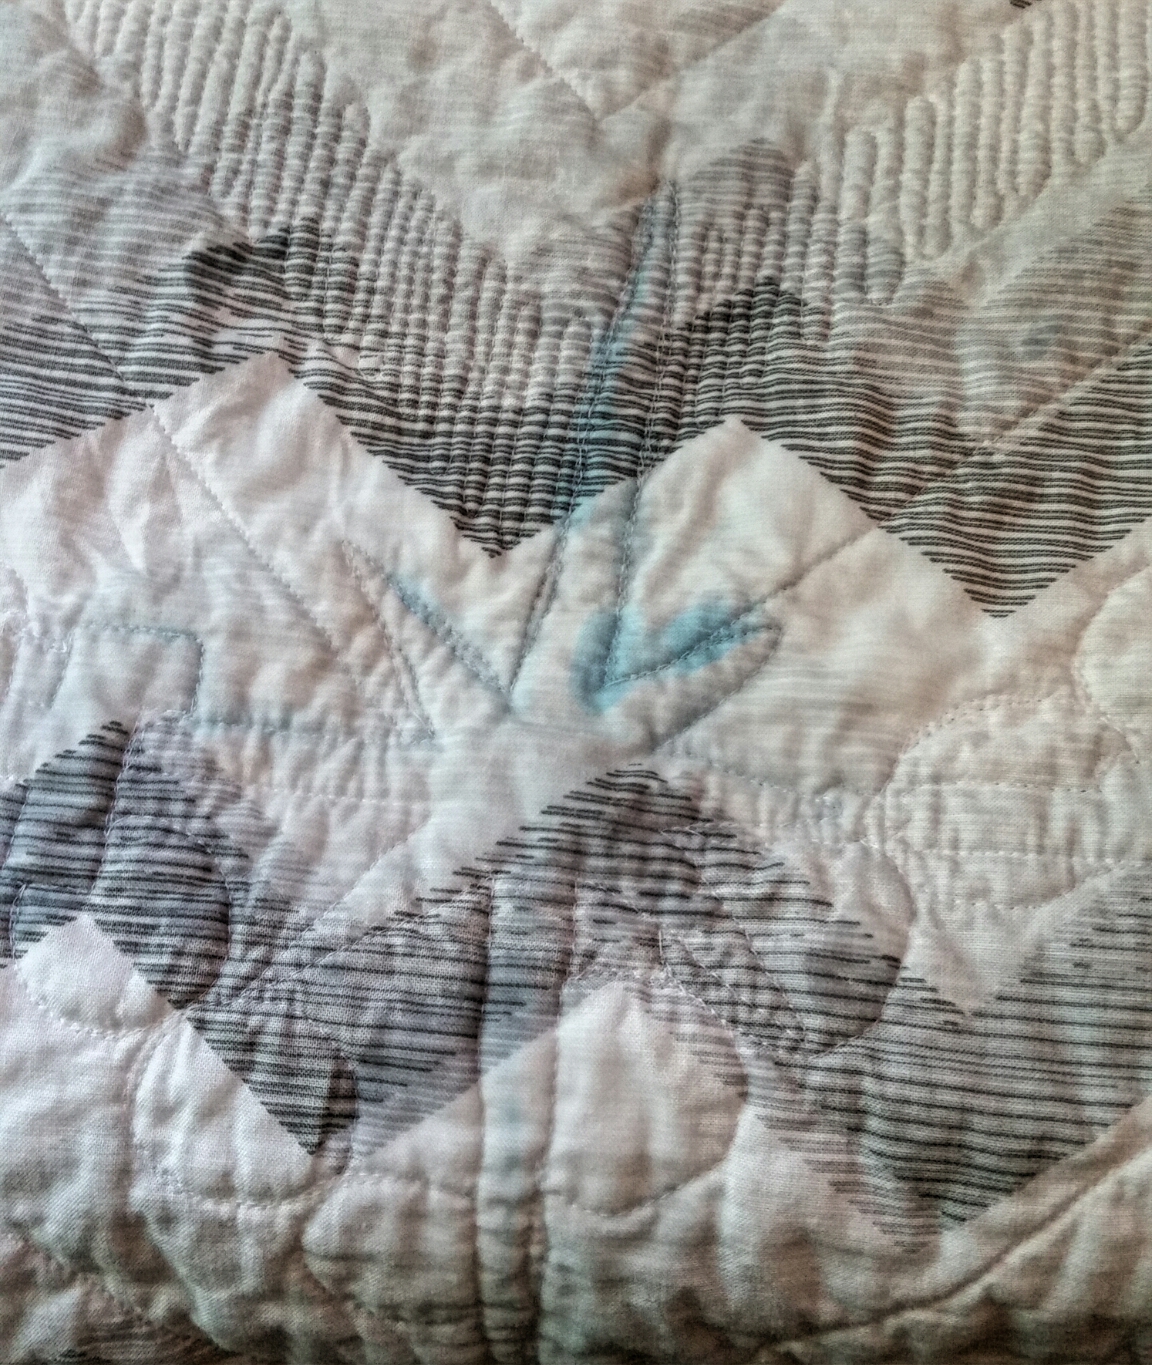
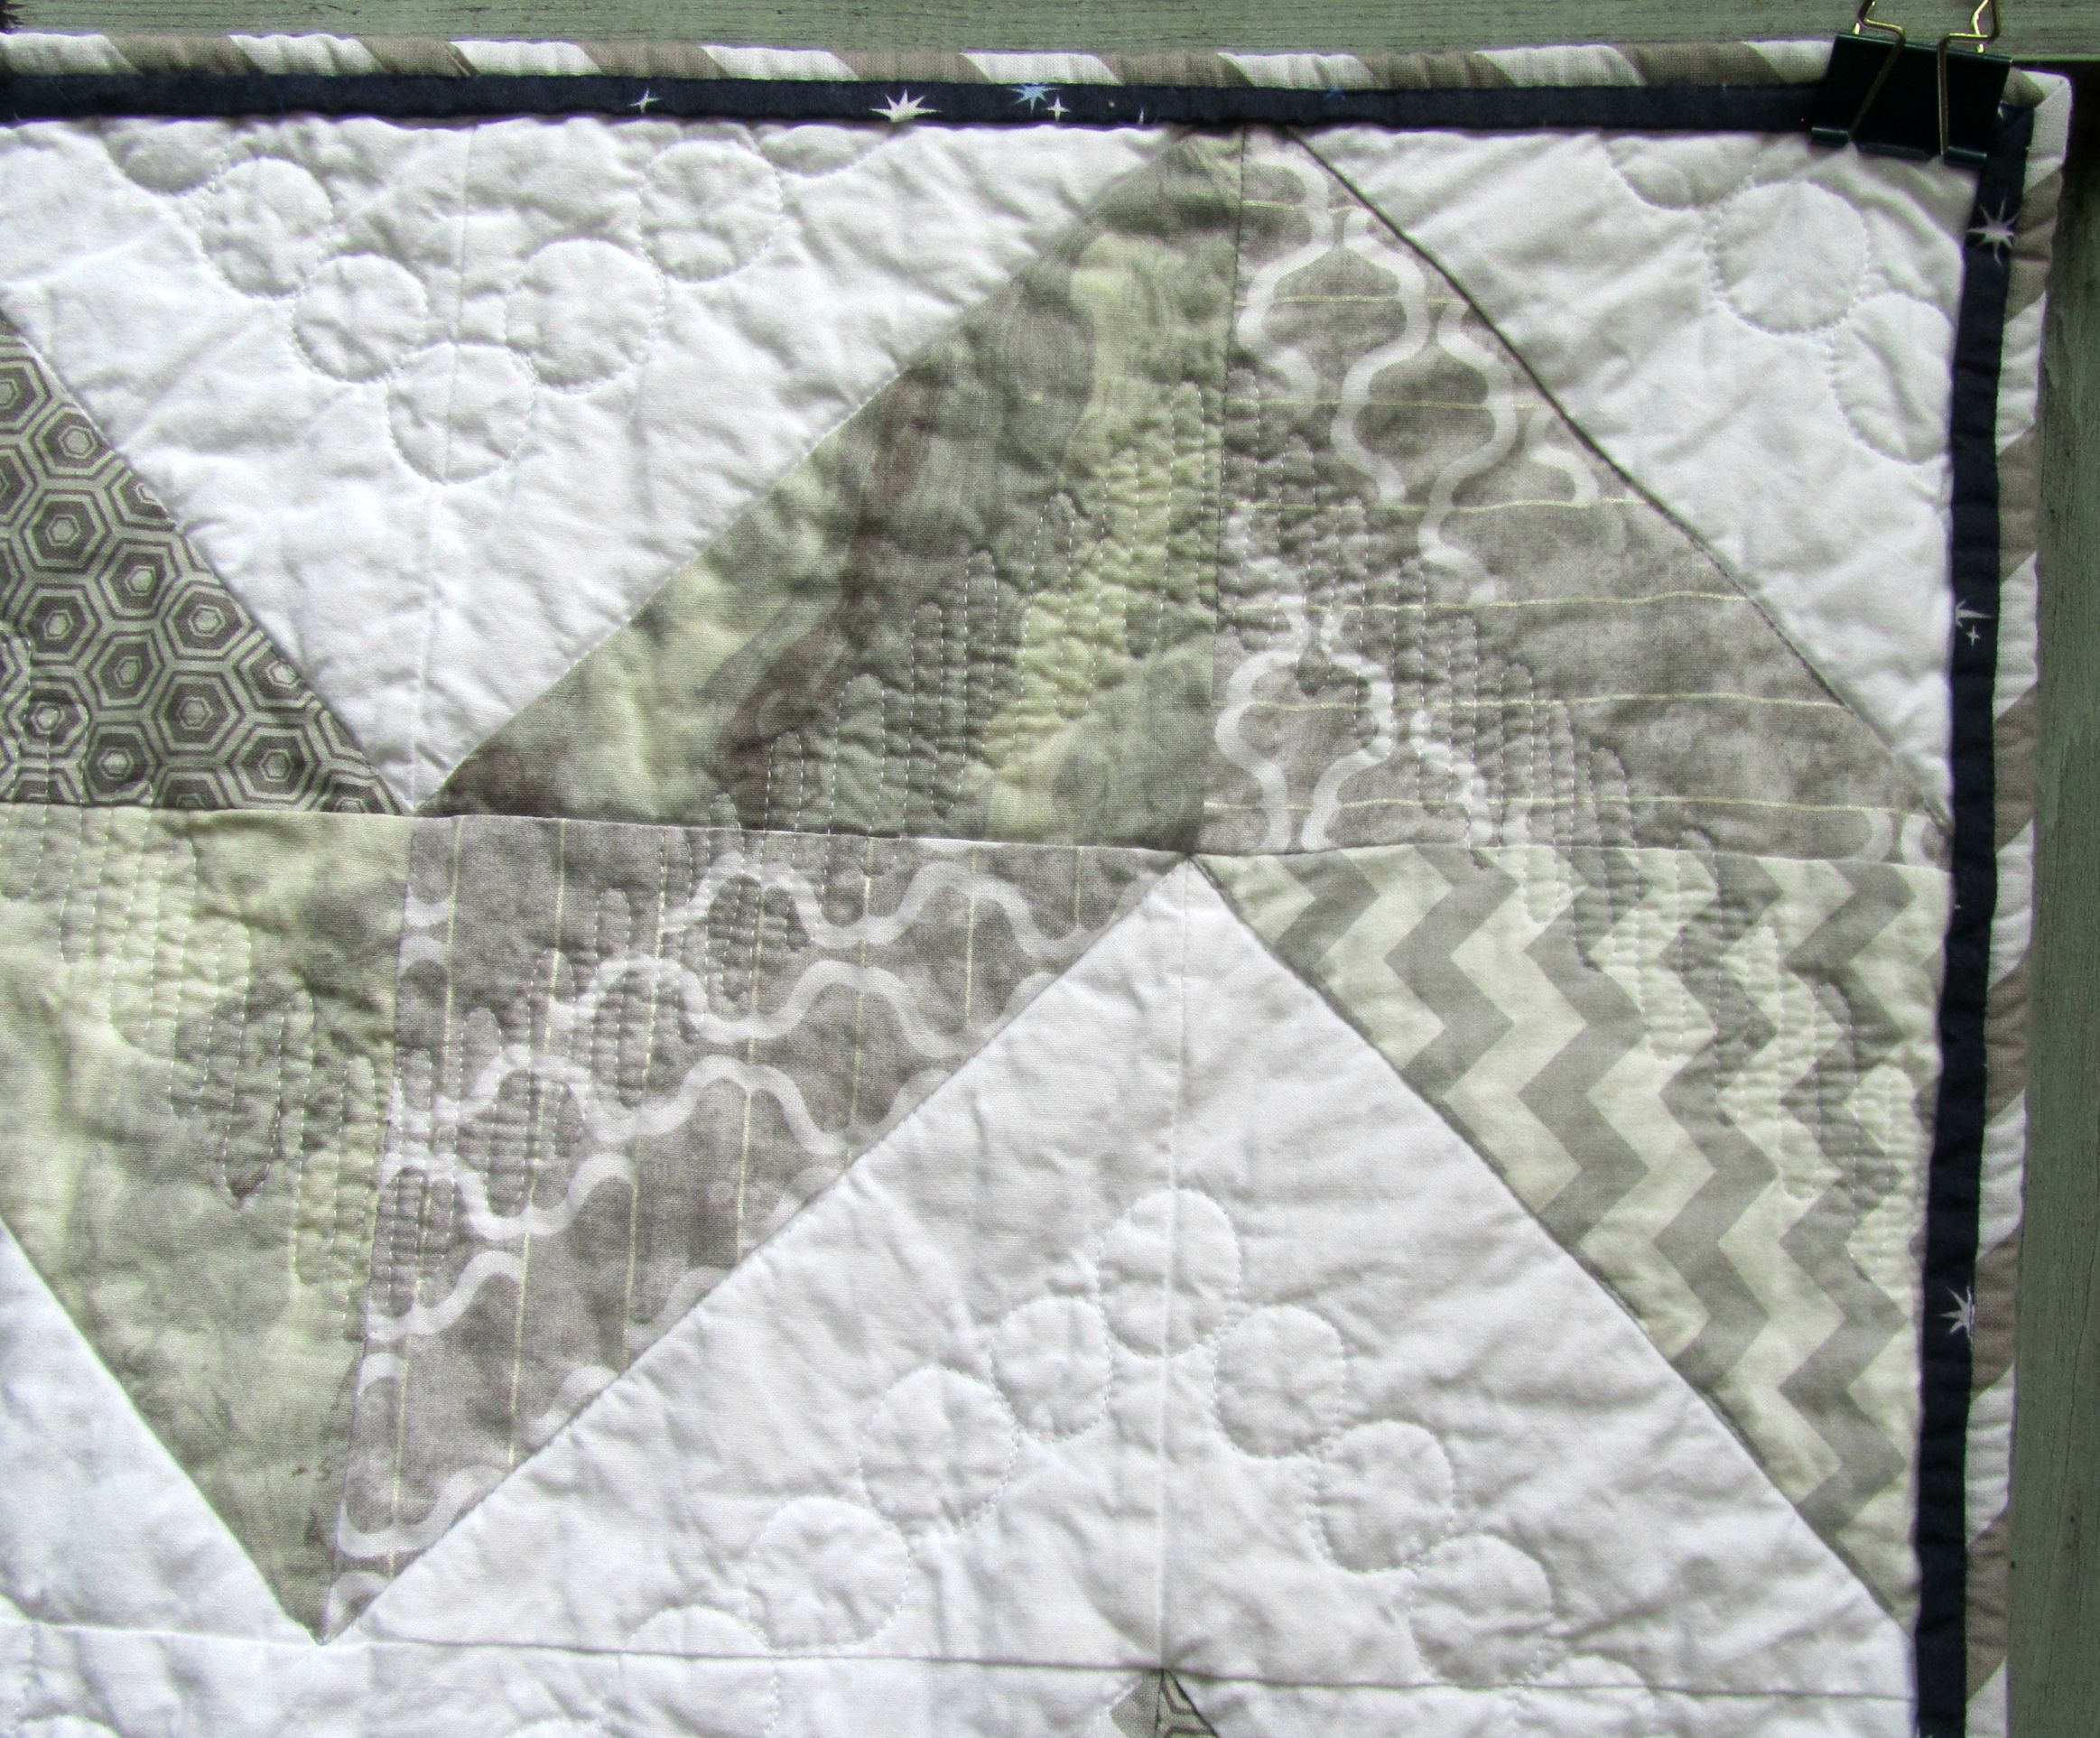
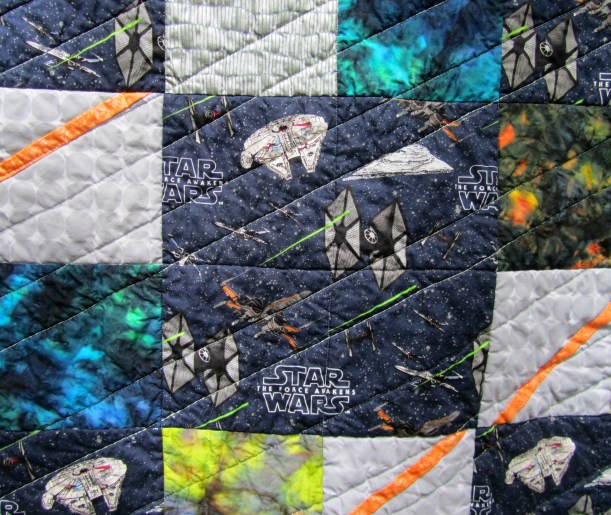 I quilted it in a six” grid with gray Bottom Line. Then I used NiteLite Extra Glow thread (Superior) to quilt diagonal lines in the direction of the green streaks in the fabric. I did both a long straight stitch, and #44, a “hand quilting” stitch. This would take some tweaking to really look like hand quilting, but the forward and back stitching put down lots of thread to enhance the glowing effect. I used this is a quilt I made my son long ago, so I know it last through years of use and washing.