Evening in the Garden Quilts

Adventures in Fabric Art


9 Comments

Finish It Up Friday 1/18/13

WinterWinter Nine Patch

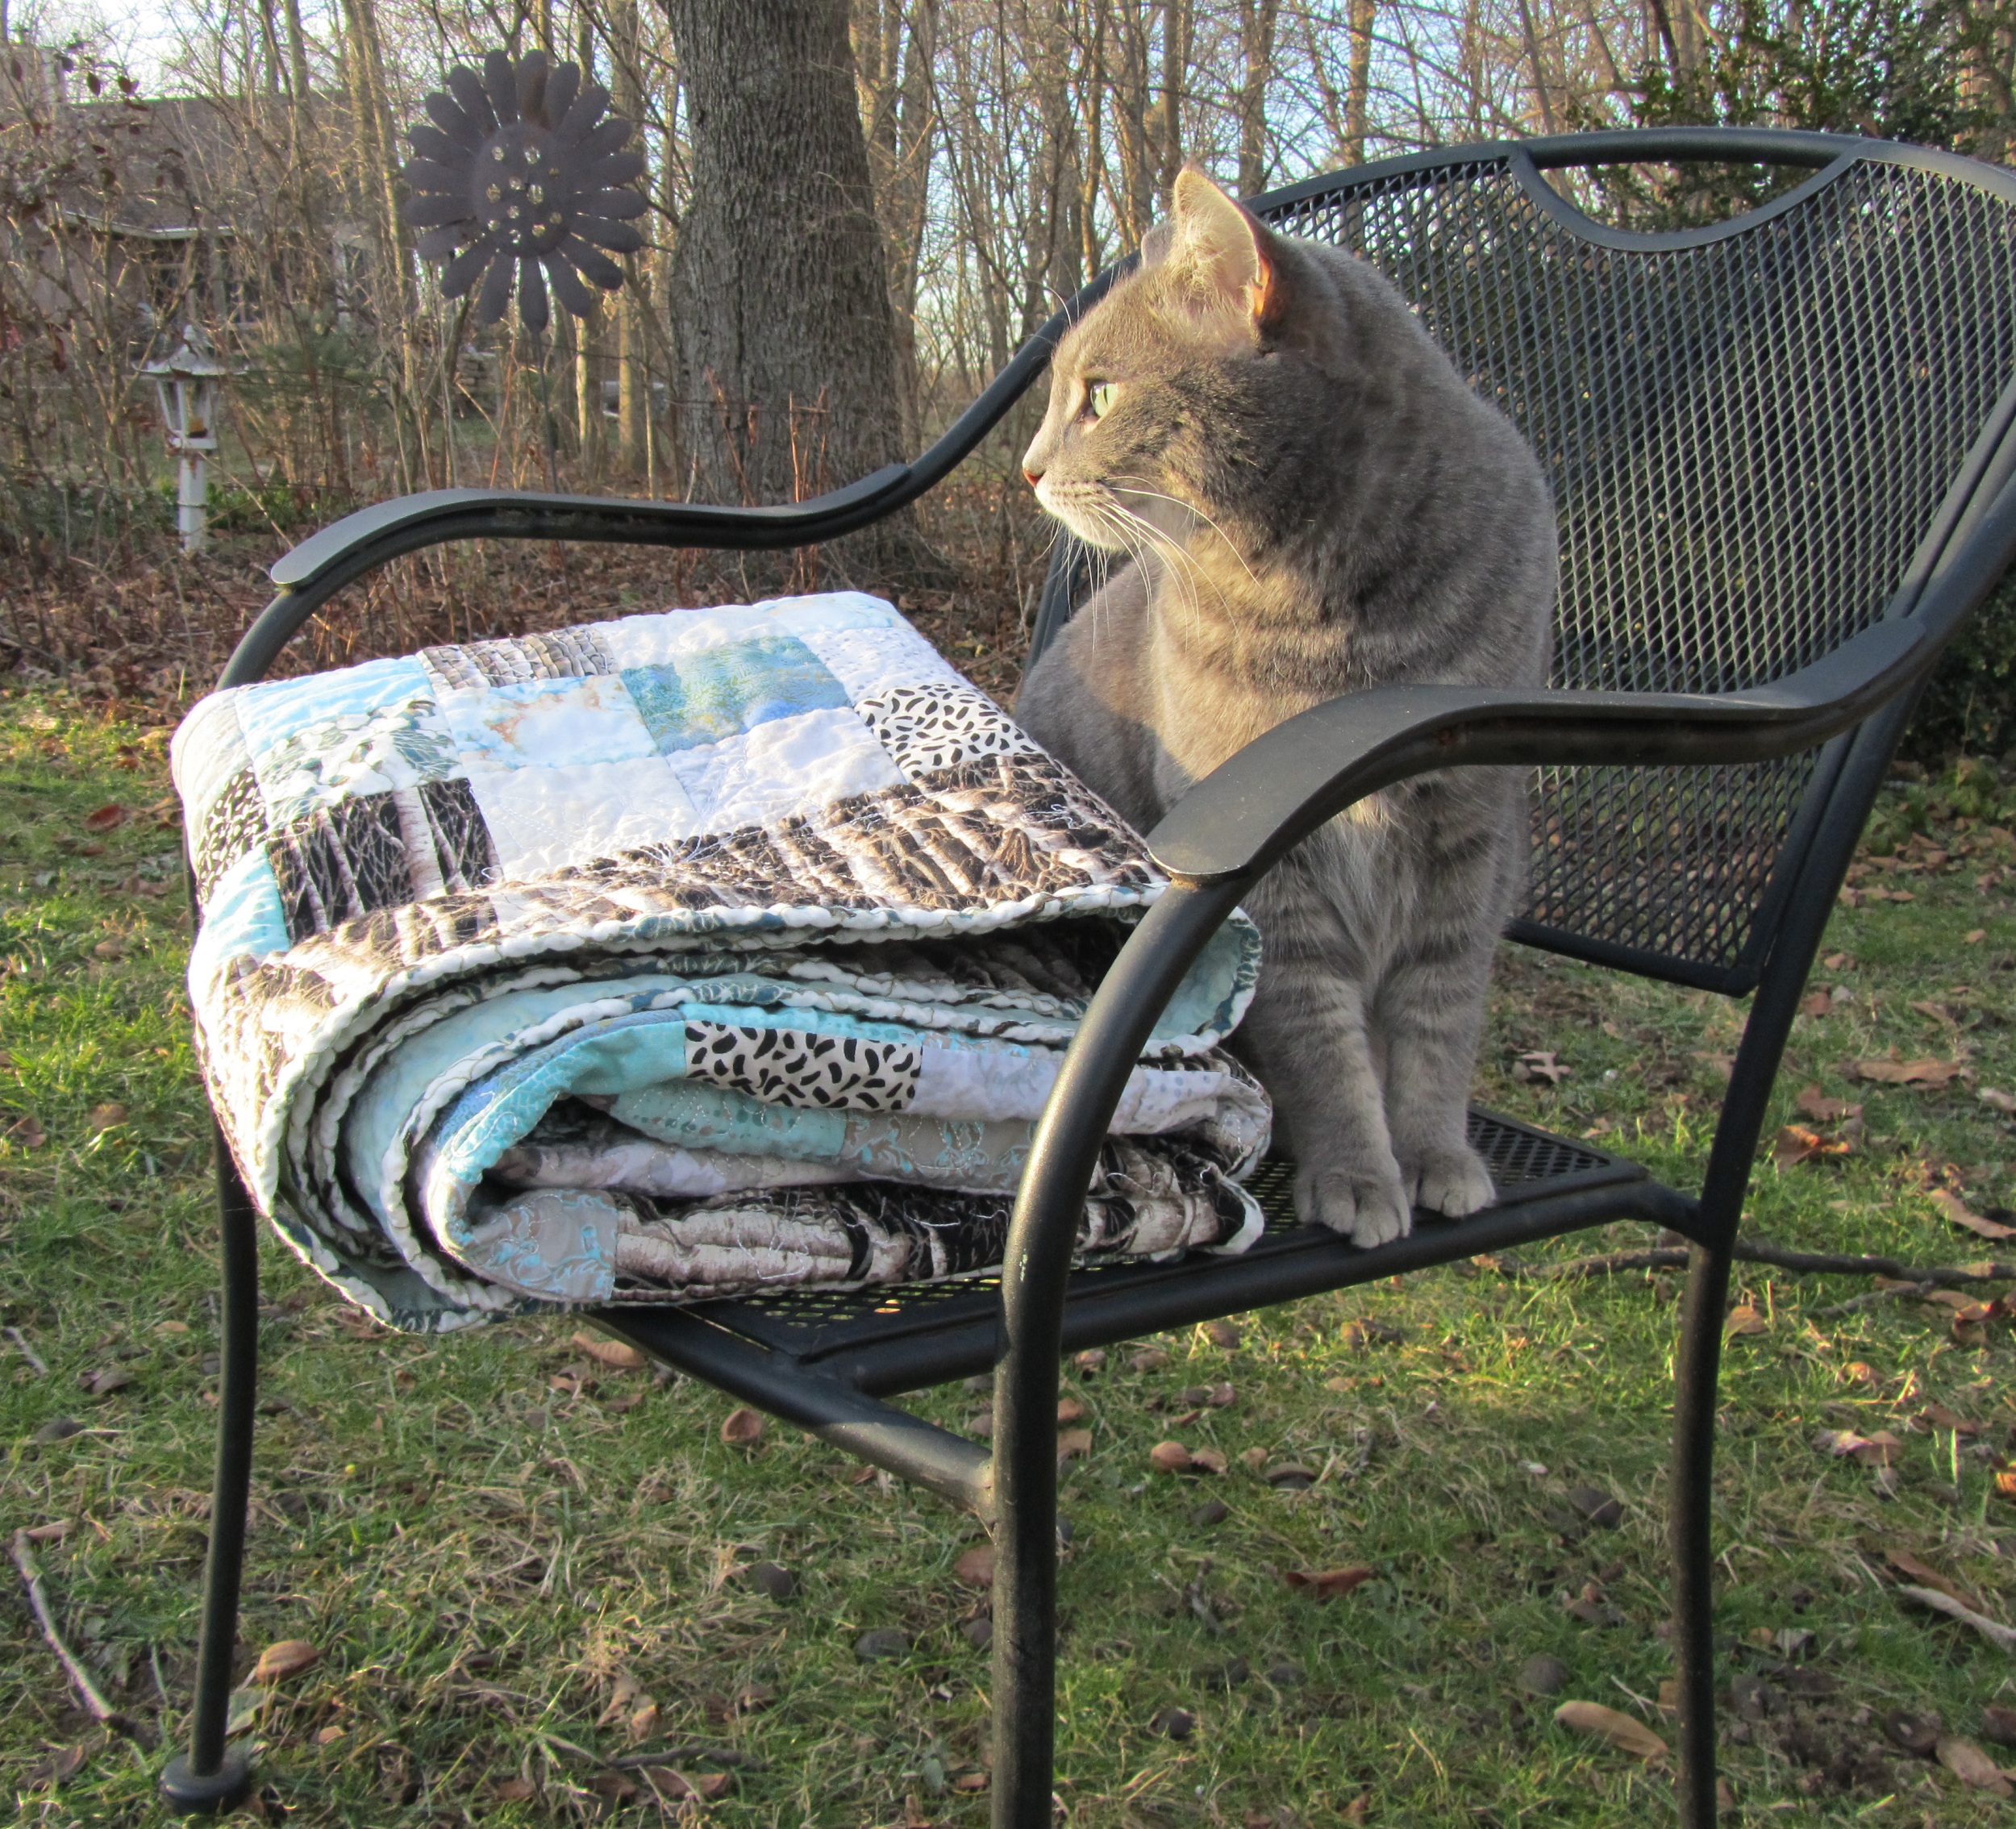
Love it!  I finished my Winter Nine Patch today in time to wash and photograph it on this cold be sunny day.

winter flakesThis quilt is best seen in person, because the fancy quilted snowflakes probably don’t show well in the pictures.  In  person, though, they are a subtle frosting all over the quilt.  The term “surface embellishment” comes to my mind with these.  No beads or buttons or spangles, just slightly shiny, etherial snowflakes.

Winter flakes 2I quilted this by stitching in all the ditches on the front with Superior’s Bottom Line thread.  This gave me a nice, stable, flat, square quilt.

Winter back
Then I flipped it over and quilted from the back.  I quilted the large batiked snowflakes of the backing fabric, and added smaller ones in the gaps between.  I used Bottom Line in the top, and a very heavy, shiny, white rayon thread for the bobbin work.  I think it is YLI, but the bottom cap and label are missing, so I’ll never be sure.  The thickness is similar to Superior’s Razzle Dazzle.  I got very lucky in sewing with this.  I left my top tension alone (4), and loosened the bobbin a half turn, and my first sample was perfect.  I wasn’t really sewing with the rayon, I was just letting it ride on the surface while I caught it with the top thread.  Even with the top-stitch needle, this thread was way too heavy to ever really form stitches with.  That’s okay, it showed more this way.

IMG_1438

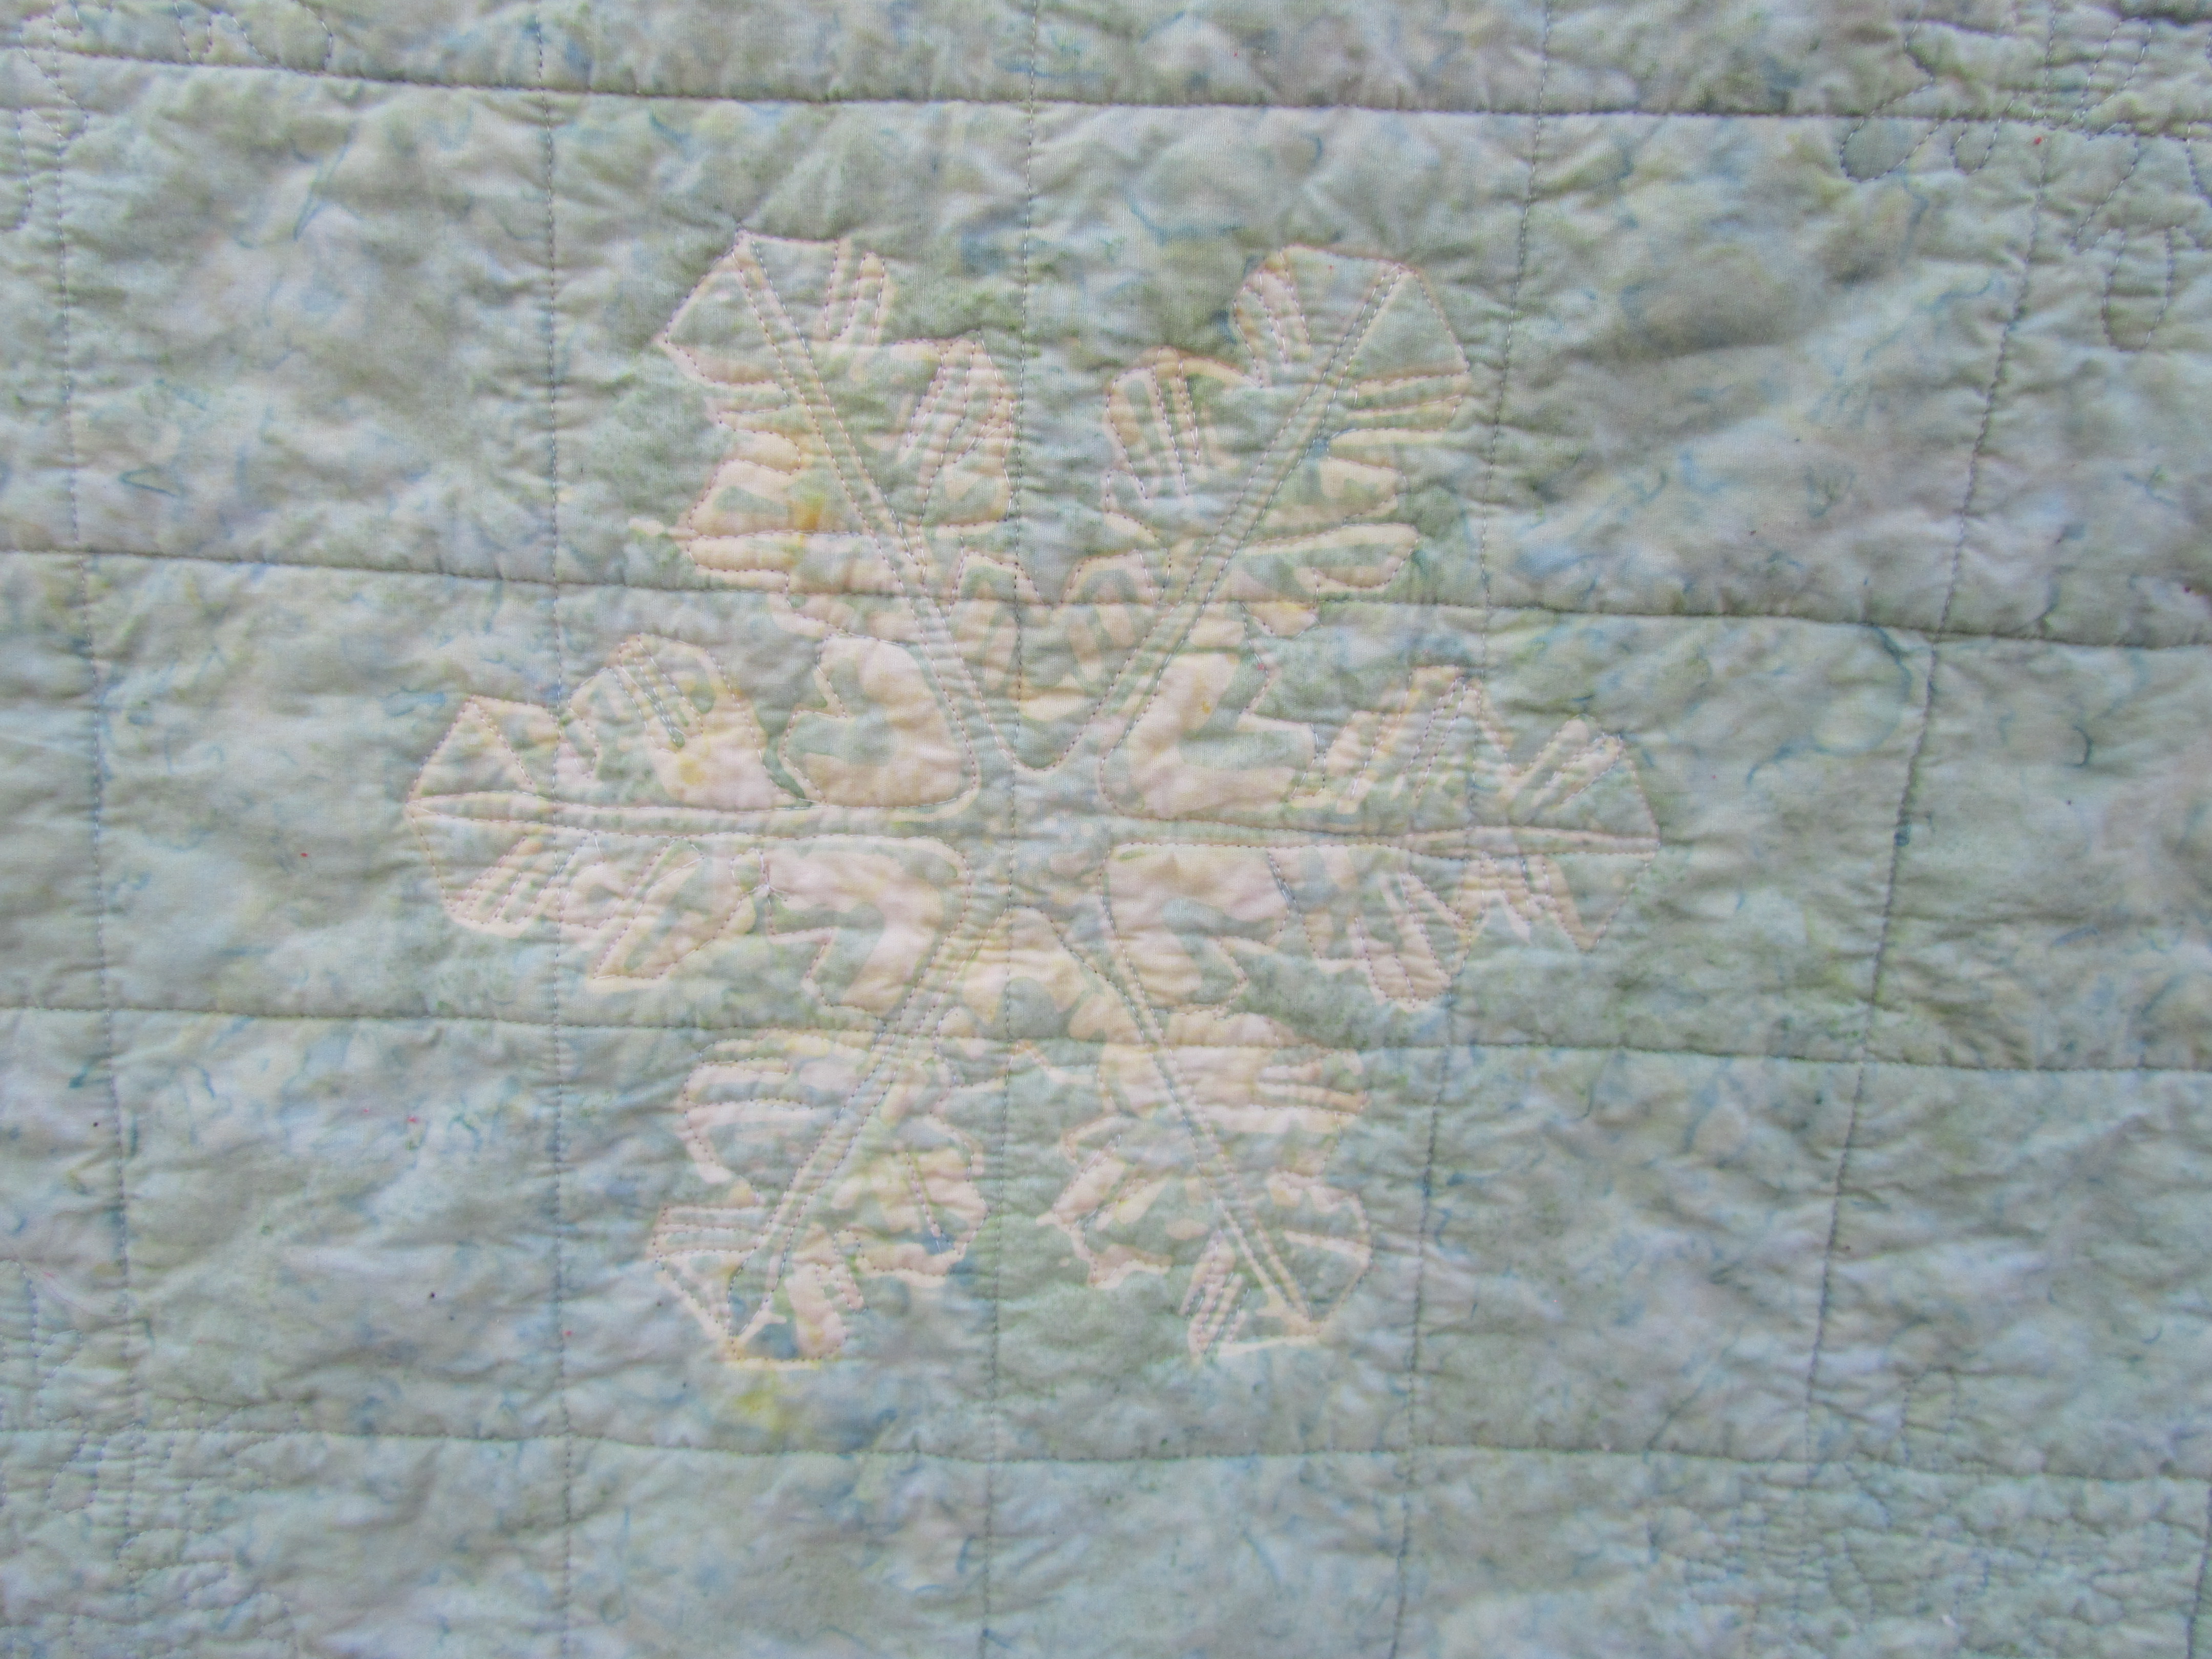
The batik snowflakes were harder to quilt than I had guessed.  They were irregular and unsymmetrical.  To do it over, I would use a marker to trace better patterns over top of the prints.  Instead, I improvised and “improved” them as I went along.  I am happy.

Winter chair

You know what I’ll be snuggling under on this wintery evening!

Winter yuri

Linking up with Finish It Up Friday at Crazy Mom Quilts and TGIFF at Celtic Thistle Stitches.


Leave a comment

Finish It Up Friday 1/4/13

Does it count if I just finished the top of the quilt?  I hope so.  One of my January goals can now be checked off.

IMG_1402This is the Quilt of Valor top I was supposed to piece on New Years Day, and it only took me four days to do.  I have excuses, but you probably don’t want to hear them.  It’s based on Judy’s design, but much simpler.  I had all the six inch squares of Alexander Henry (and other) firefighting prints, scraps from my pillowcases.  I was impatient about the small borders, and had two yards of this large scale flag print, so the border is also six inches (finished).  Simple, but bright, and I think the quilting will add interest.

IMG_1405

I was surprised by how poorly the flag print photographed (indoors).  I guess the gold in it reflects a lot of light.  If my studio had an extra foot of space, I could have perhaps photographed it from an angle or something, but that is just not happening.  The quilt top is 62″ x 82″.

How are you coming on your goals?

I’m linking up with Finish It Up Friday at Crazy Mom Quilts.


7 Comments

Getting It Done in 2013

image

2013 sounds like such a funny, futuristic date to me.  I’m sure we will be used to it soon enough.  I first heard of this year back in 1983 when DH and I took out a thirty year mortgage to buy our first house.  The pay-off date sounded like such a ridiculous, sci-fi kind of thing, in the next century, for heaven’s sake.  Of course, we long ago paid off that mortgage, and bought this place, and paid it off, too, so 2013 no longer holds any real estate significance to us.  We shall have to see what the year brings.

For quilting motivation in 2013, I am going to try Judy’s “Getting It Done”.  This involves listing quilty goals for the coming month, and they can include new projects or portions of them, as well as UFOs.  (Tanesha at Crafty Garden Mom is doing a UFO Along that sounds fun.  I have  very few quilt UFOs , but I might join in later if I ever pick up my knitting needles again.)  On the one hand, I don’t want to be overly focused on productivity, but I also know that I tend to get nothing done if I don’t set goals, so I think I will try this.

GOALS FOR JANUARY

1.  Construct Quilt of Valor top during New Year’s Day Sit and Sew (also #NDSI on Twitter).
2.  Quilt/finish said QOV quilt.
3.  Create and post tutorial about binding a quilt with blanket binding
4.  Create a fun, new quilt of my choice using stash fabric, inspired by playing with said fabric.

DESTASHING GOALS

I feel like my 100 yd destashing goal of last year worked out really well, so I’m going with 100 more yards for this year.  It’s a significant amount, but not so high that it won’t permit me to buy some new fabric when I want to.  Thank you to the readers who assured me that I am allowed to buy fabric, since I’ve been so good, and that quilting is about having fun.  I know, and I really do have fun with it.  I also think that I would find it fun to be able to open the basket drawers where I keep my fabric, instead of them being all stuffed to the gills.  My DS heard that I was down over a hundred yards, and he ran up to my studio to see if he could tell the difference, but he couldn’t. Yeah.  So there must be a lot more hundreds up there.  I don’t want to know, but I do want to keep destashing.  100 yds. in 2013.

So those are my modest goals for the new year.  I look forward to reading about yours and watching your progress.  Good luck to us all!

image

Linking up with Gettinhttp://www.patchworktimes.com/2012/12/31/january-2013-getting-it-done/?utm_source=feedburner&utm_medium=feed&utm_campaign=Feed%3A+PatchworkTimes+%28Patchwork+Times+by+Judy+Laquidara%29g It Done on Patchwork Times.


6 Comments

Wrapping Up The Year 2012

It’s that time to look back over the year in quilting and think about what was made and what was learned.

In 2012, I made about 31 quilts or other projects.  Here are most of them:

2012 Quilts

In 2012, I began selling on Etsy.  I’ve made 27 sales so far.  (I also sell on Artfire, but I’ll be ending that.  I did sell in a shop here locally, which was an interesting, if not lucrative, experience.  I stopped that this summer, but kept up the friendships I made there.)  I’m paying for all my fabric and supplies, and showing a profit, so I can’t complain.  I’ve learned about postal rates and customs forms.  Most importantly, I’ve “met” so many nice people, and found homes for my work all over the country and around the world.  I know they’ve gone to new babies, sick friends, nursing home patients, and favorite relatives, and to brighten people’s homes and offices.  I like that.

In 2012, I’ve given quilts and pillowcases to several charitable causes.  I’ve given two to convalescing friends.  I had one appear in Southern Weddings Magazine. (I’ll post more about that when I actually see the magazine and can show you pictures.  So far I’ve only glimpsed a peek online.  The quilt is there, just hidden behind a bridal party.  The nerve!)

In 2012, I got involved with quilters/bloggers/podcasters on Twitter, and I’ve really enjoyed it.  We’ve shared Sew-Ins and holiday preparations and pets and weather and new additions and illness and our quilt successes and questions, etc., etc., etc.   Mostly it’s just a lot of nonsense and love, and it never fails to bring a smile to my face, if not an outright laugh.  So fun to have friends around the country, and a few across the world. If you’re looking for me there, I’m @scooquilt.

And in 2012, I started this blog.  This is really pretty “out there” for me, but I dove in and did it anyway, and I’m glad I did.  This is my 40th post!  I’ve learned a lot from it, and had a lot of encouragement from nice people.  I haven’t begun to meet my goals with it, but it’s a start.  It’s helped me destash 100+ yards of fabric, and pushed me a bit to finish projects and keep working.  I refuse to be a slave to it, but a little structure is a good thing.  I like being part of the wonderful quilting community.

IMG_0004So that’s what I can recall of my quilt life this year.  How was your year?

2013, here we come!


7 Comments

Tale of a Rescued Christmas UFO

Those of you who chat about quilting with me on Twitter (don’t we have fun?) know about my recent heart palpitations over a Christmas quilt I sold on Etsy that took its own sweet time reaching the new owner, along with unconcerned Postal workers and broken tracking.  It all came out fine.  The new owner (very pleasant to work with) proclaims it, “one of the most gorgeous Christmas quilts I have seen.”  Nice, hmm?  Alas, it was not always so, and I want to share its journey from UFO to beauty.

This really begins several (five?) years ago, when I became intrigued with using blue and white squares to reproduce a gingham pattern.

Blue gingham 011The result was successful, if a little boring.

Blue gingham 1000I jazzed it up with some peacock feather borders and a flat white piping, then quilted it with lovely feathers.  The batting stayed flat and unshrunken (I really think it was Hobbs Heirloom Cotton- could that be?), so the feathers never plumped.

Blue foldedI still think it would have been effective in the right nursery, but it’s never sold.  It will be heading for Project Linus soon.

Next, I thought, Christmas plaid!  Yes, this could be made with 2 1/2 squares in red, green, and white.  Here is what I got.

plaidYeah.  Plaid.  And it just kind of sits there, doesn’t it?  So it kind of sat in my sewing studio for a couple of years.  This doesn’t seem odd to some of you (you know who you are!)  who have oodles of UFOs, but I have hardly any.  At that time, this was the only one.  Now I have two, I think.  So, yeah, I really had no idea what to do with this bit of Christmas ickiness.

Eventually, I took it back out and dove into it.  I pulled out all my stash Christmas fabric.

V C detail4I made borders from gold braid prints and tassel prints.  Better, but still small and square.

V C detail2I created diamond (on point) blocks with varying shades of gold on dark backgrounds, and put rows of these on the top and bottom of the quilt.  Better.  A rectangle now.

IMG_0569Now I cut large borders of printed swags and tassels.  I didn’t have quite enough so I added corner stones.  These brought it to its final size (47″ x 65″) and Victorian glory.  I added lots of quilting in gold metalic thread.

finished ChristmasI knew it was either a masterpiece or a gawd-awful hodgepodge of Christmas fabric, but at least it was a finished quilt.  It was festive and warm.

Victorian Christmas 500Apparently, it is attractive, because it was picked up in several Etsy treasuries after I listed it last month, and favorited by many, and then purchased by this nice appreciative lady who was giving it as a gift before the holiday.  I am so glad it will have a loving home for Christmas, happy it turned out okay, and so happy to have it out of my sewing space!

Yes, Jaye, it is the process.  Some just take longer than others.


2 Comments

Baby Quilt Finished

Wills stool

I finished up the baby quilt yesterday, and it’s all washed and dried and crinkly.  This looks different from other baby quilts I’ve made, but I like it.

Will's Quilt

It’s bright and bold and energetic, and I think it will be perfect for a little boy.  I bound it with rayon blanket binding for the touchable edges.  This finish doesn’t seem to sell well for me, but I almost always use it on gifts, because I know the babies like it.  This is made completely from stash.

Wills backThe backing is one piece of pale blue and white cloud fabric.

Will back 2I like this stained glass look where the sun brings the other colors through it.

Wills detailThe piecing and cutting were very quick, perhaps three hours.  The quilting, however, took around six hours.  There’s lots of it, in the ditches and through the block centers.  I used Superior Bottom Line in a pale blue on top and bottom.

Wills folded

The finished size is 36″ x 48″.  I always consider that the binding will take about 2″ off of each side of the design, so I usually add borders.  I didn’t this time, because I thought it was okay to cut off the edges of these Disappearing Four Patch blocks, and I think it works.

I’m linking up with Finish It Up Friday at Crazy Mom Quilts.


1 Comment

Christmas Pillows Finished!

Pillows largeThese six Christmas pillow covers were really finished yesterday, but it has been pouring steadily for two days, so I just now got pictures of them.  It was still drizzling when I took them out to the wet bench for photos. They turned out very well, especially since they are for my own living room.  I made a few mistakes, and learned a new technique, so it was a good project.

Pillows backYou can’t see this zipper, can you?

New technique:  I used this tutorial from Sew, Mama, Sew for inserting a covered zipper into the backing.  (I heard about this recently from someone else on a blog, but I can’t remember who’s Ah, is was Jacquie, from Tall Grass Prairie Studio. Just look at her beautiful pillows! Thank you!)  It worked really well, especially after the first one.  I was able to assembly line the last five covers and achieve a very nice look in no time.  I liked this much better than the velcro I’ve used before.  I had some trouble with the 1/4″ Steam-A-Seam2 Double Stick Lite Fusible Web.  It was supposed to be sticky to stick to the project before ironing, but it wasn’t at all.  The web kept separating from the paper backing and it was a little fussy to use.  Also, the cat was very attracted to these slender, curly strips I was trying to work with.  It was worth the fuss, and I got better at it, and it really made the zippers go in easily.  I will use it again.

Pillows greenMistakes:  The red and green strips showed through the Kona Snow.  I only noticed this after the tops were quilted.  They were actual strings, with frayed edges.  In the future, I will trim these edges and check the pieced top carefully for any seams that are showing through.  Live and learn.

Urbana-20121208-00514Also, I’m used to shaping the corners of pillow covers by trimming 1/2″ from each corner, tapered on back to the middle on each side.  This works great with home dec covers to keep the points on the corners from being too “pointy” and sticking out.  I think it was the fact that these covers were quilted that caused this not to work so great. They’re just a little wonky, but look fine on the couch.  Next time I will just sew them square.  These covers were sewn right sides together, then machine bound like a quilt.  I much prefer this to covering cording, inserting it, then turning the pillows, which I’ve done for years.  I like this method and this look.

Pillows red and greenNot a mistake:  Even though I pre-wash all my fabric, I still thought that all that red and white could be trouble.  I washed the covers with two Color Catchers, and I’m very glad I did.  I have six nice clean pillows and two very pink Color catchers.

Pillow green insideSo my living room looks better for Christmas.  What are you working on for yourself?

I’ll go ahead and link this up with Finish It Up Friday at Crazy Mom Quilts.


4 Comments

A Finish: Midwest Modern Zig Zags

I just mailed off this new quilt to Timeless Treasures to be part of the Luanna Rubin’s 5000 Quilt Challenge for Hurricane Sandy relief.  It finished 70″ x 86″, which is about as large as I like to quilt on my home machine.  For larger ones, I usually quilt in two pieces, join, then quilt the joined area.

This is a very different color palette for me, mainly inspired by spotting the large amount of Amy Butler fabric in my stash and finding I could easily pull enough coordinates to go with it.  My donation blocks were bright and cheerful;  here I went with soothing.  The whole thing has a feeling of butterscotch about it.  I hope it warms and soothes someone in need.

I pieced the top in one day, but the quilting took about 12 hours, which I spread over several days because it was a little hard on my shoulders and back.

I started quilting but using the walking foot to quilt a stabilizing grid of lines between all the blocks.  For this, I rolled the quilt to fit under the machine.  To support this long sausage, I assembled several surfaces.  The white is my machine cabinet; the brown is the wooden cabinet that always backs up against the machine cabinet;  the silver is my ironing board, lowered to line up; and the white table is a narrow folding table.  This table was new this spring for the graduation party, and this is the first time I used it in the sewing studio.  It was the perfect size for my cramped quarters.

For the straight lines in the chevrons (are “zig zag” and “chevron” completely interchangeable?) I used the walking foot, where I would usually free motion them.  However, the large size made it possible to use the walking foot, and I know it made my lines a lot straighter (notice I didn’t have to come on Twitter to beg you to chant about crinkling for me).  This was the least fun and most time-consuming part.  Shoulder tiring.  I found that moving the white table around to the left side of the machine gave me the support I needed for this step.

Finally I got to my favorite:  free-motion feathers.  I know I’m in a little bit of a rut with these, though I am stretching and doing different things with them sometimes.  When I get stuck on something like this, I often just go with it until I get them out of my system.  Or get good at them.  Or sick of them.  So far I am getting pretty good at them, though I find that some days I can form feathers and some days I really can’t.  More and more I can.  And, as Kati R. said, I may just make them forever.  So versatile and traditional, but I like the contrast for modern things, too.

For the feathers, I used the flatten and smash technique (is that right?  Leah Day?).  I used the stitch regulator on my machine, but I’m alright without it, too.  I just marked the spines (which I quilted before I took off the walking foot) and went for it.  I’m pretty happy with them.  There’s some glitches and size variation, but I won’t point those out to you.  I think it washed up beautifully.

I bound it with the coordinating stripe, which is wavy, giving the binding an interesting slanted look in places.  It’s all machine bound.

This all came from stash, front and back.  I enjoyed it, and I hope it comforts someone.

Happy Thanksgiving.


4 Comments

Finish It Up Friday

The Red and Gray Zig Zags is finished!  I’m very happy with it.  I thought it would be quicker, but I kept adding more quilting, and that’s usually a good thing.

This quilt started from this intriguing but odd piece of fabric (“stash dog”).  “Germania” by Jay McCarroll.  I loved it when I bought it, on sale, I’m sure, but it never worked with anything and never made any sense to me.  Finally, decided to cut it up and put it with various luscious grays.  This gave it depth without being any more busy than it already was.

I usually make my HSTs by cutting squares 7/8″ larger than the finished side, placing right sides together, drawing a diagonal line down the center, then sewing 1/4″ inch from the marked line on both sides.  I rarely trim them, as they are usually very accurate, and these were just fine.

I pressed them open, which I think helps a lot with preventing stretching, and I think it helped in matching these particular seams.

Lot of them, though.  Except, remember, that I had cut them all wrong at the beginning.  So I adjusted the block sizes to 3 1/2″ finished.  Didn’t really know what size that would be on the finished quilt, because I misfiled or failed to save my design on EQ7.  The quilt washed up at 48″ x 61″, which is okay for a throw.  A little longer would have been nice.

Our “crinkle” chants worked pretty well, and the straight line quilting is presentable.  I really like my free-motion feather border.  This is the first time I made a double spine, and also outlined the feathers on the outside.  The stippling next to them makes them pop a little.

The binding is the last of the red fabric with a little Kona “Lagoon” and “Rich Red”  thrown in to extend it.  The batting is Warm and White.   The back is pieced with 12″ squares of grays and three blocks made from scraps with pops of red.  I think it has just enough quilting, and I’m in love with the crinkly grayness of it.  A good finish.

I’m linking up to Finish It Up Friday on Crazy Mom Quilts and to Owen’s Olivia.


2 Comments

A Finish!

Seems like a while since I’ve finished a quilt, and longer than I thought with this one, but Blue and Gold Cabins is done.  I did remove and reverse the fabric on the borders, and I like the result.

It was awkward and cumbersome to rip off the borders and reattach them at that stage, and added a few more hours.  While I worked I could only see that it looked like the back of a fabric, faded and not as smooth as the front, but it looks fine washed up.  Like a lighter colorway in the same fabric line.

One thing that did happen is that I must have brought thousands of batting pills over to the front (I guess because of the spray baste).  I’ve washed it, shaken it outside, and now will lint roll it thoroughly before I box it up to send today.

It’s going to a relative in the hospital who survived a medical crisis and now has a long recovery ahead.  This is nothing if not a cheery quilt!

Here is the view out my studio window, where I look into the top of a dogwood tree.  What you can’t see are all the birds hopping around, eating the orange berries.  Right now I see a wren, but often there are titmice, chickadees, cardinals, flickers, and others.  Lots of company and extra interest for the cats.

I hope you all have a beautiful fall (or spring!).

I’ll be linking to Finish It Up Friday on Crazy Mom Quilts.