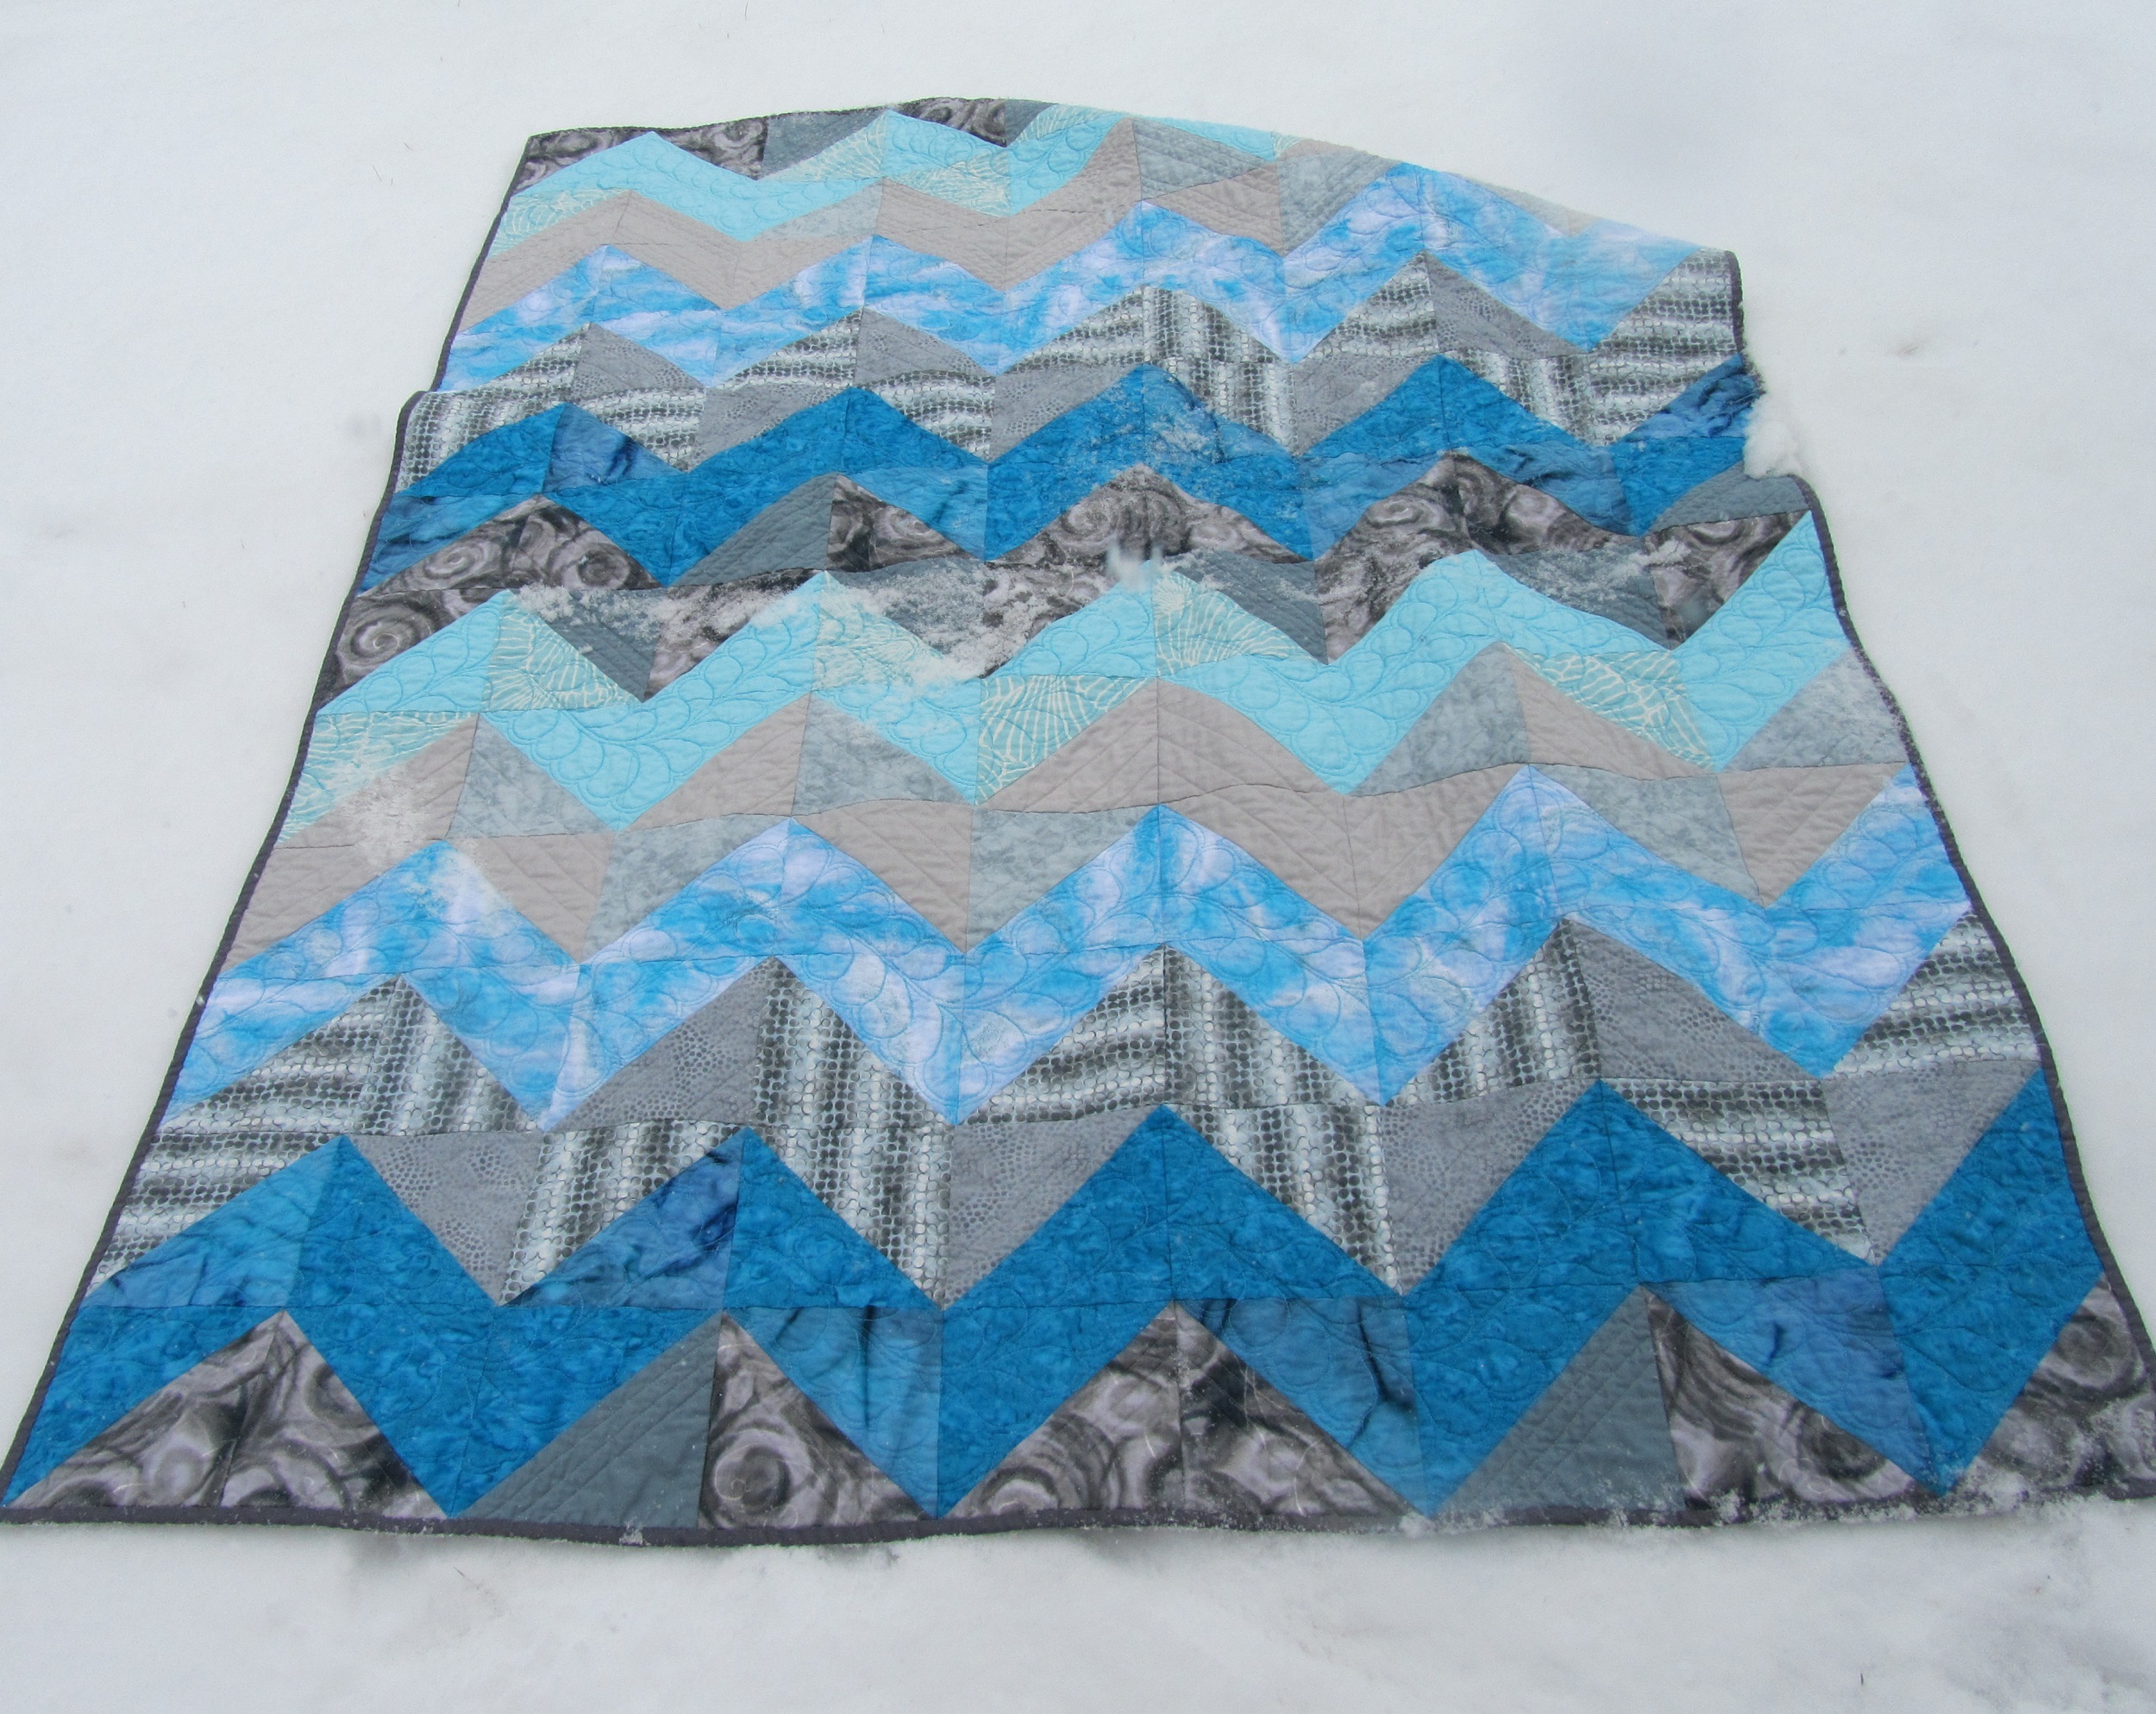
I just mailed off this new quilt to Timeless Treasures to be part of the Luanna Rubin’s 5000 Quilt Challenge for Hurricane Sandy relief. It finished 70″ x 86″, which is about as large as I like to quilt on my home machine. For larger ones, I usually quilt in two pieces, join, then quilt the joined area.

This is a very different color palette for me, mainly inspired by spotting the large amount of Amy Butler fabric in my stash and finding I could easily pull enough coordinates to go with it. My donation blocks were bright and cheerful; here I went with soothing. The whole thing has a feeling of butterscotch about it. I hope it warms and soothes someone in need.
I pieced the top in one day, but the quilting took about 12 hours, which I spread over several days because it was a little hard on my shoulders and back.

I started quilting but using the walking foot to quilt a stabilizing grid of lines between all the blocks. For this, I rolled the quilt to fit under the machine. To support this long sausage, I assembled several surfaces. The white is my machine cabinet; the brown is the wooden cabinet that always backs up against the machine cabinet; the silver is my ironing board, lowered to line up; and the white table is a narrow folding table. This table was new this spring for the graduation party, and this is the first time I used it in the sewing studio. It was the perfect size for my cramped quarters.

For the straight lines in the chevrons (are “zig zag” and “chevron” completely interchangeable?) I used the walking foot, where I would usually free motion them. However, the large size made it possible to use the walking foot, and I know it made my lines a lot straighter (notice I didn’t have to come on Twitter to beg you to chant about crinkling for me). This was the least fun and most time-consuming part. Shoulder tiring. I found that moving the white table around to the left side of the machine gave me the support I needed for this step.

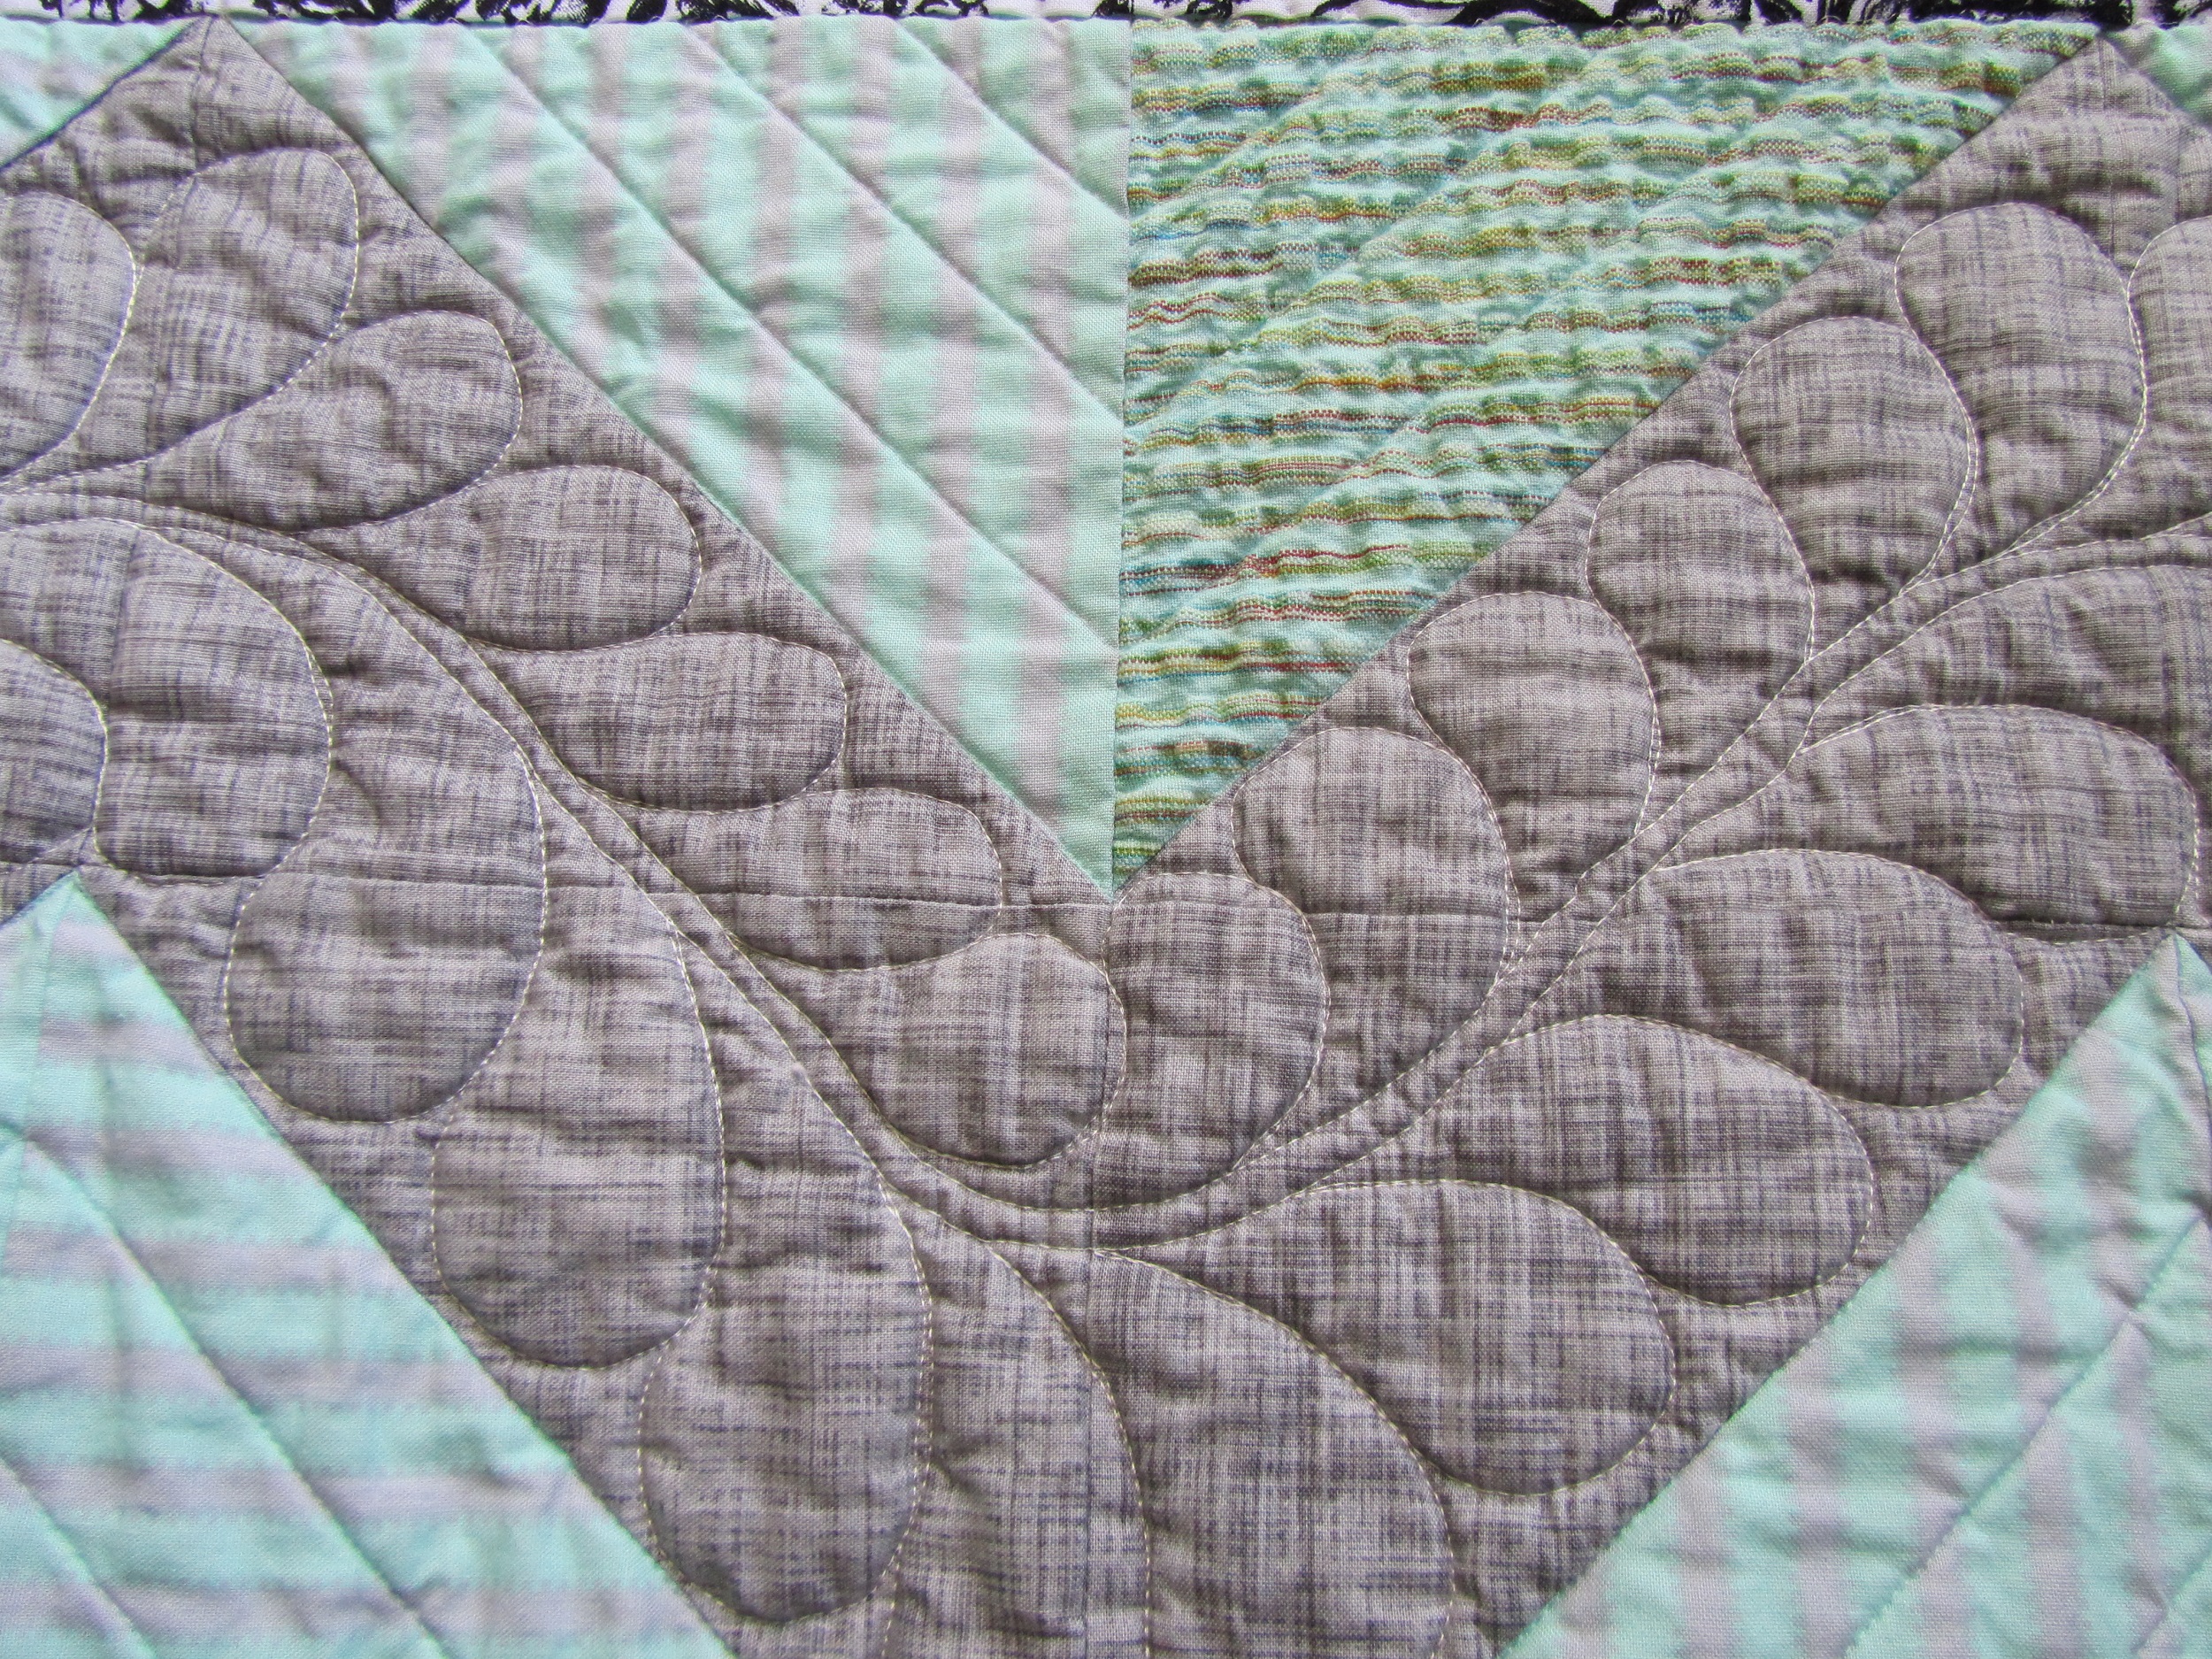
Finally I got to my favorite: free-motion feathers. I know I’m in a little bit of a rut with these, though I am stretching and doing different things with them sometimes. When I get stuck on something like this, I often just go with it until I get them out of my system. Or get good at them. Or sick of them. So far I am getting pretty good at them, though I find that some days I can form feathers and some days I really can’t. More and more I can. And, as Kati R. said, I may just make them forever. So versatile and traditional, but I like the contrast for modern things, too.
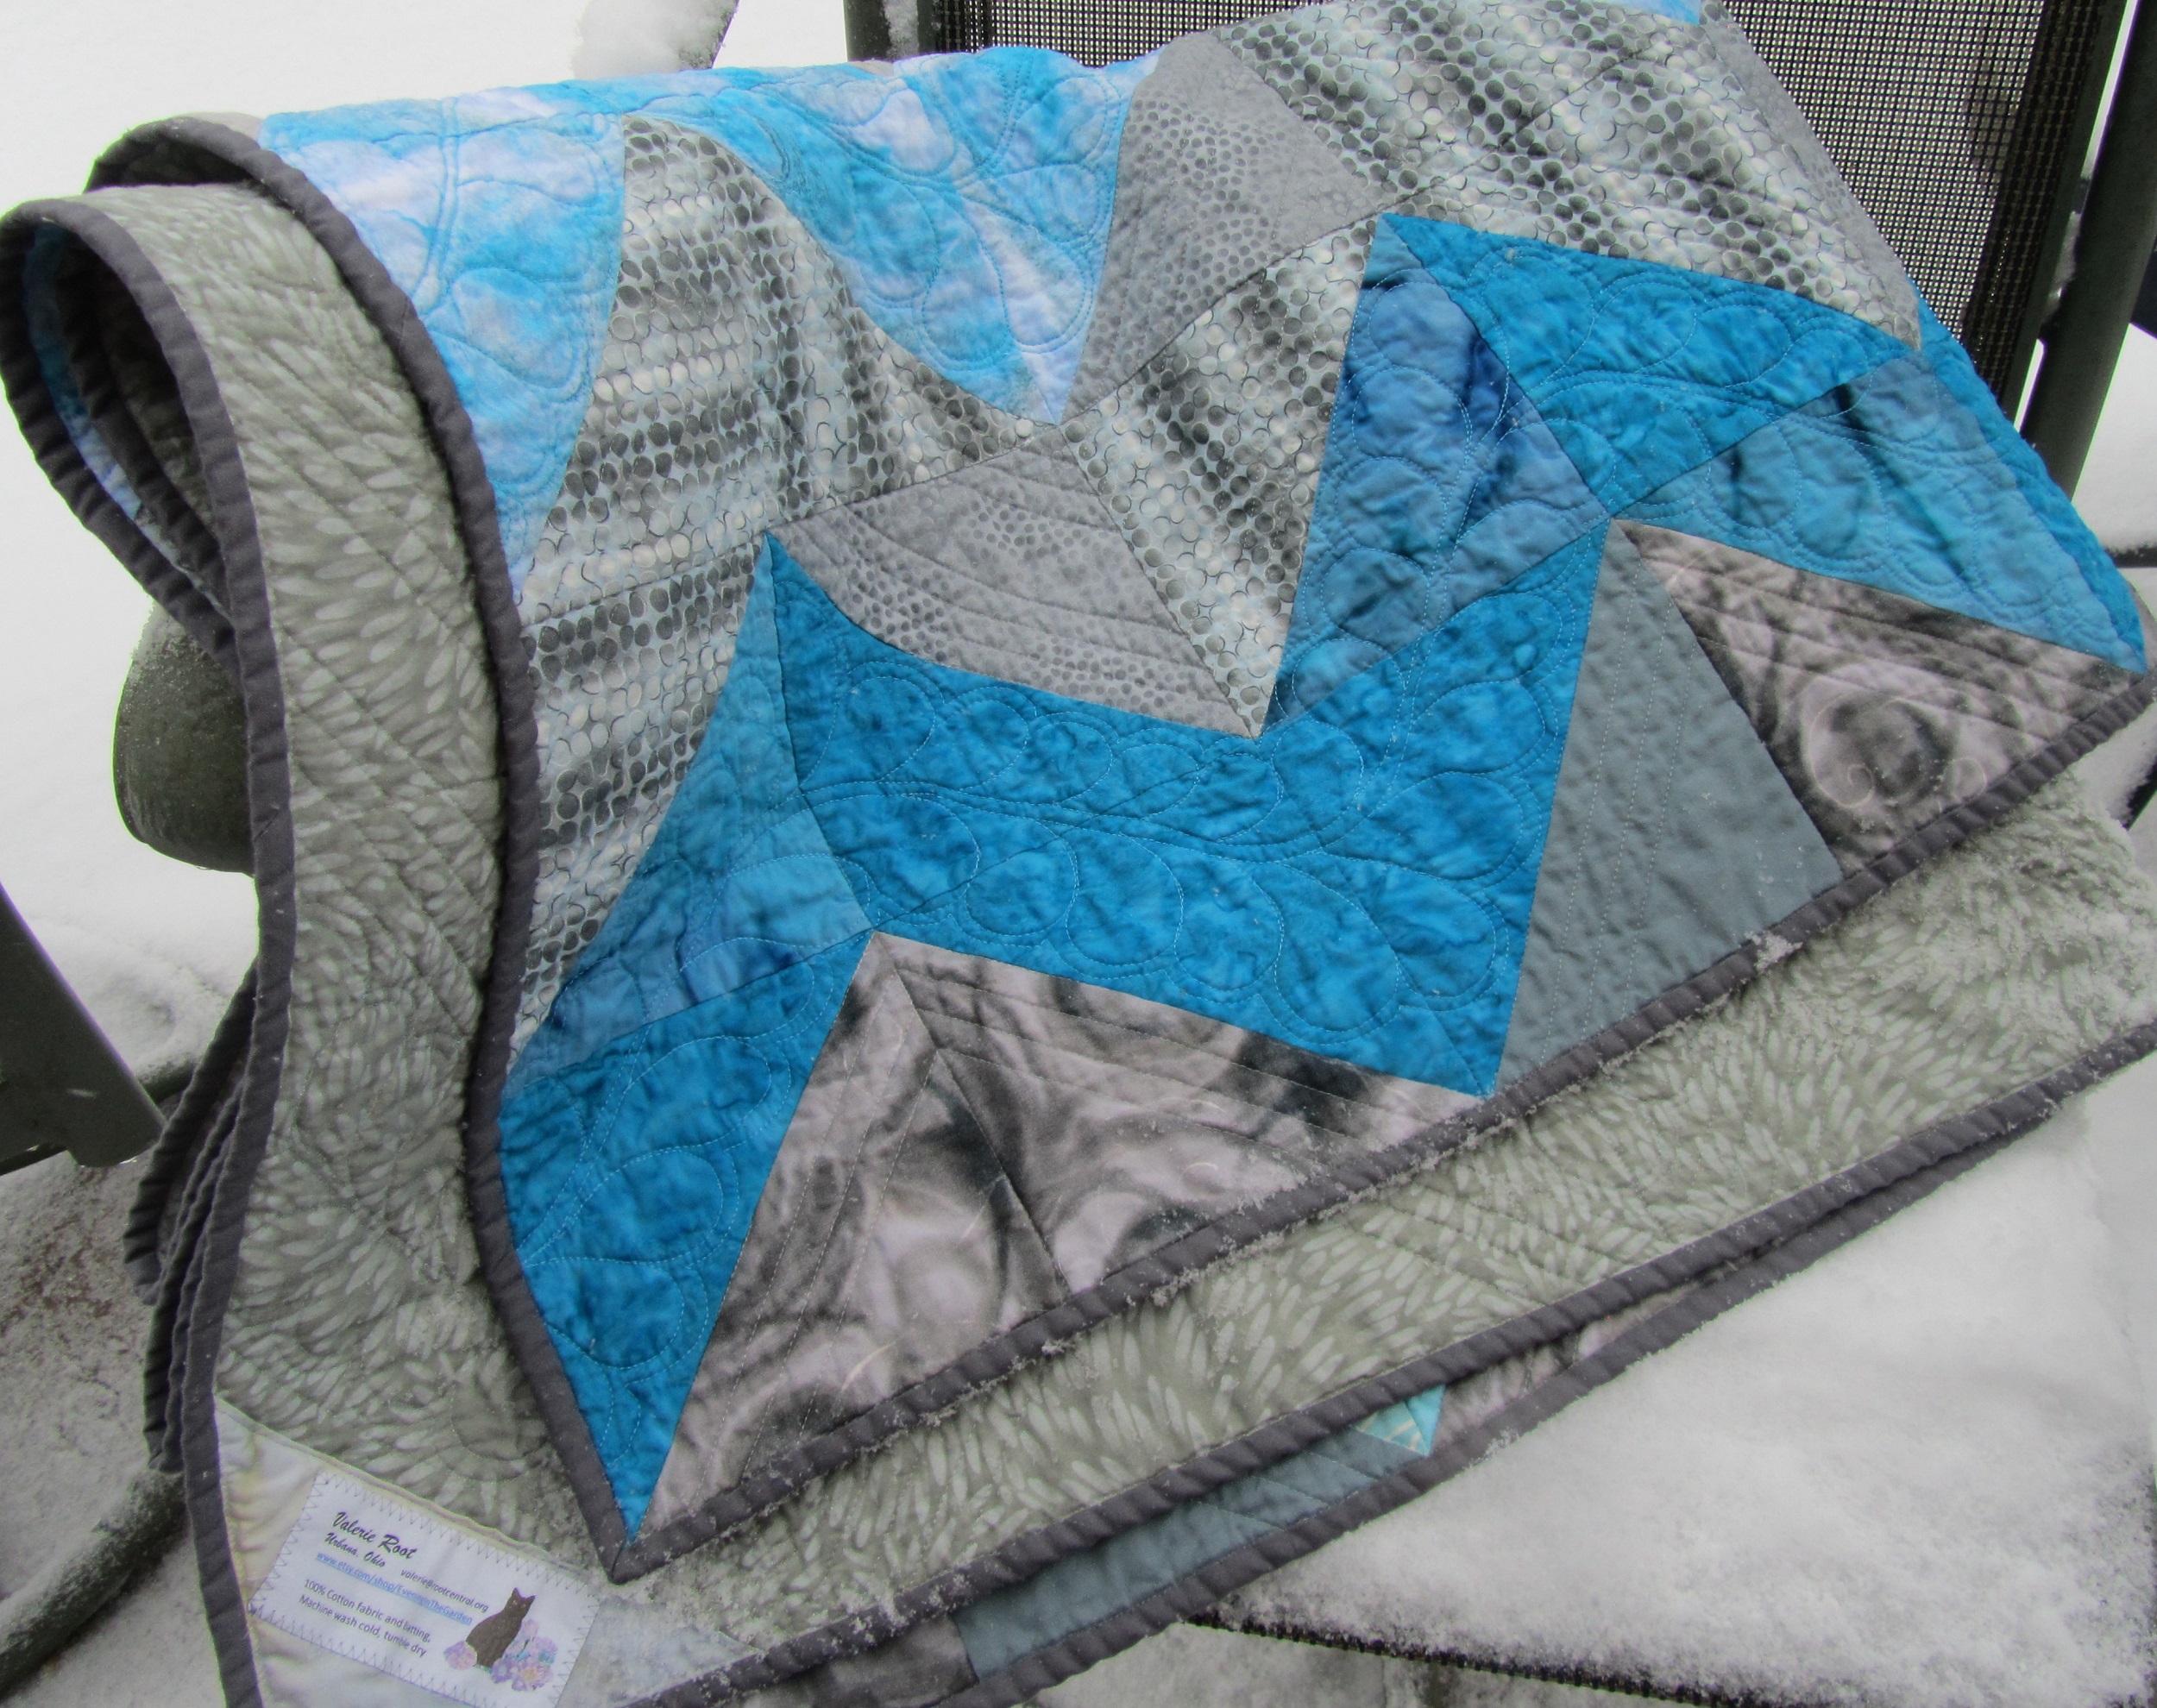
 For the feathers, I used the flatten and smash technique (is that right? Leah Day?). I used the stitch regulator on my machine, but I’m alright without it, too. I just marked the spines (which I quilted before I took off the walking foot) and went for it. I’m pretty happy with them. There’s some glitches and size variation, but I won’t point those out to you. I think it washed up beautifully.
 I bound it with the coordinating stripe, which is wavy, giving the binding an interesting slanted look in places. It’s all machine bound.

This all came from stash, front and back. I enjoyed it, and I hope it comforts someone.
Happy Thanksgiving.
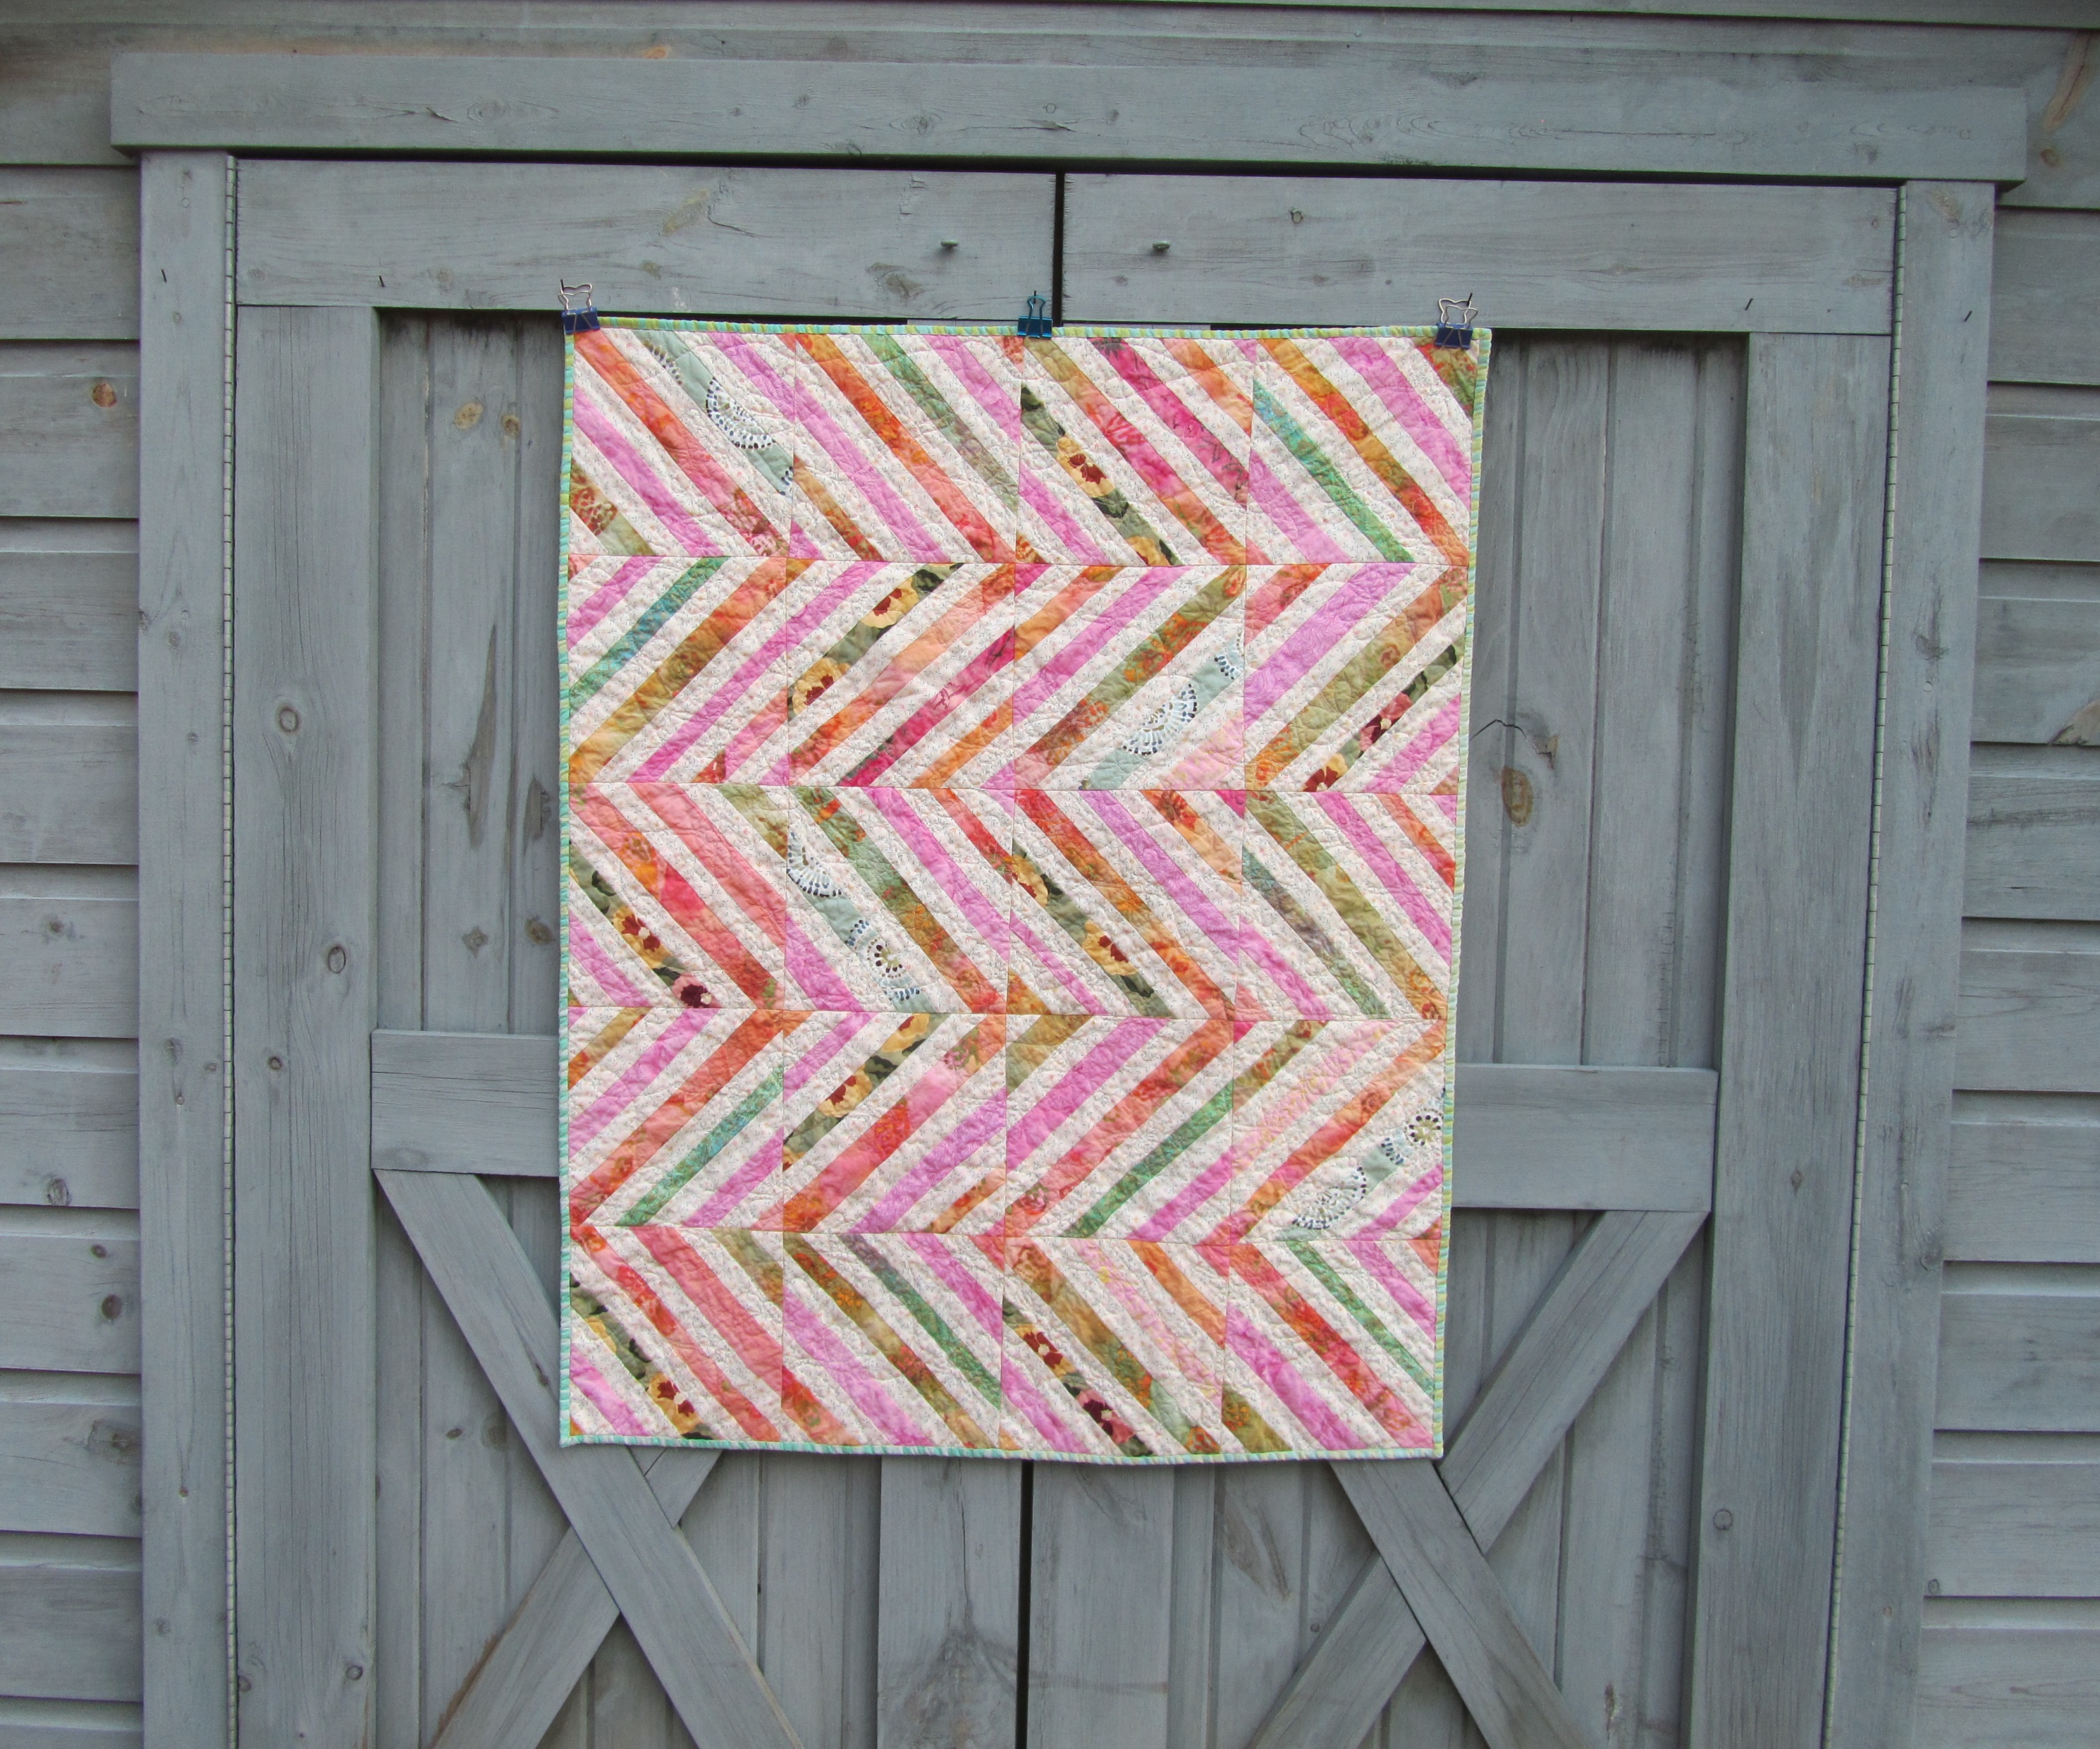
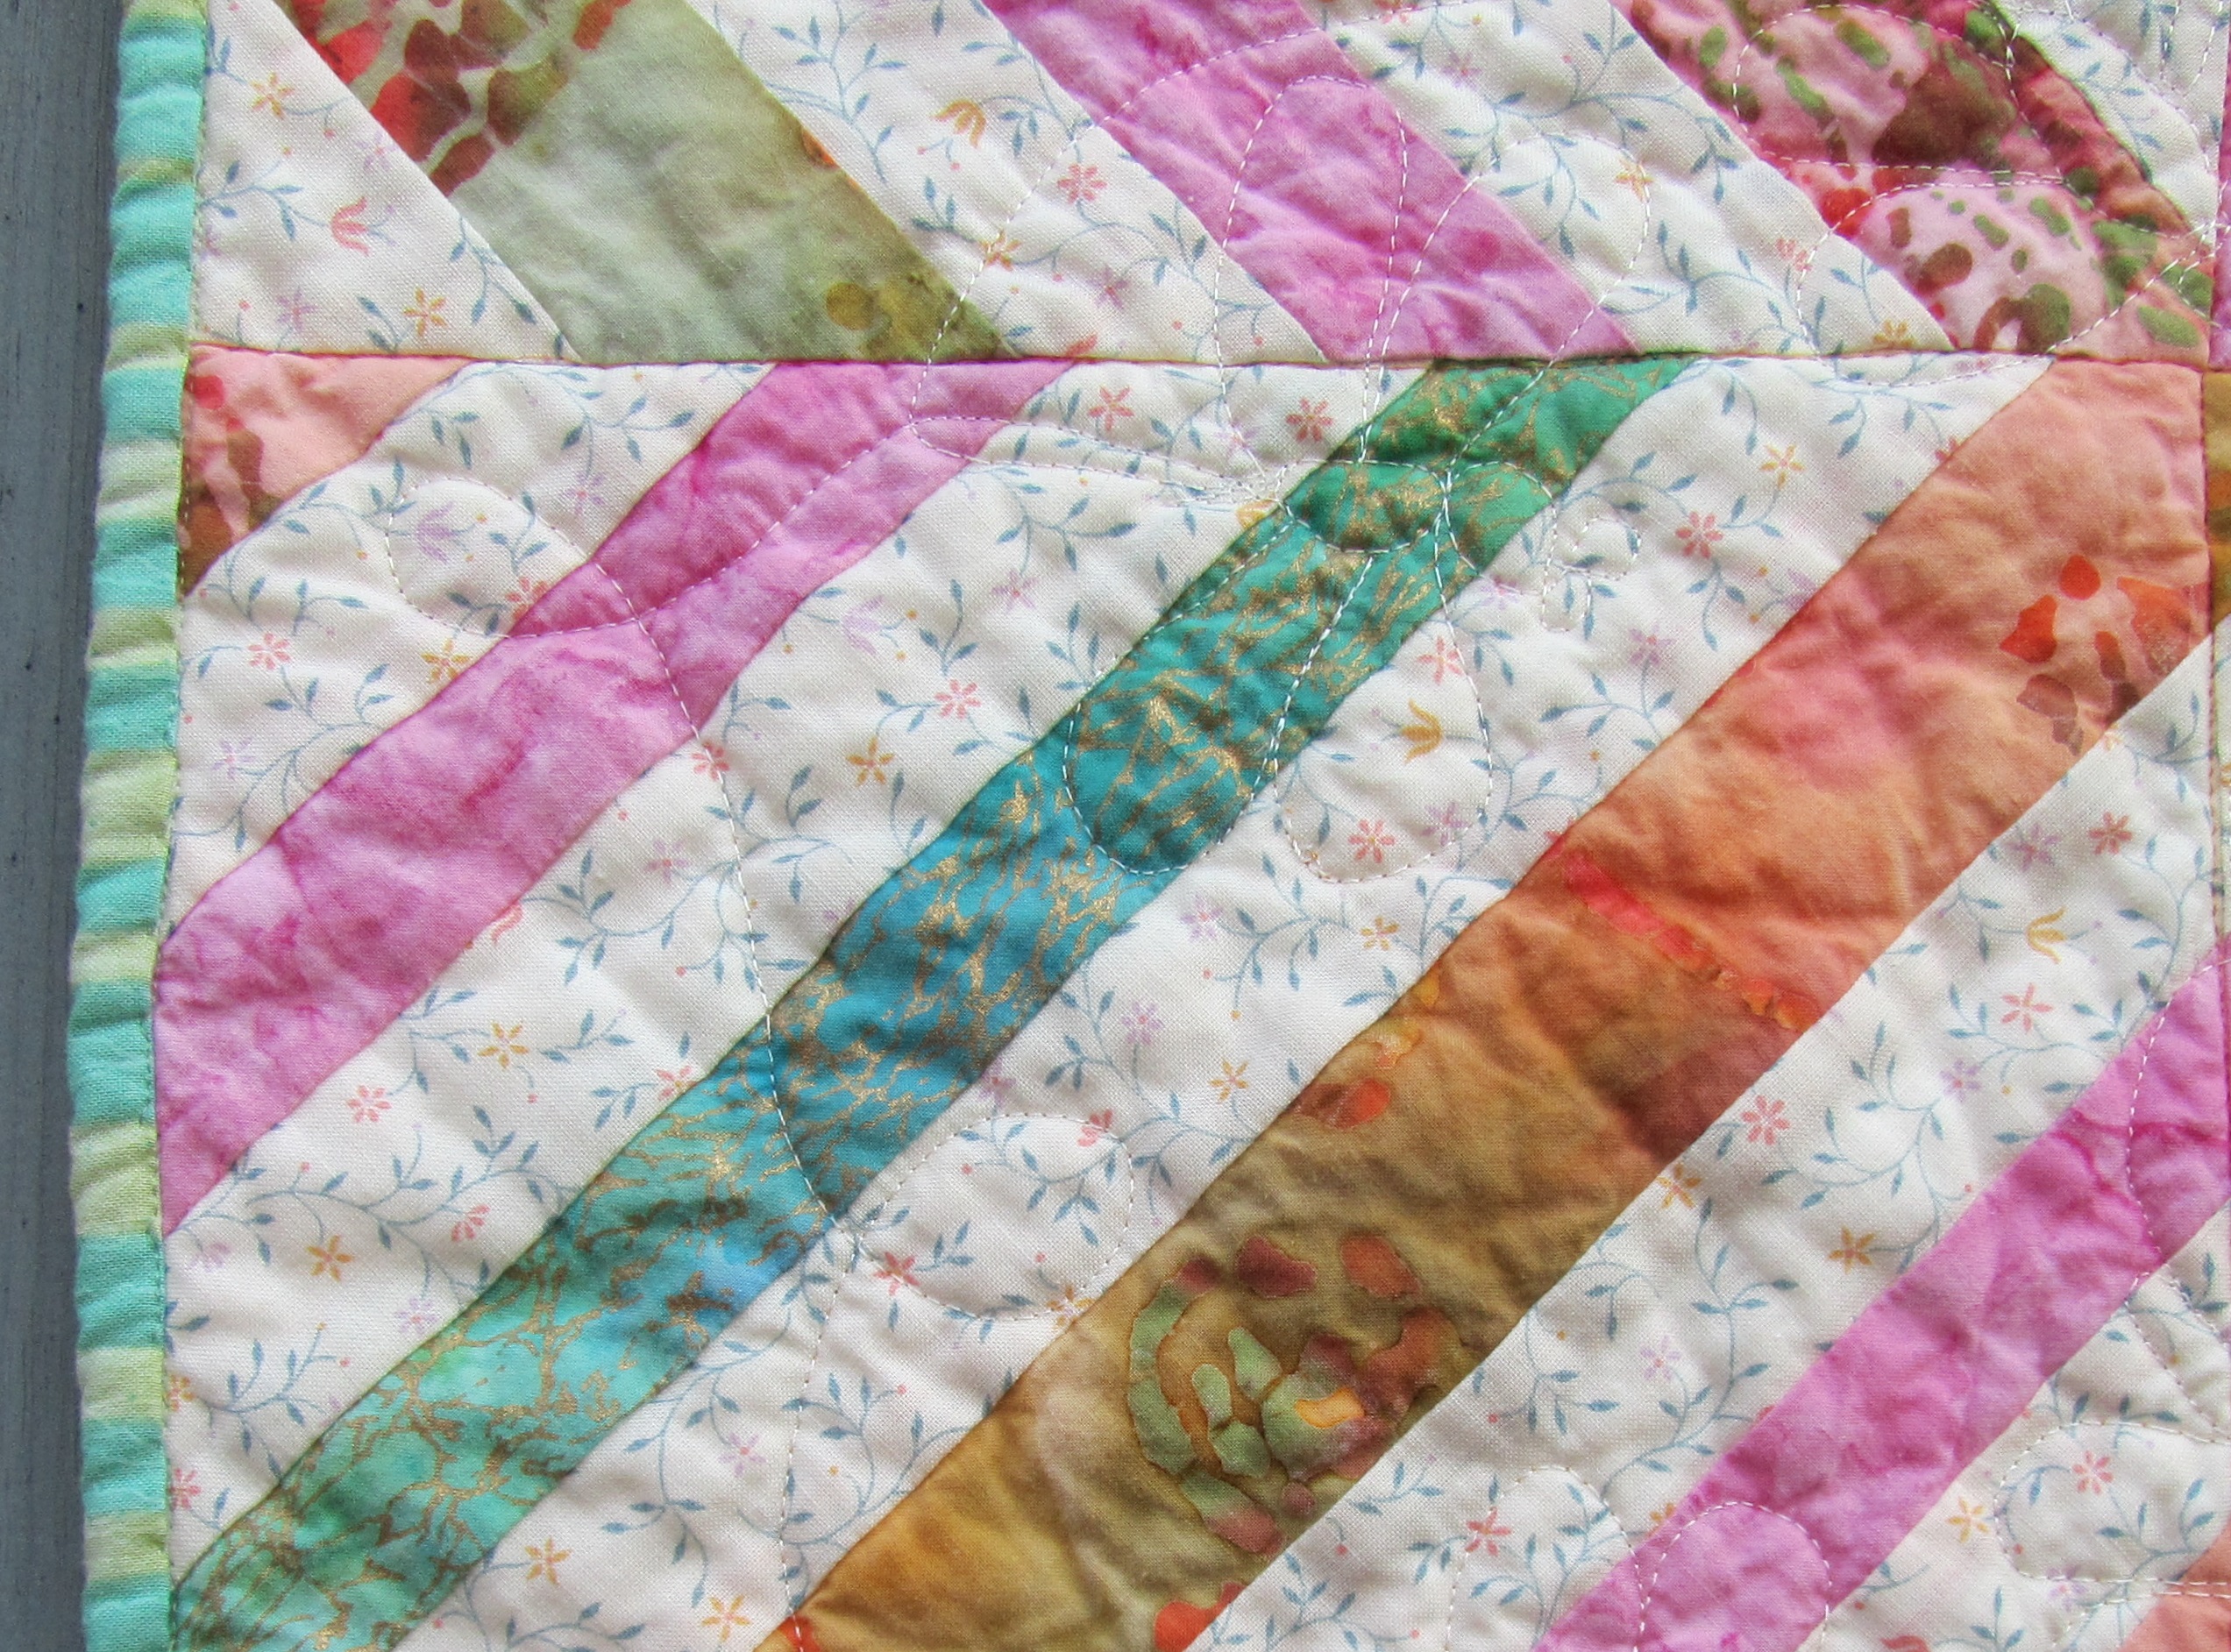
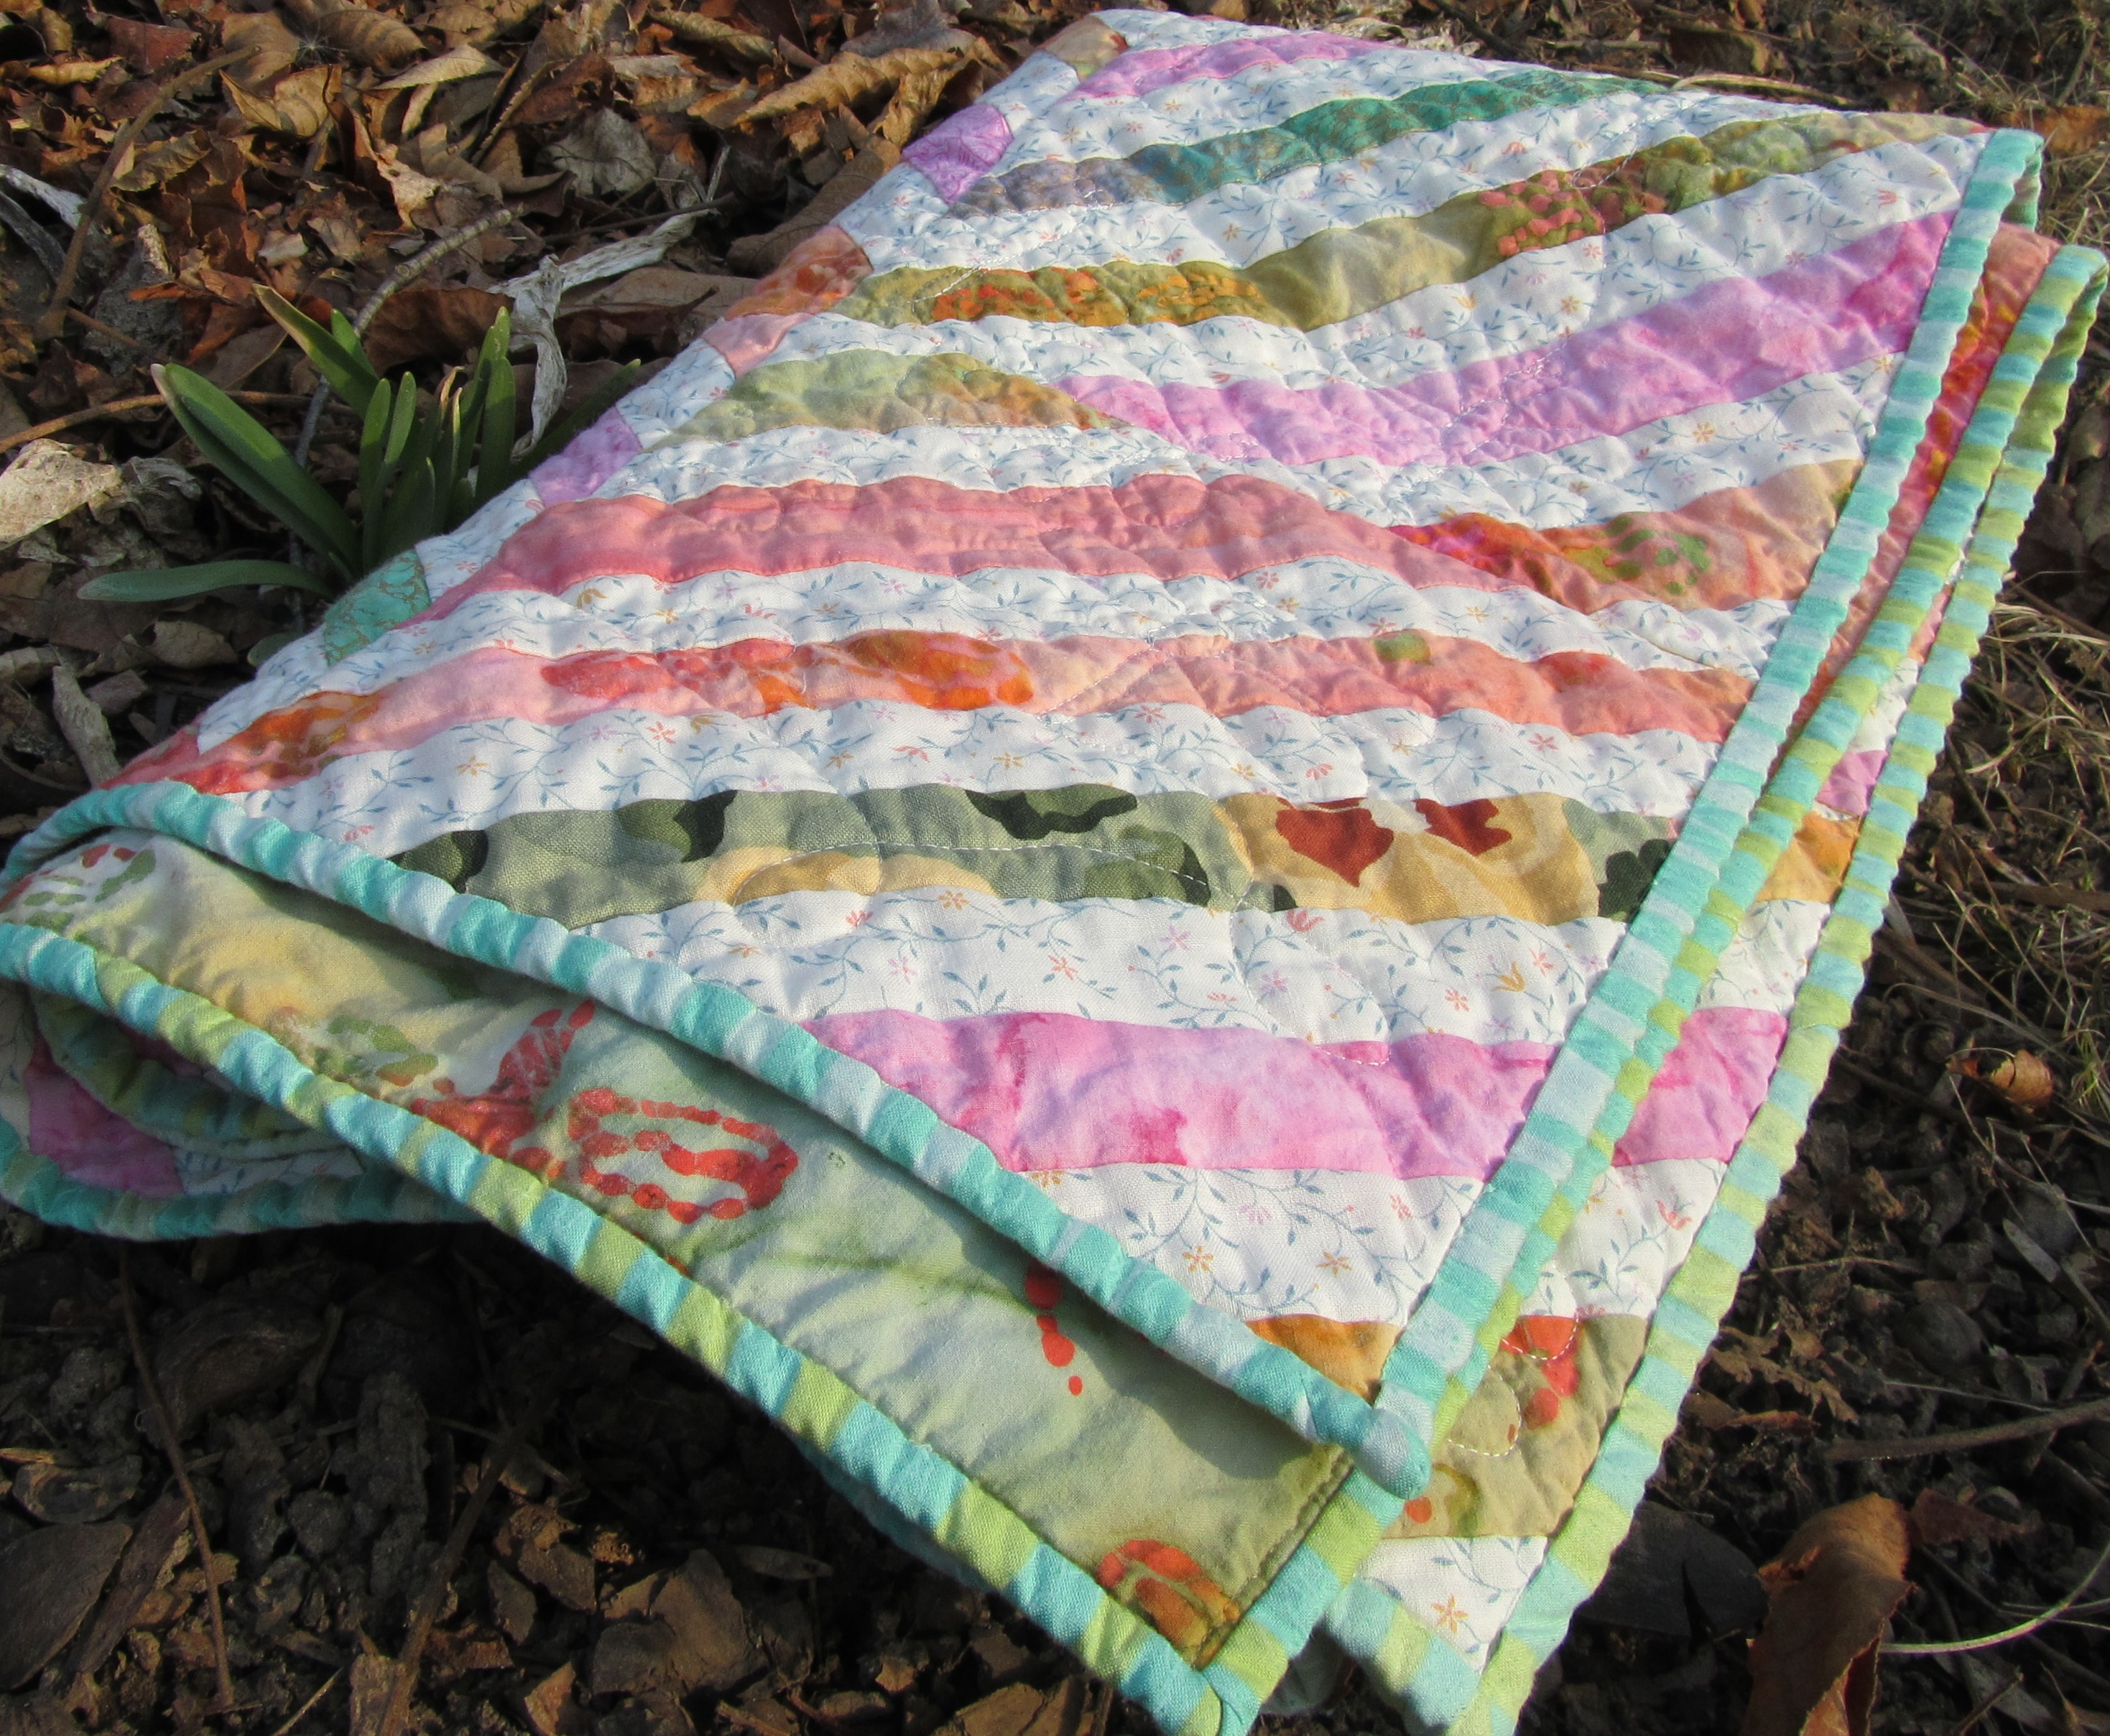
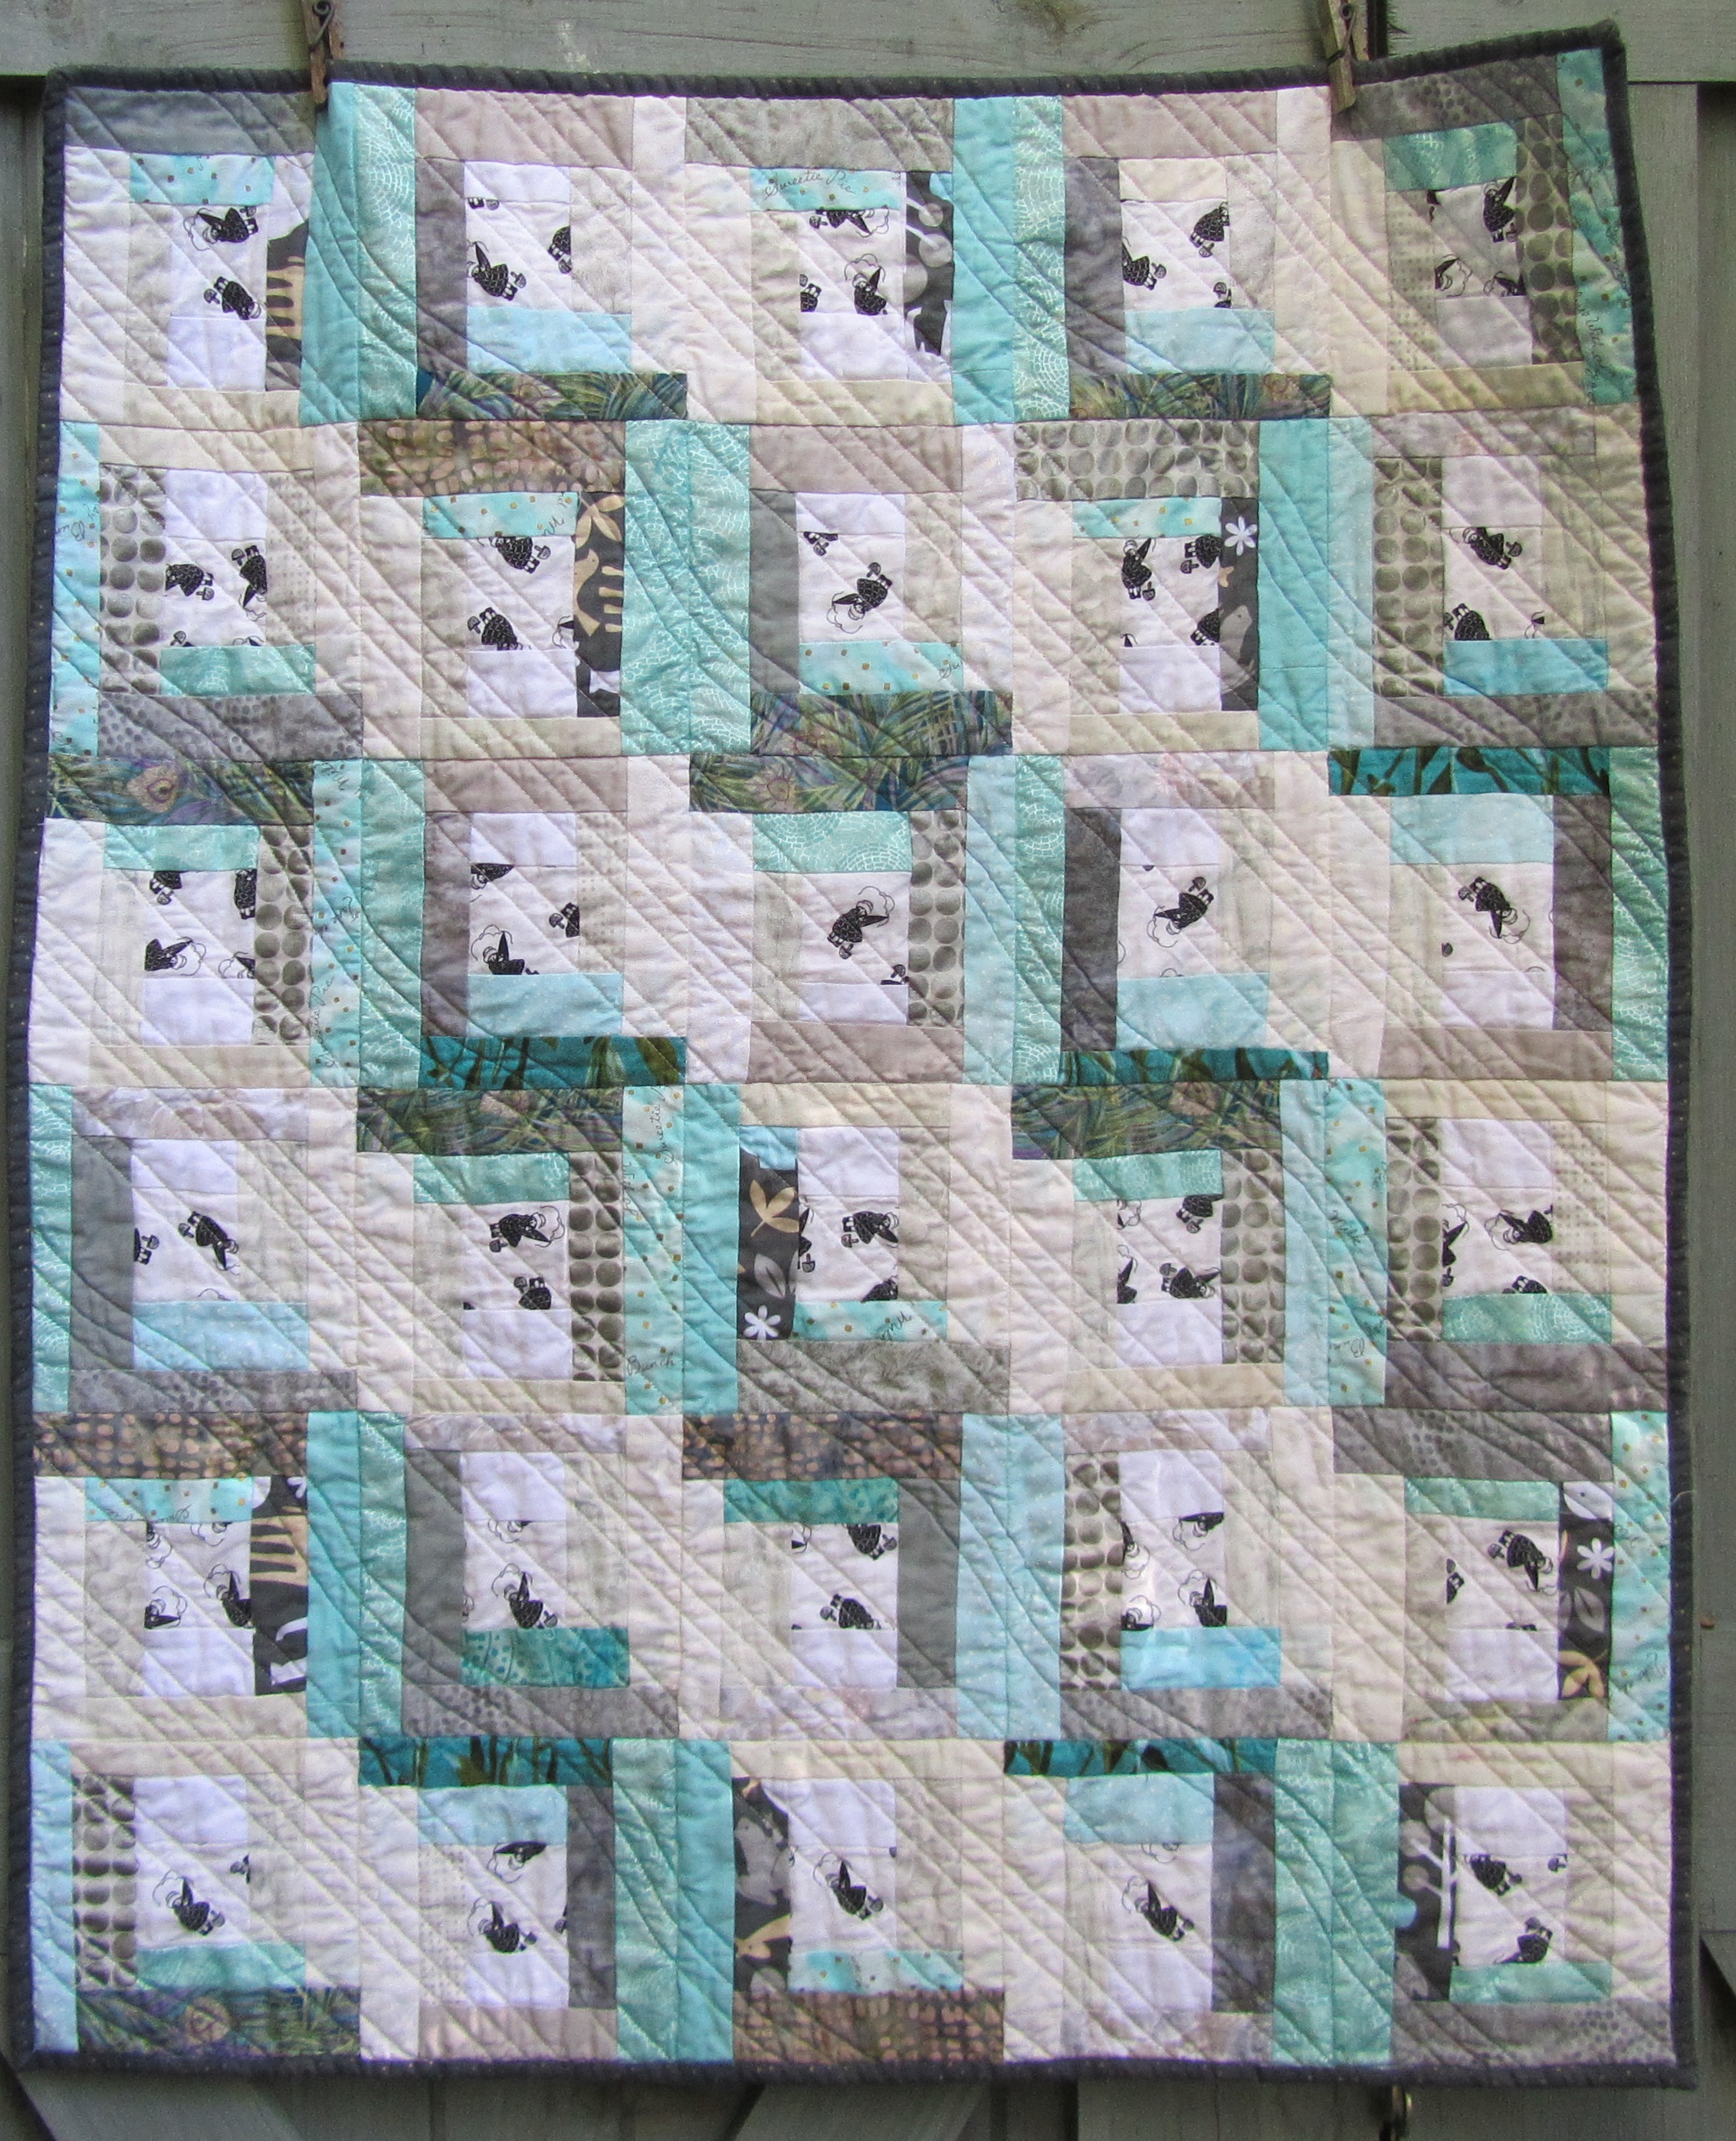
 This week I put this together this little string quilt. Nope, still can’t tell any difference in my string baskets, but it did use a big pile of them.
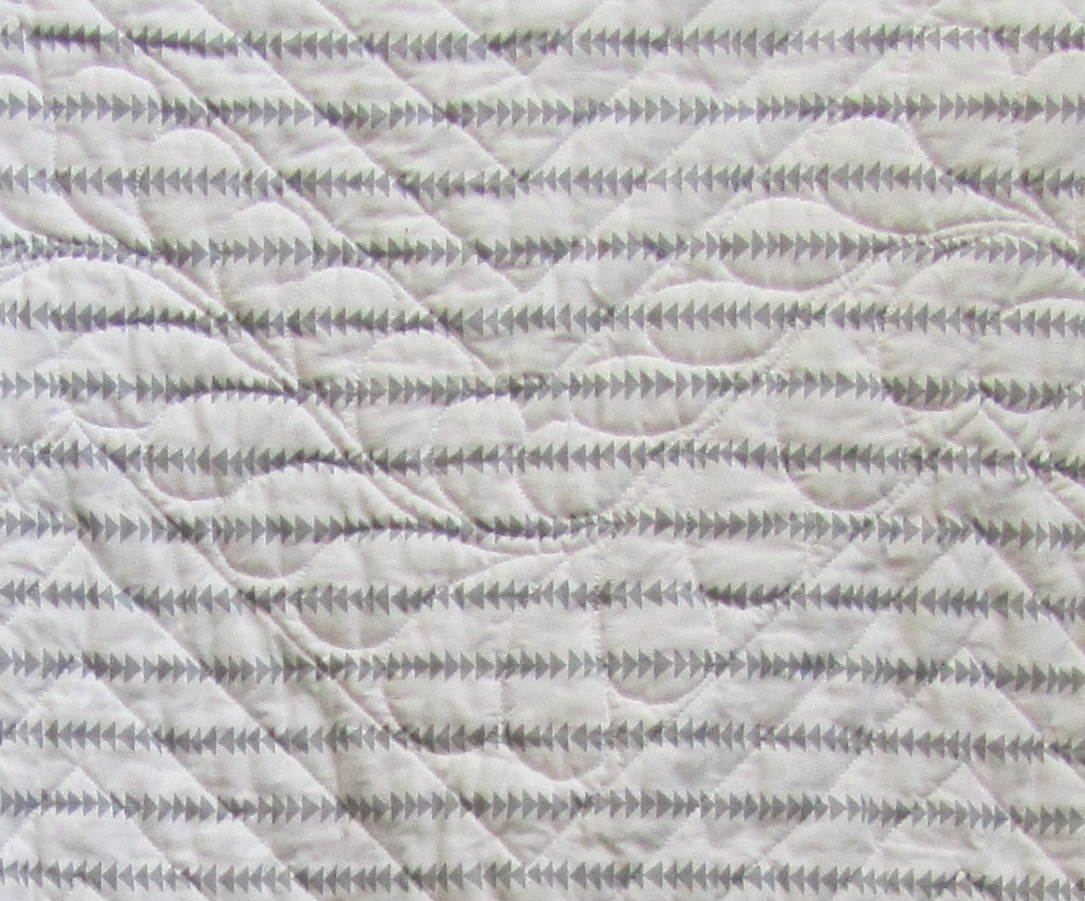
 I quilted it with five rows of feathers in white Bottom Line.
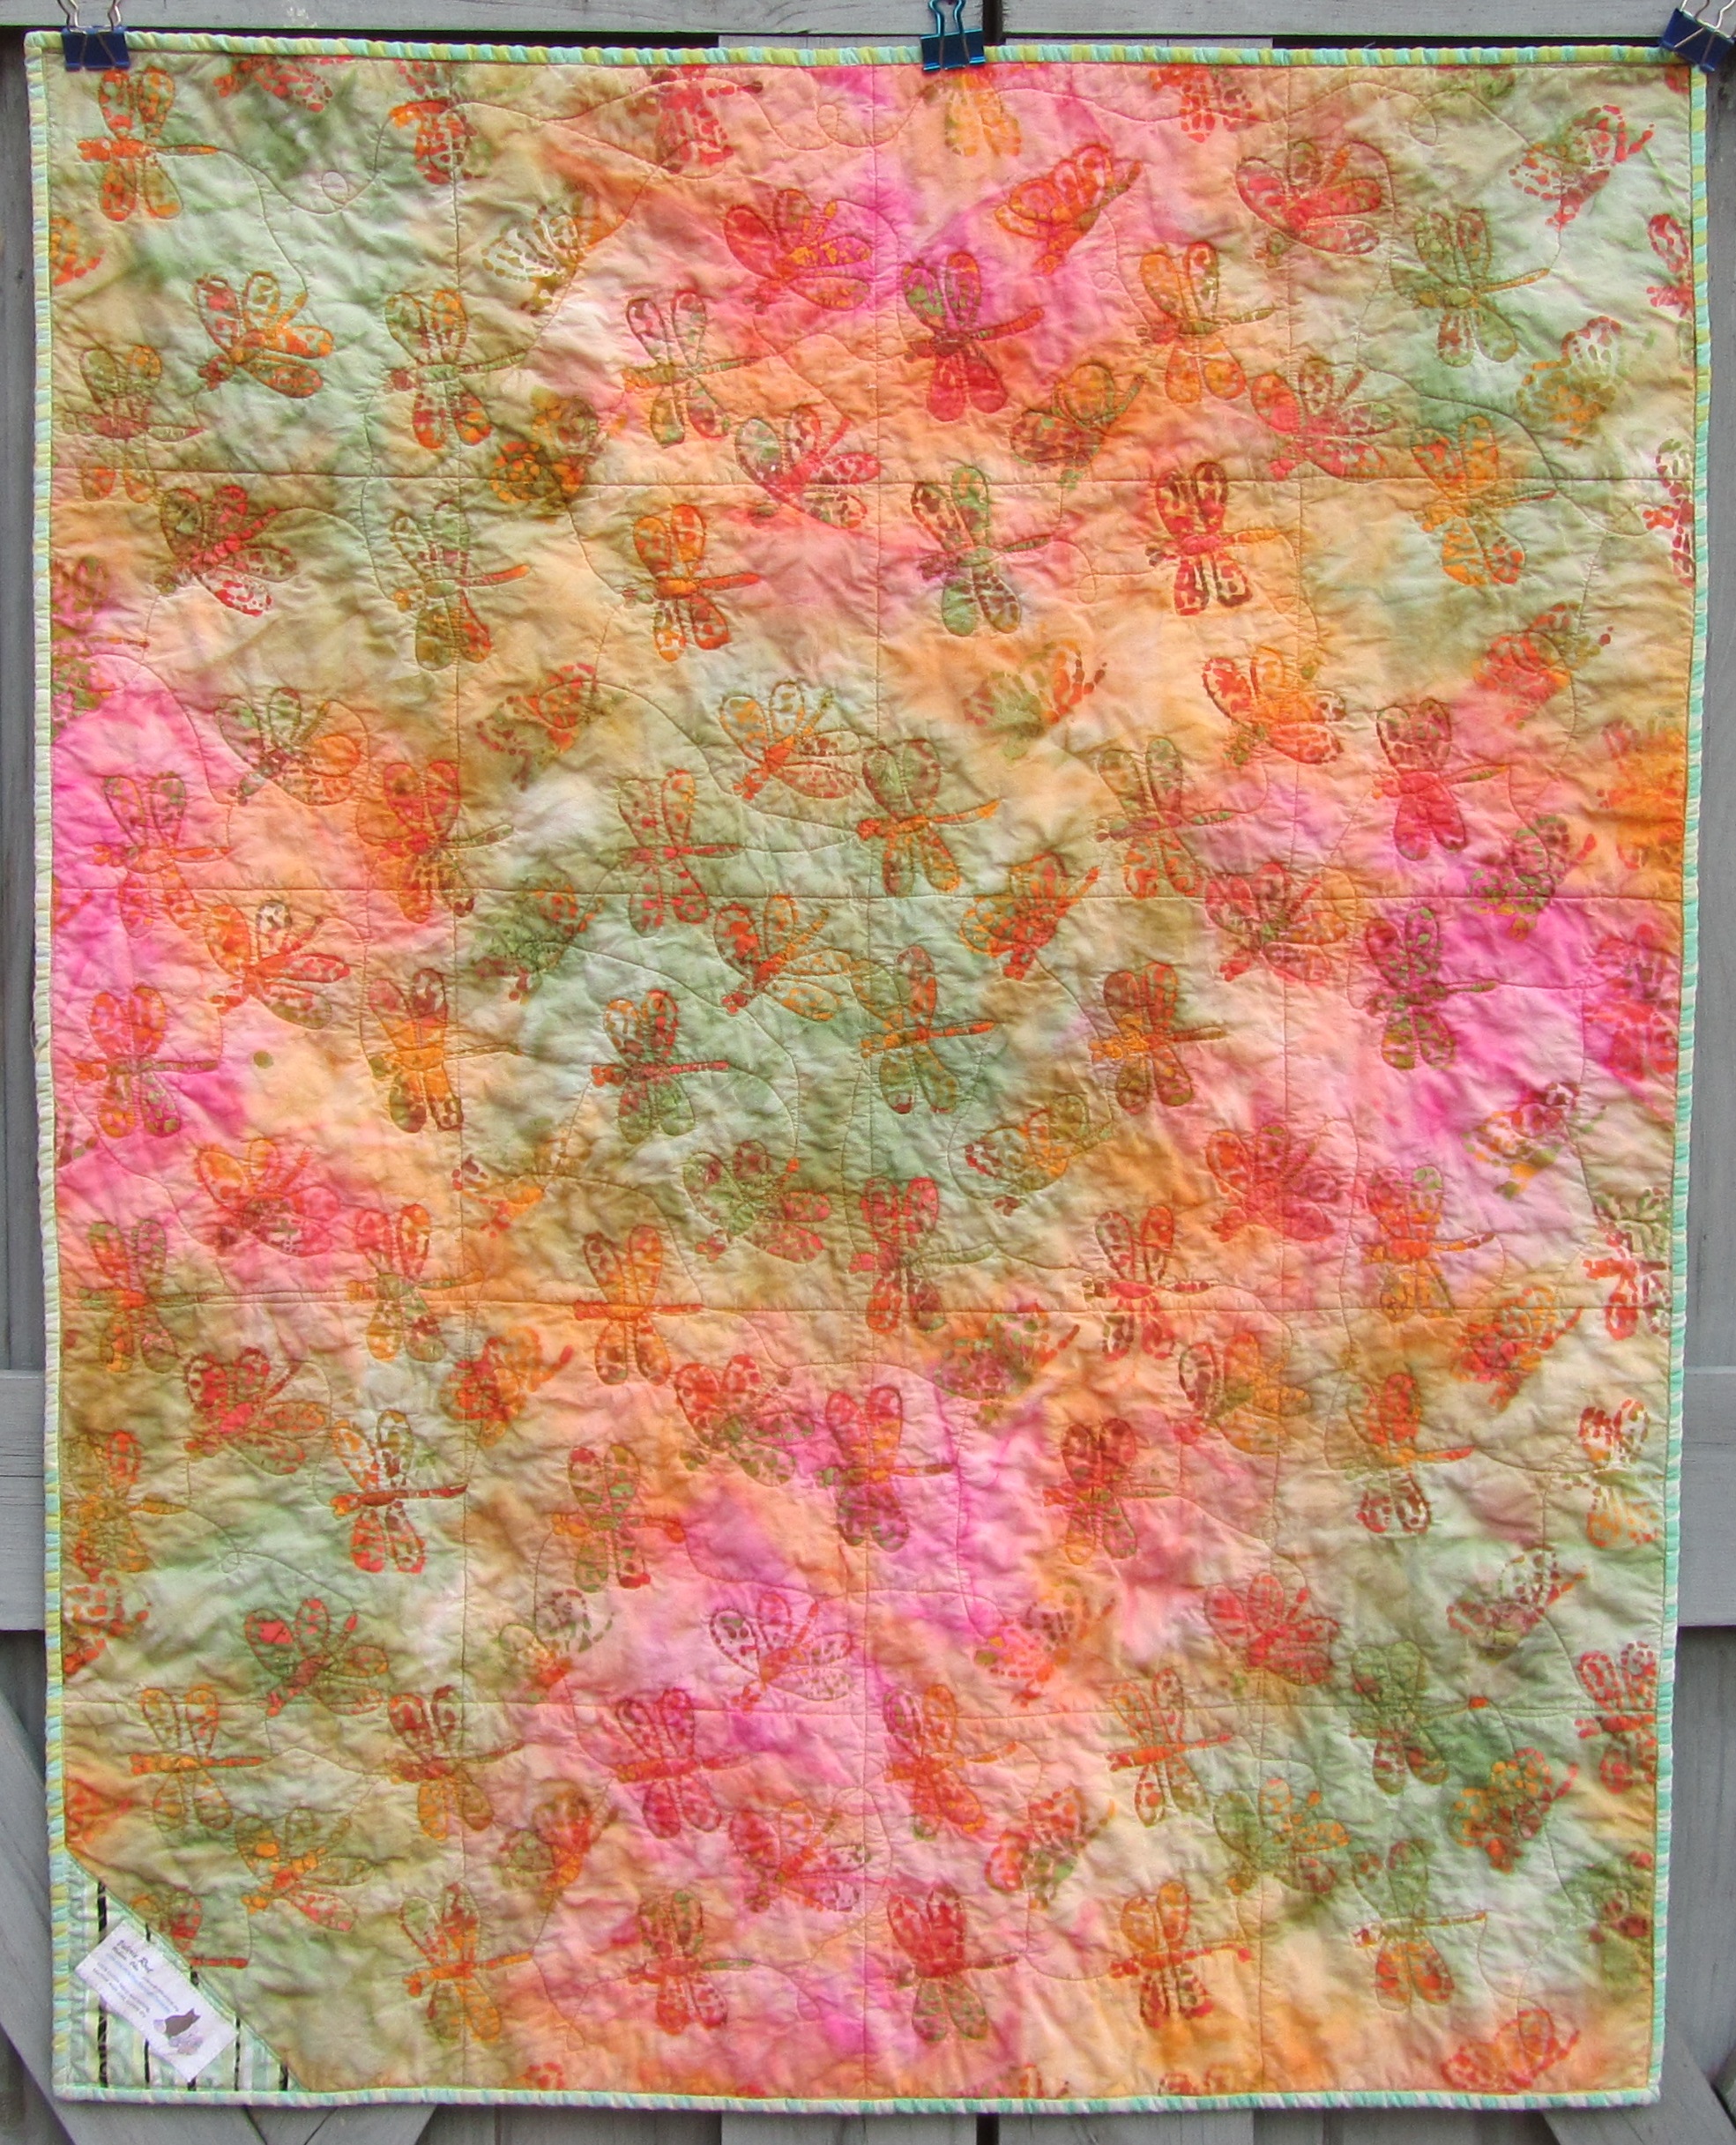
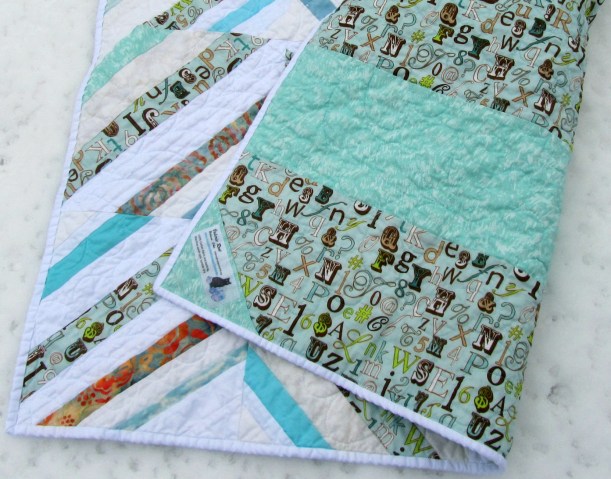 The back is the last of this alphabet print.