Evening in the Garden Quilts

Adventures in Fabric Art


27 Comments

Pets on Quilts Show 2014


Lily Pad Quilts is once again holding the famous Pets on Quilts Show, and, of course, we are linking up in the Cats and Kittens category.

IMG_00000490

Yuri started the year taking his job as quilt helper pretty seriously.

2014-05-08 18.02.29

As the quilts rolled along, he relaxed a bit.

2014-05-25 13.07.08

And a bit more.

wpid-1.jpg

And most recently has been downright silly.

Krissi

Krissi, however, maintains her dignity.  She agreed to sit in front of this one.


So, that’s the way the cats look this year at Evening in the Garden.

Check out everyone else’s help at the Pets on Quilts Show 2014.  You can also enter pet-themed quilts.


5 Comments

Log Cabin Finish

2014-07-24 10.11.20

This warm, summery quilt was lots of fun to make, and it made a small dent in the string boxes.  It’s definitely a redo of this quilt, the one that was almost visible in Southern Weddings Magazine (Can’t see it?  Look behind the bride.)  Completely coincidentally, Southern Living Magazine contacted me this week to say that the wedding spread would be appearing in their upcoming issue.  No details yet.  Maybe there will  be a different shot that shows my quilt!

2014-07-24 10.08.43

This time I used 12″ blocks with no borders.  The other quilt also had more variety in the centers because I made them from a charm pack, and cut these from yardage.

2014-07-24 10.10.33

The back is very boring restful.

2014-07-24 10.09.21

I free-motion quilted a sun in every block with a sunny orange Masterpiece thread from Superior.  I really enjoyed doing them and I like the way they turned out.

IMG_2110

Hope you are having some fun summer finishes.  I’m linking up to Finish It Up Friday at Crazy Mom Quilts.


1 Comment

WIP Wednesday: 7/23/14

IMG_2096

No, Lee isn’t having the linky for a couple of weeks, but I do have progress on a couple of things to report.

On the Log Cabin quilt, I finished all the quilting, trimmed it, and made the label.  With any luck I’ll bind it today.  I quilted each block (24) with a free-motion sun.  I marked two circles on each to guide me, and went from there, in one continuous line for each one.  At first they looked more like flowers, but I found that when I made the center spirals larger, they got more sun-like.  Either way, they are summery.

IMG_2097

I like the way the back looks, too.

IMG_2098

I got super organized and used a few spare minutes to make the binding the other day, but now I’m not so sure.  I usually like a dark edge to frame a quilt, but I might want to use the yellow and orange batik.  What do you think?

IMG_2094

I spent last week’s cool, dry weather cutting and spray painting a new top for our deck table.  Somehow, during that fiercely cold winter, our glass table top shattered.  We just looked out and there it was on the deck.  I priced a piece of replacement glass.  No.  We looked at replacement sets, but didn’t see what we wanted.  Also, we just didn’t want to spend the money on that right now.  And there’s nothing wrong with the rest of the set.  So I bought a piece of plywood, cut it, primed it, painted it, and sealed it.  I hope to get a year or two out of it.  I’m pretty happy with way it turned out.  I knew the newsprint stencil was lifting a little, but I think it looks kind of airbrushed and interesting. We have an orange umbrella, and the other furniture is orange, blue, and lime.


AND, I settled on this tutorial for boxy pouches, and bought some interfacing.  I’m creeping up on that project.

p (3)

Now I’m going to go clean out my purse to add money to my Piggy Bank Savings pitcher.  Thanks for all the comments on that post, especially Myrna, who warned me that old glass can be brittle.  I’ll add the coins carefully!


Hope you’re having a productive week.


7 Comments

Sunday Stash Report: 7/6/14

image

Beware of a Stash Report that opens with a fabric store sign!  Yes, some was added, but it was blacks, whites, and some sale fabrics for a backing.  No apologies.  You don’t expect me to pass Waynesville, Ohio without stopping, do you?

image

These zippers for future pouches came in the mail yesterday.  Almost as pretty as fabric, but I don’t have to add them in. They came frome Zipperstop.com, a link I believe I got from Jaye.

image

On the minus side, I put together ten tissue covers last night, using half a yard of scraps.  I never made them before (I think Benta inspired me), but they were simple, quick, and fun.  I used this tutorial.  I feel this may really be the last bit of Mirror Ball Dot, at least in the lime/teal colorway.  I think.

Also, I took a page from Judy’s book, and cut up half a yard of old stuff for plant ties.

This week: +9 yards, -1 yard

YTD: +73.75 yards, -134 yards

Net stash used 2014: –60.25 yards

Good luck with your destashing!
I’m linking up with Sunday Stash Report at Patchwork Times.


8 Comments

Rail Fence Finishes


scrap basket QAL


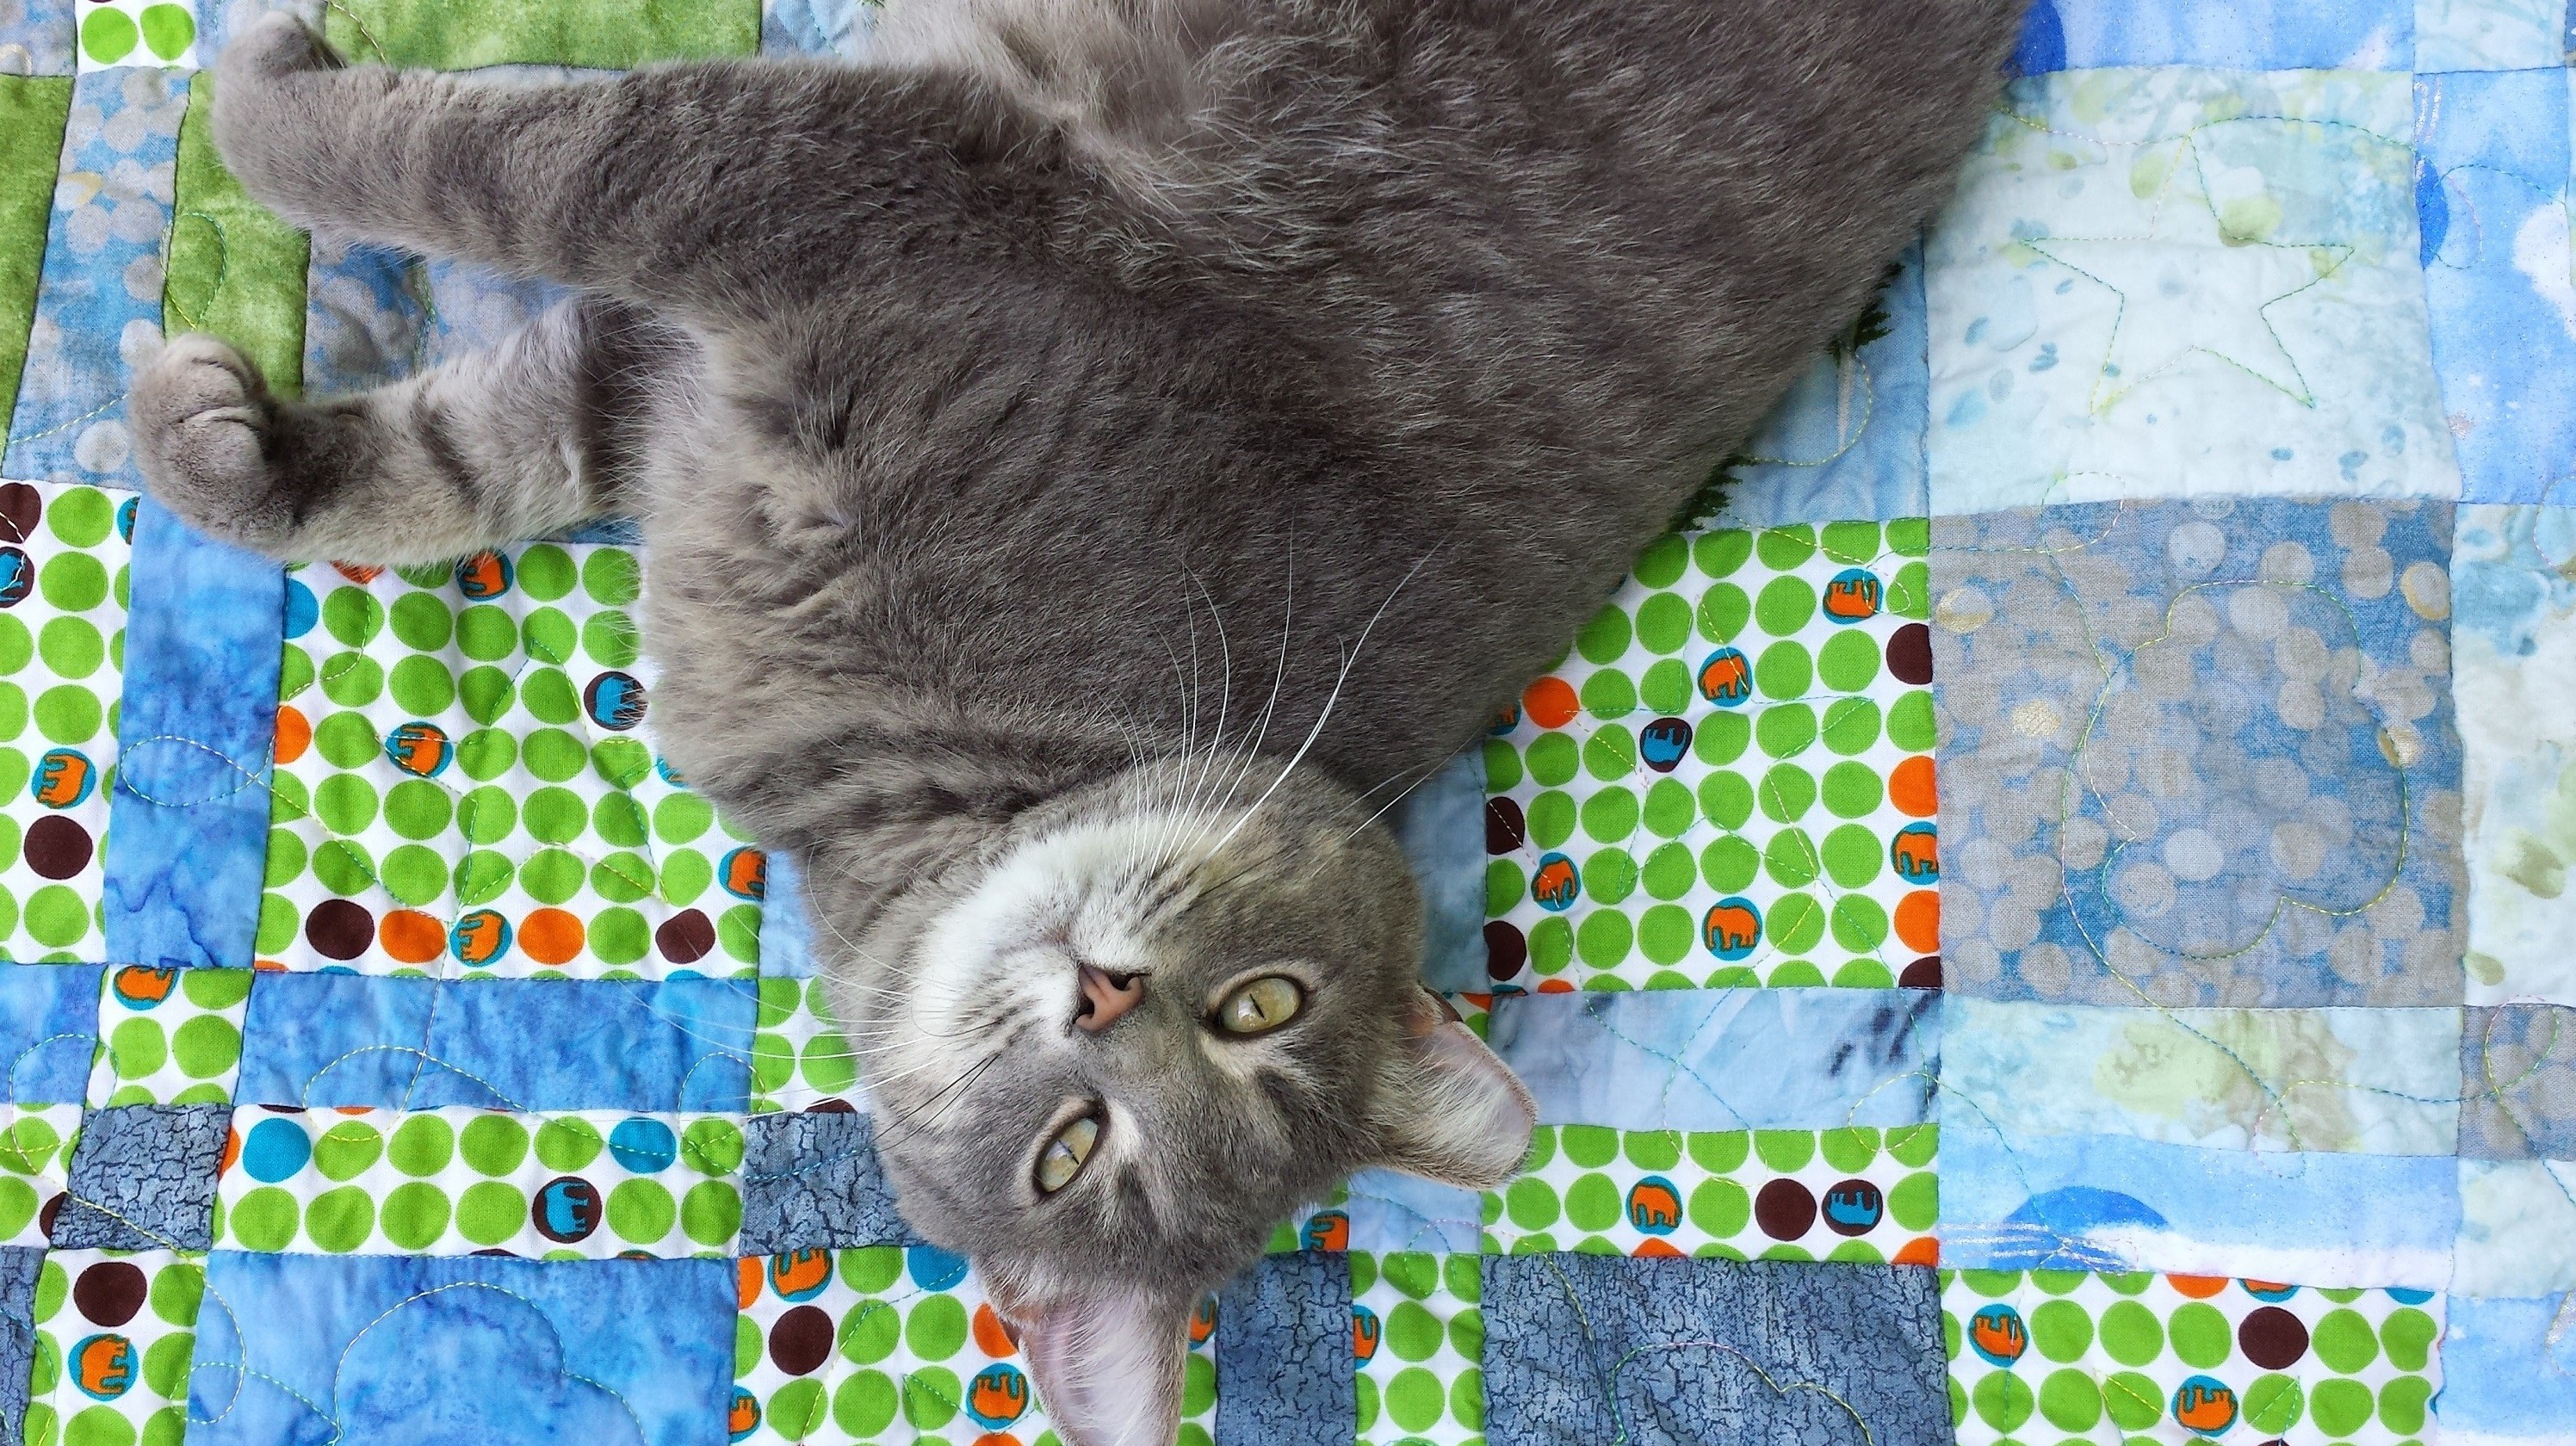
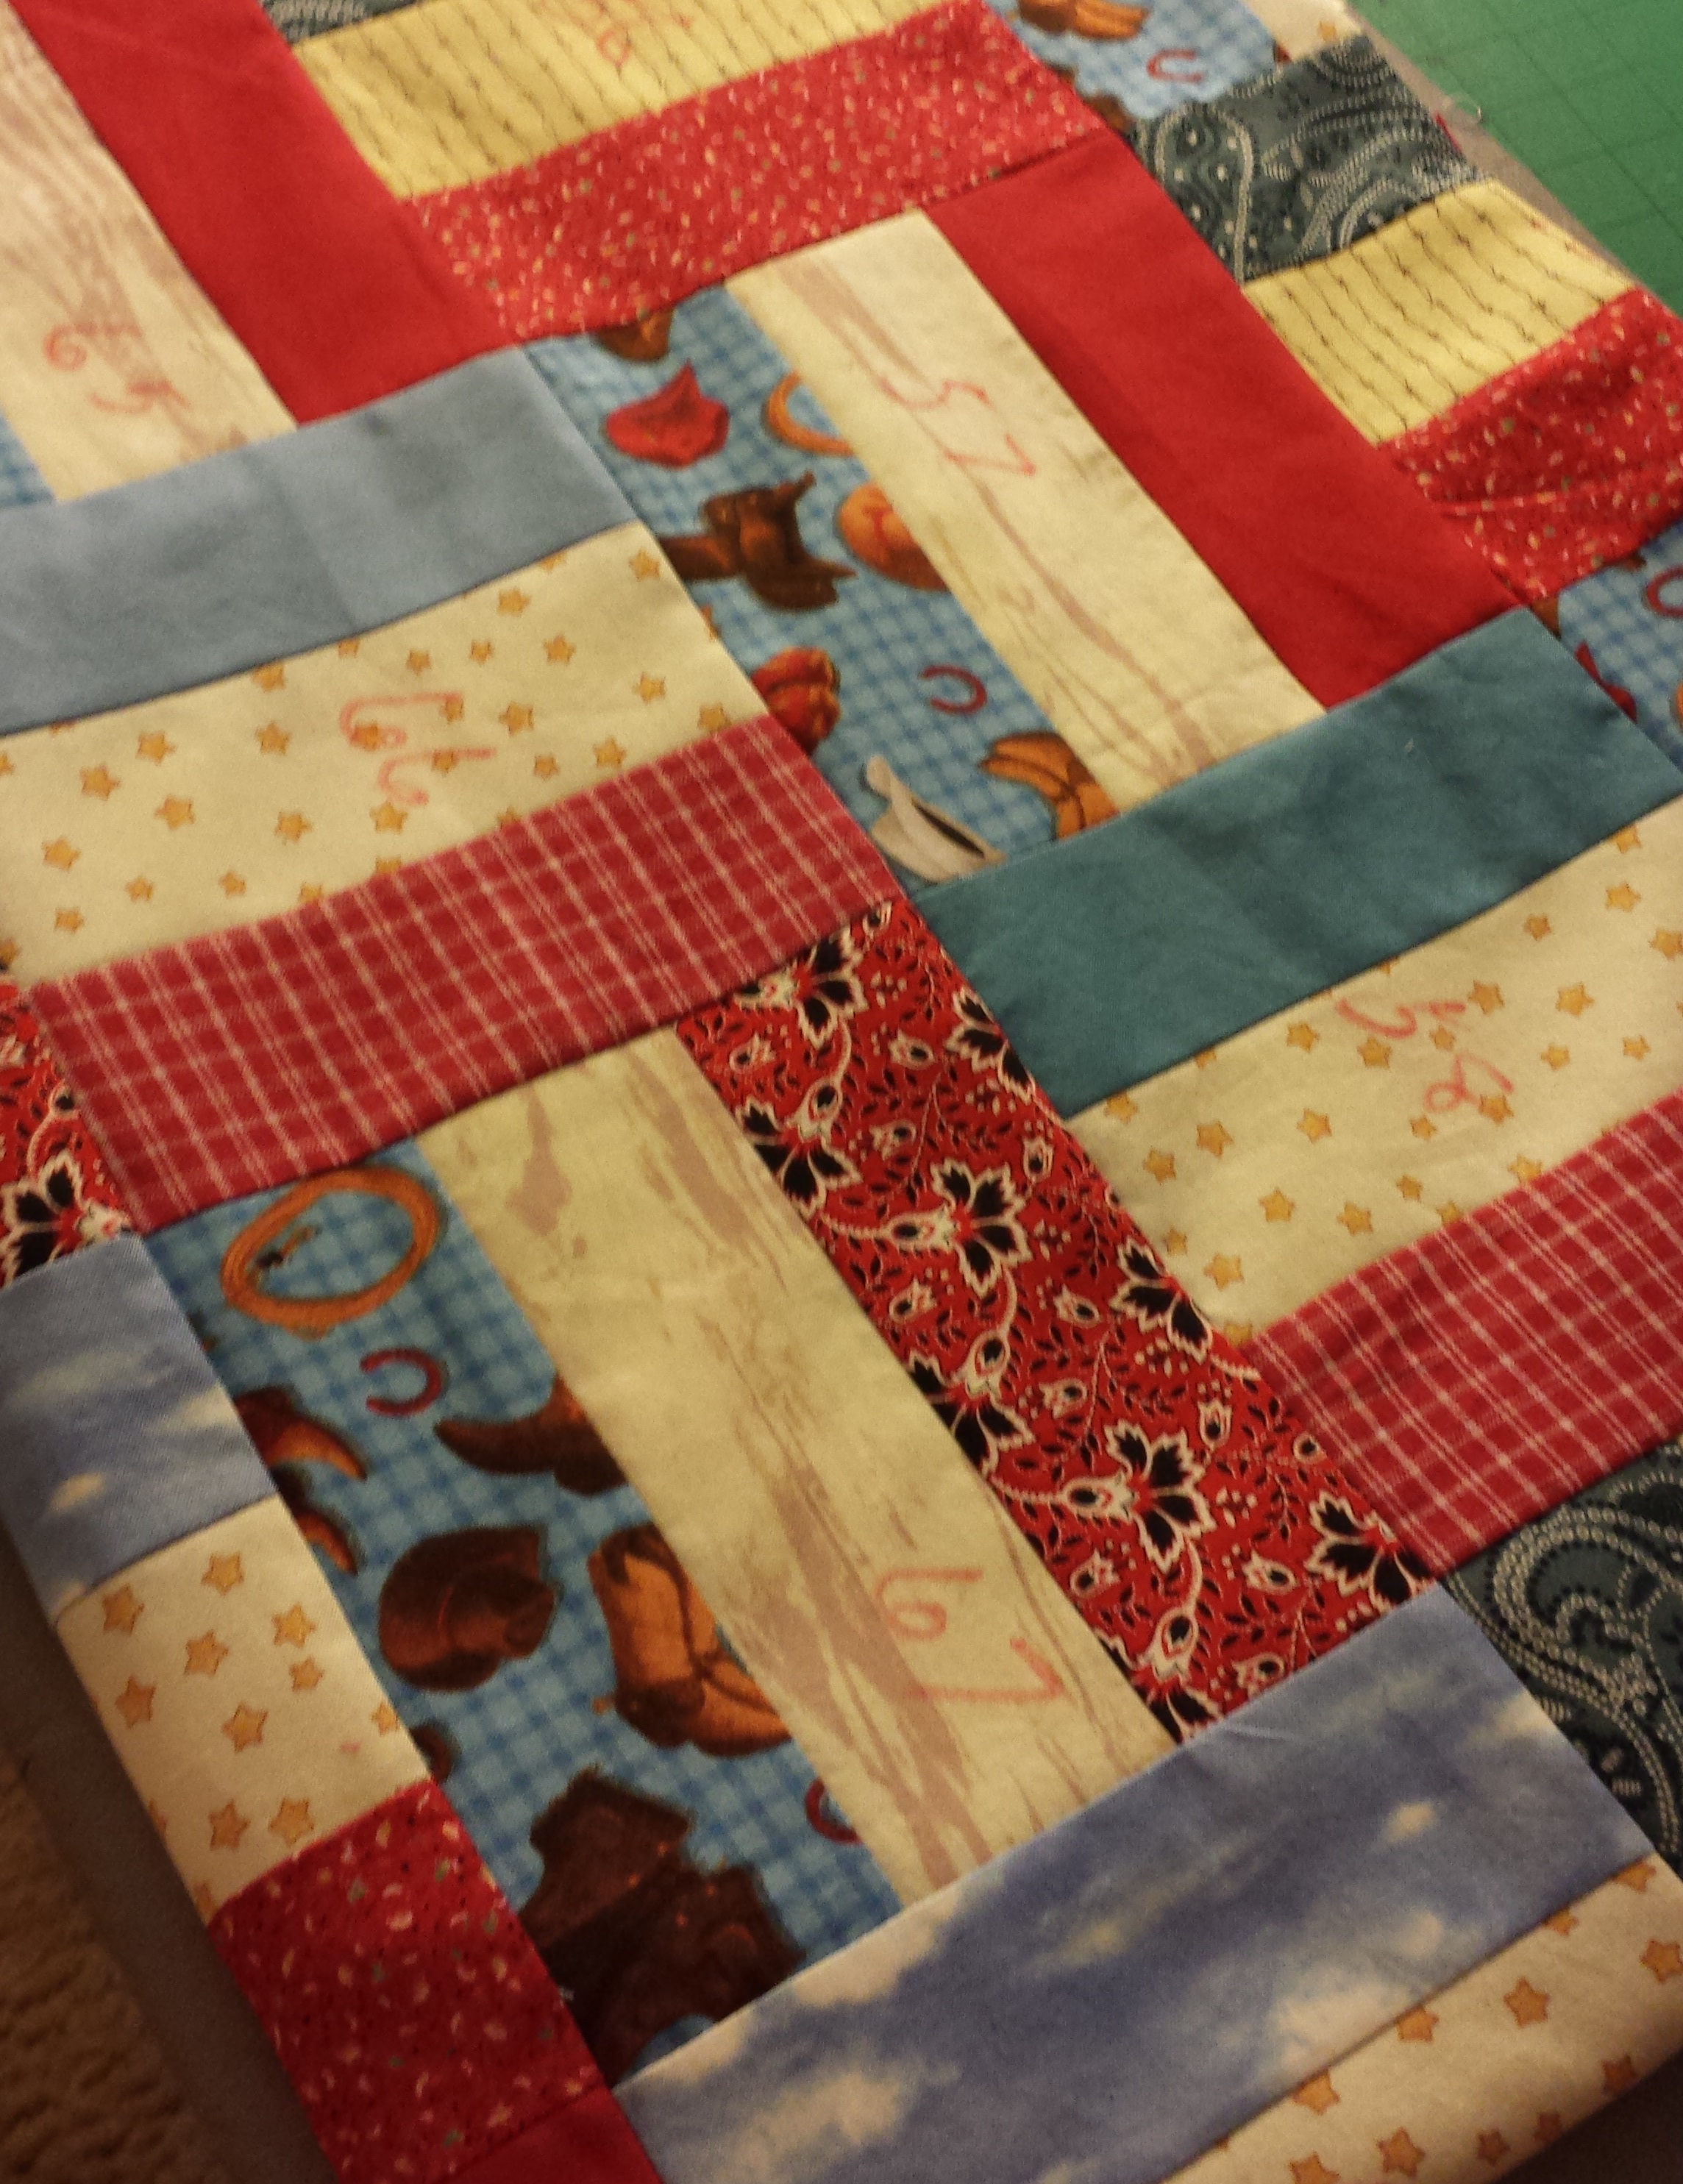
Something clicked when Amanda Jean suggested this Scrap Basket Quilt Along.  I have been whittling away at my stash, and this seemed like a fun way to use a lot of fabric.  Boy’s quilts are especially needed, which caused me to think of the lonely pile of cowboy fabric scraps from Guthrie, OK, that has been waiting a long while to be used.  When I dug it out, I found a pile of plaid scraps left from a graduation quilt (circa 2000).  Okay, so a fun way to make two quilts.


IMG_2079

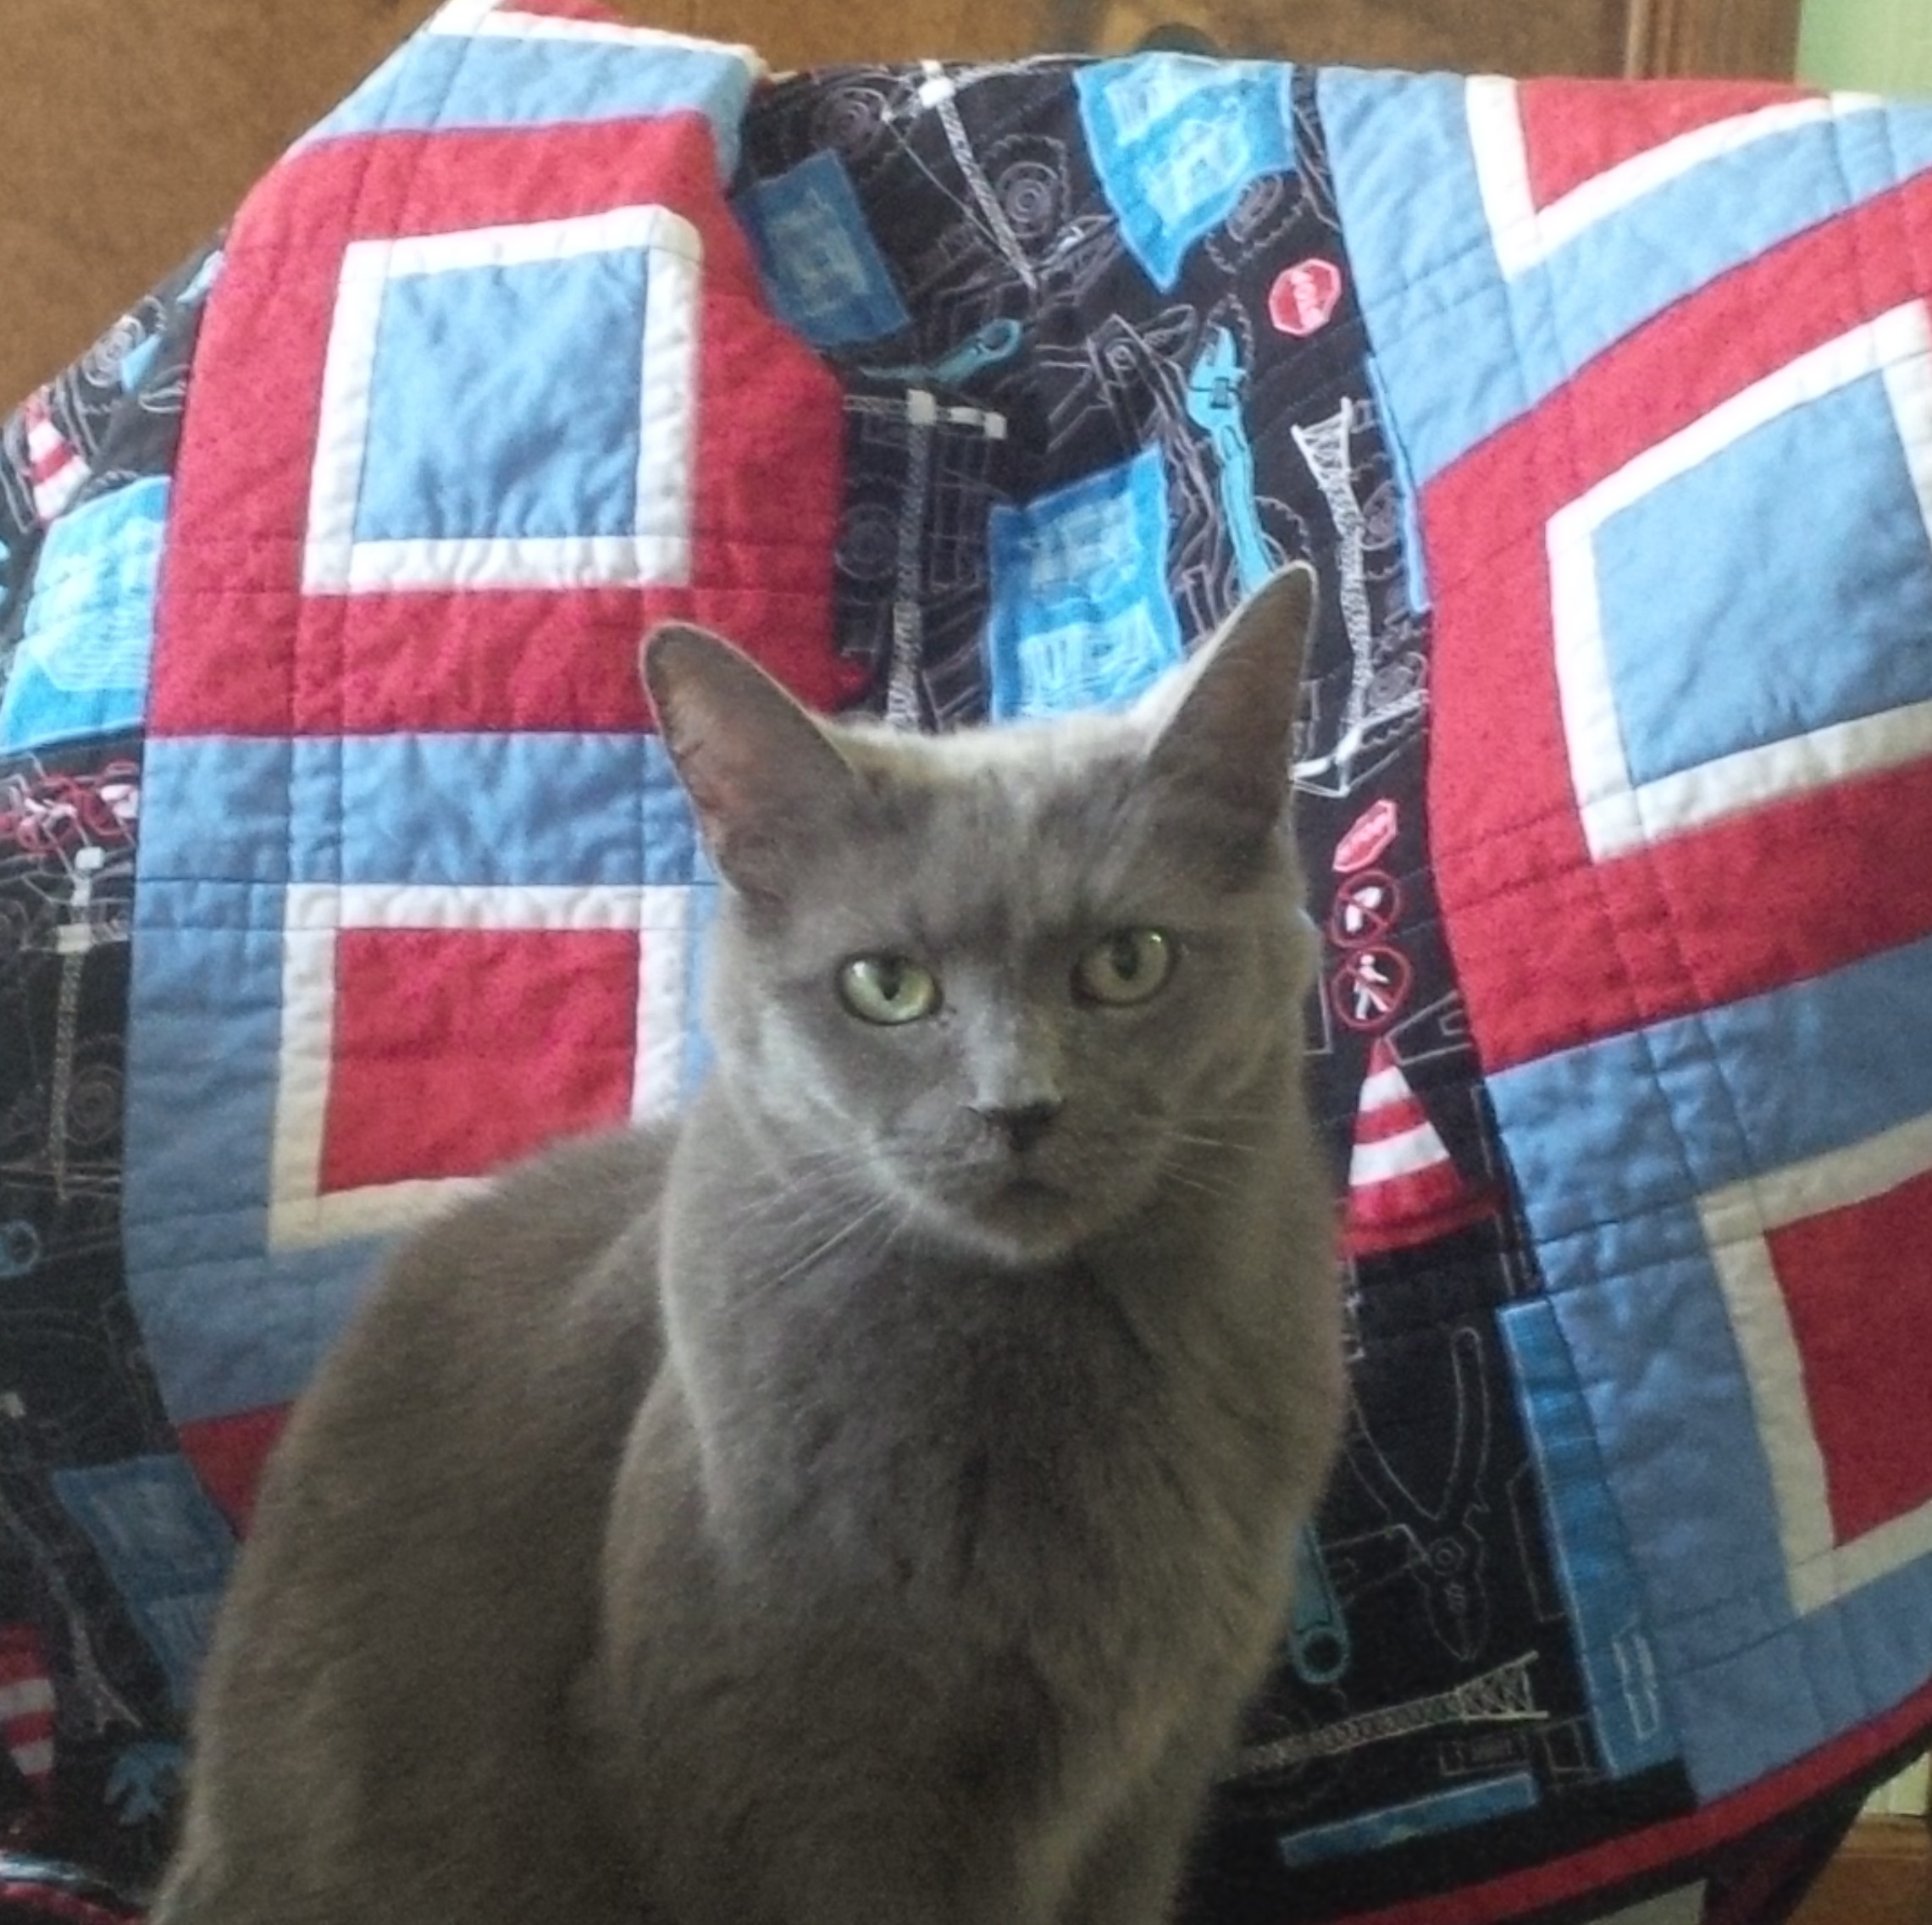
The cowboy fabric was red, light, and blue, so it ended up like this.


IMG_2084

I used up every smidge, including on the back, where I also added some orphan blocks, a solid, and a starry fabric.  Perfect for a little cowboy to sleep under.


IMG_2082

To quilt it, I first stitched in the ditch between all the blocks (per this post).  I liked Amanda’s approach to the quilting (she stitched a trio of wavy lines down every column and across every row), but I wanted to change it up, so mine are twirling ropes and strands of barbed wire.  Ouch!  I alternated rows to leave blank areas.


IMG_2083

I put hats on some. (Here’s the brown chalk stripe binding.)


IMG_2081

And boots on others.  I’m pretty happy with the results.  Bottom Line on the bottom, Masterpiece on top.


IMG_2086

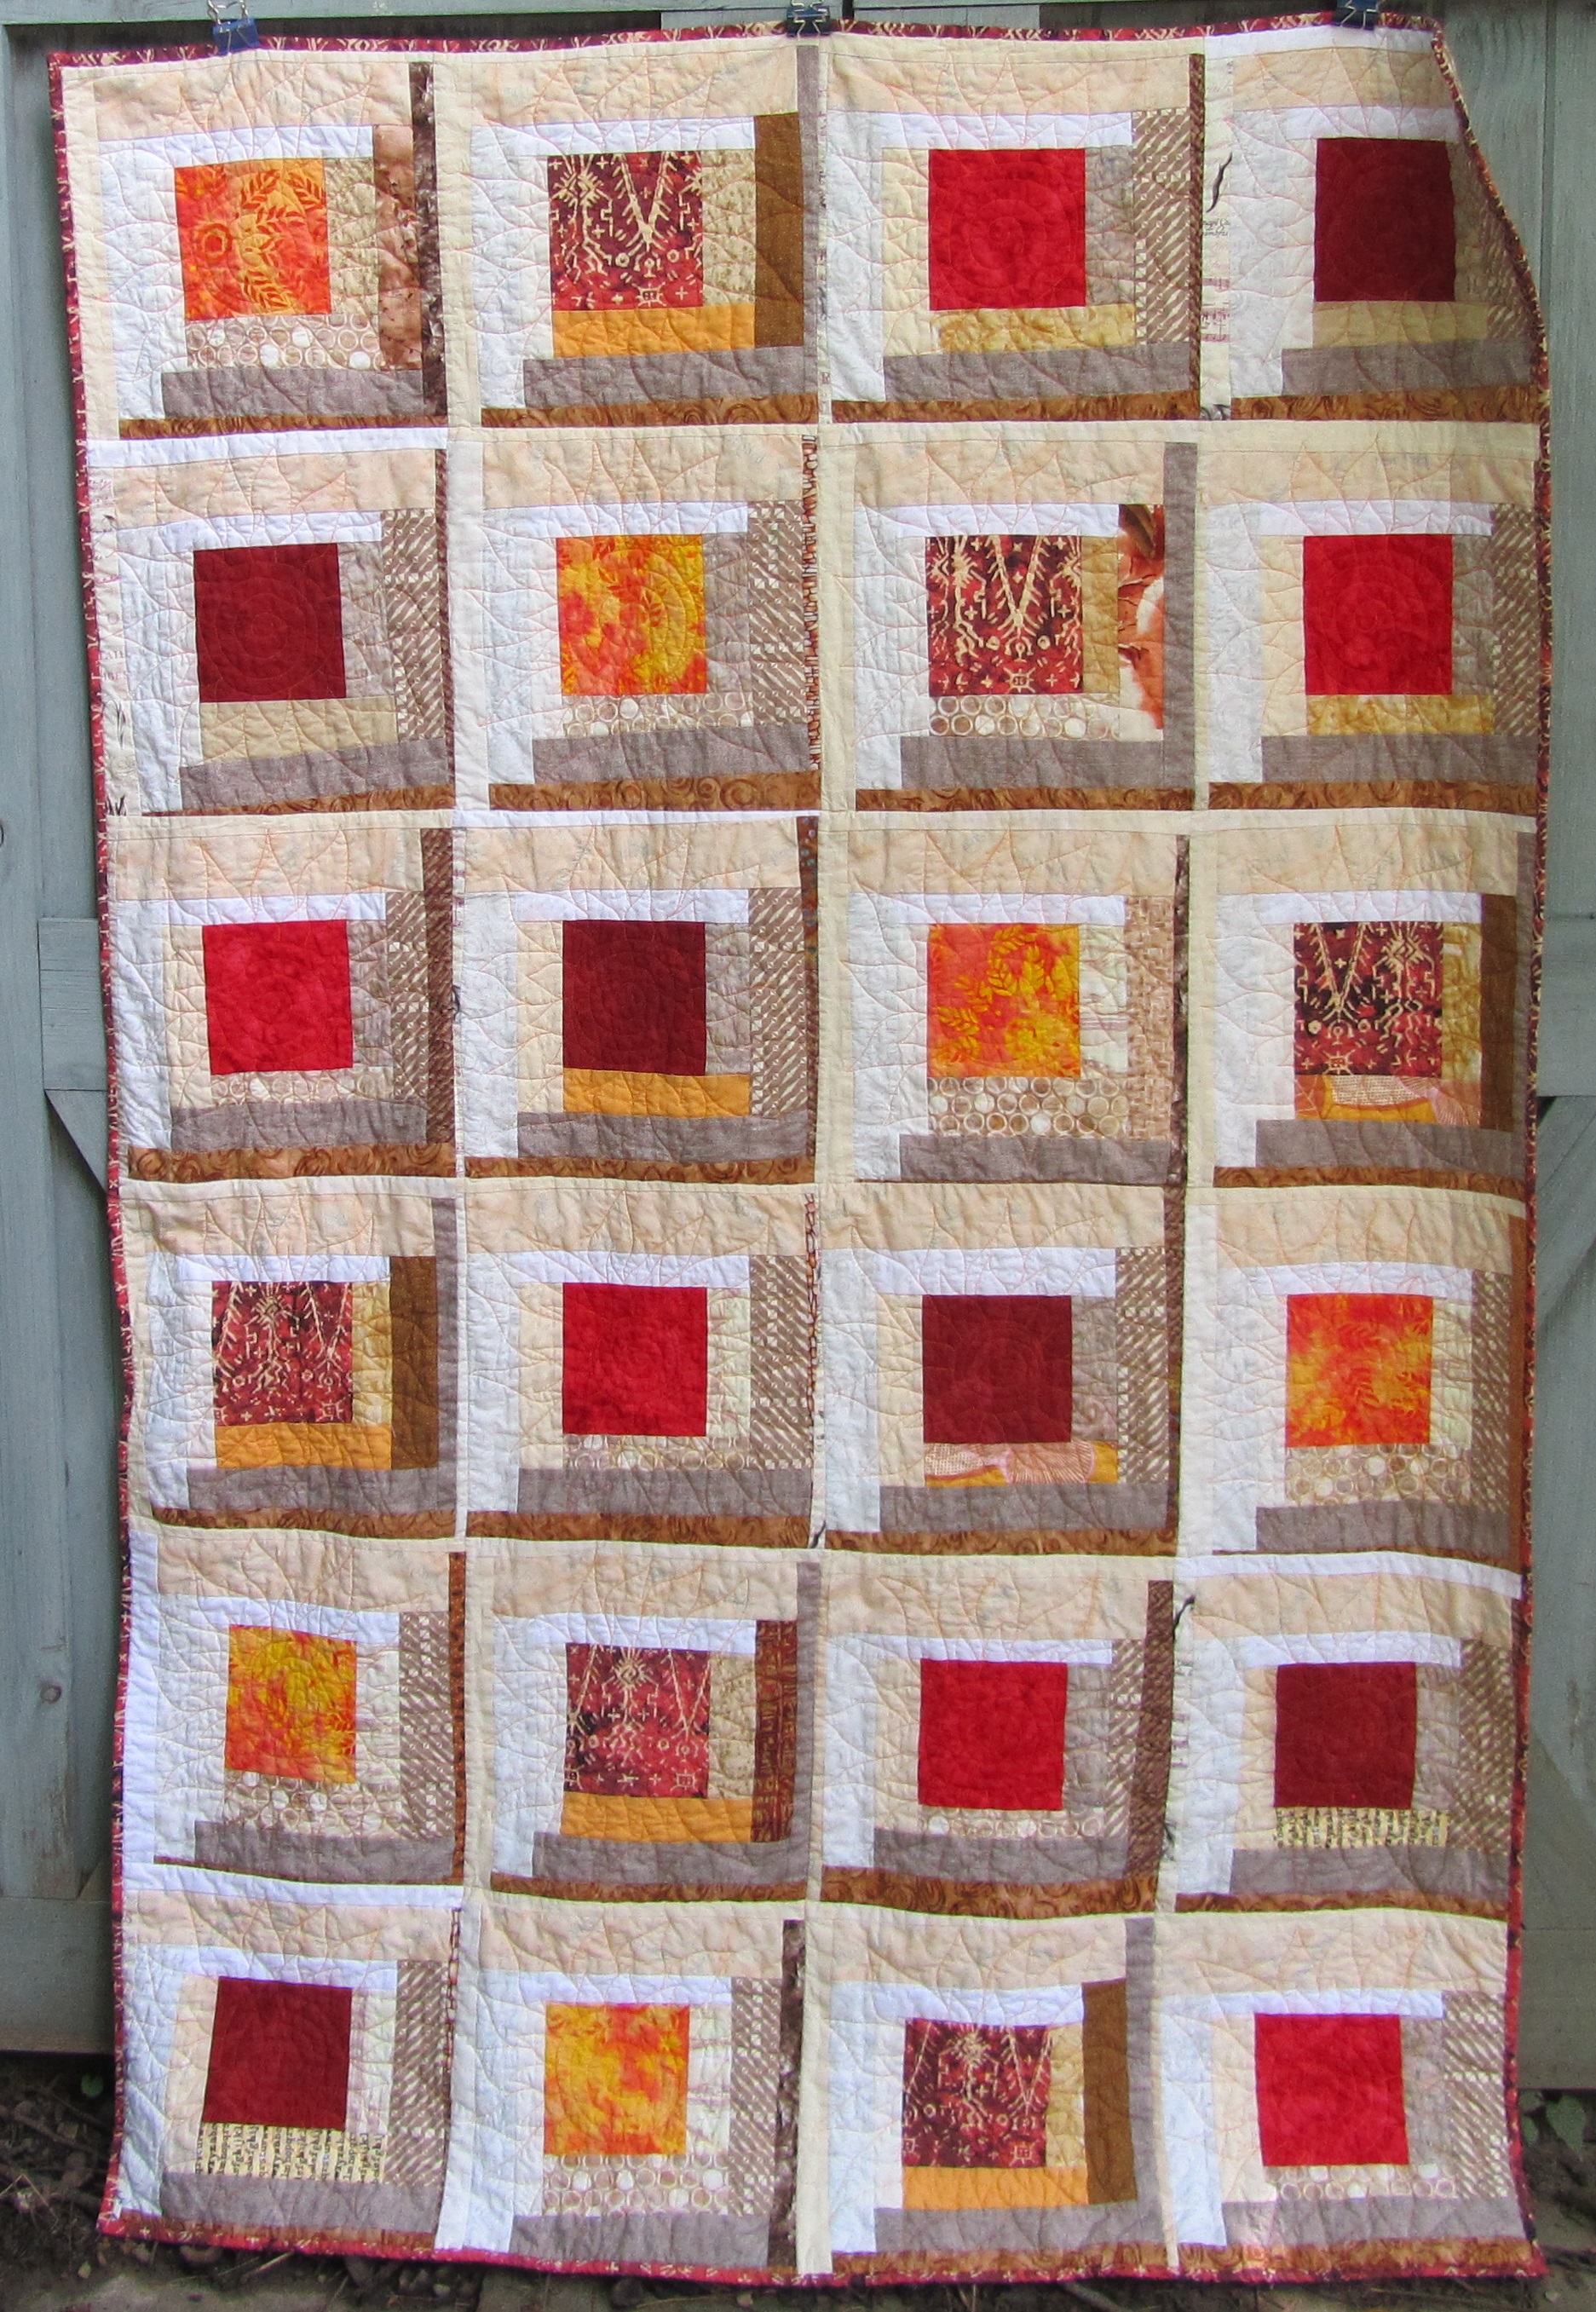
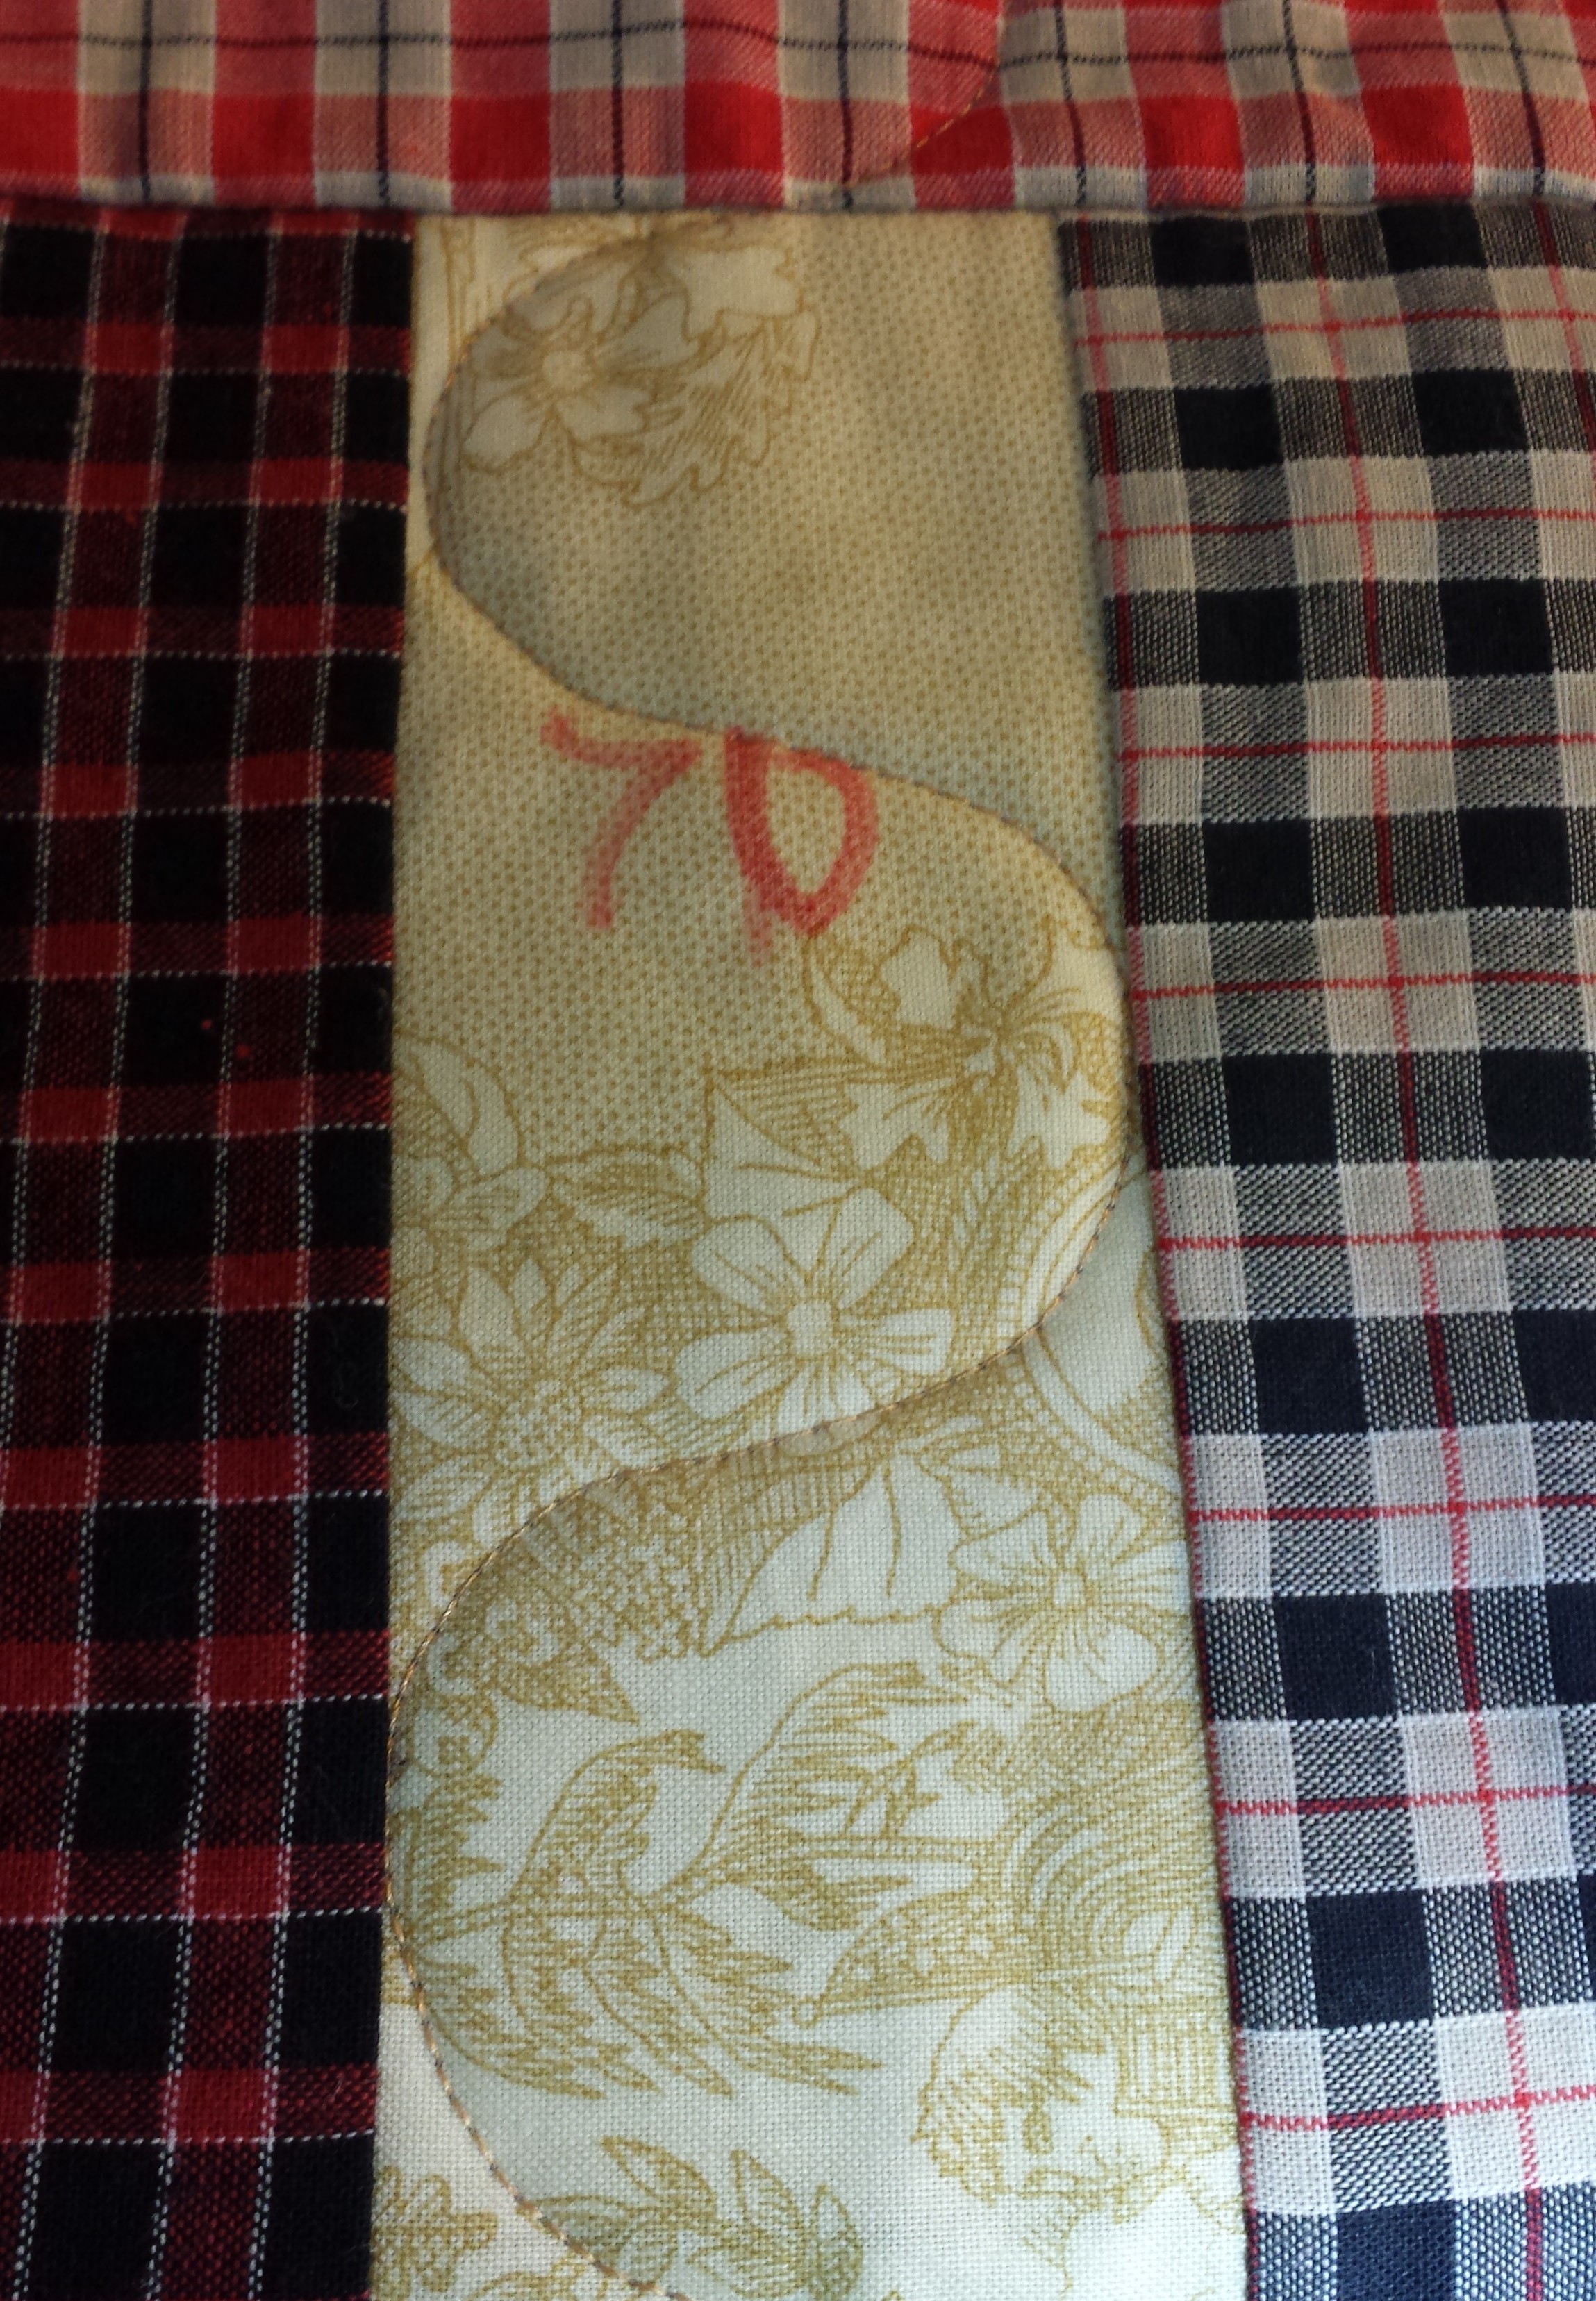
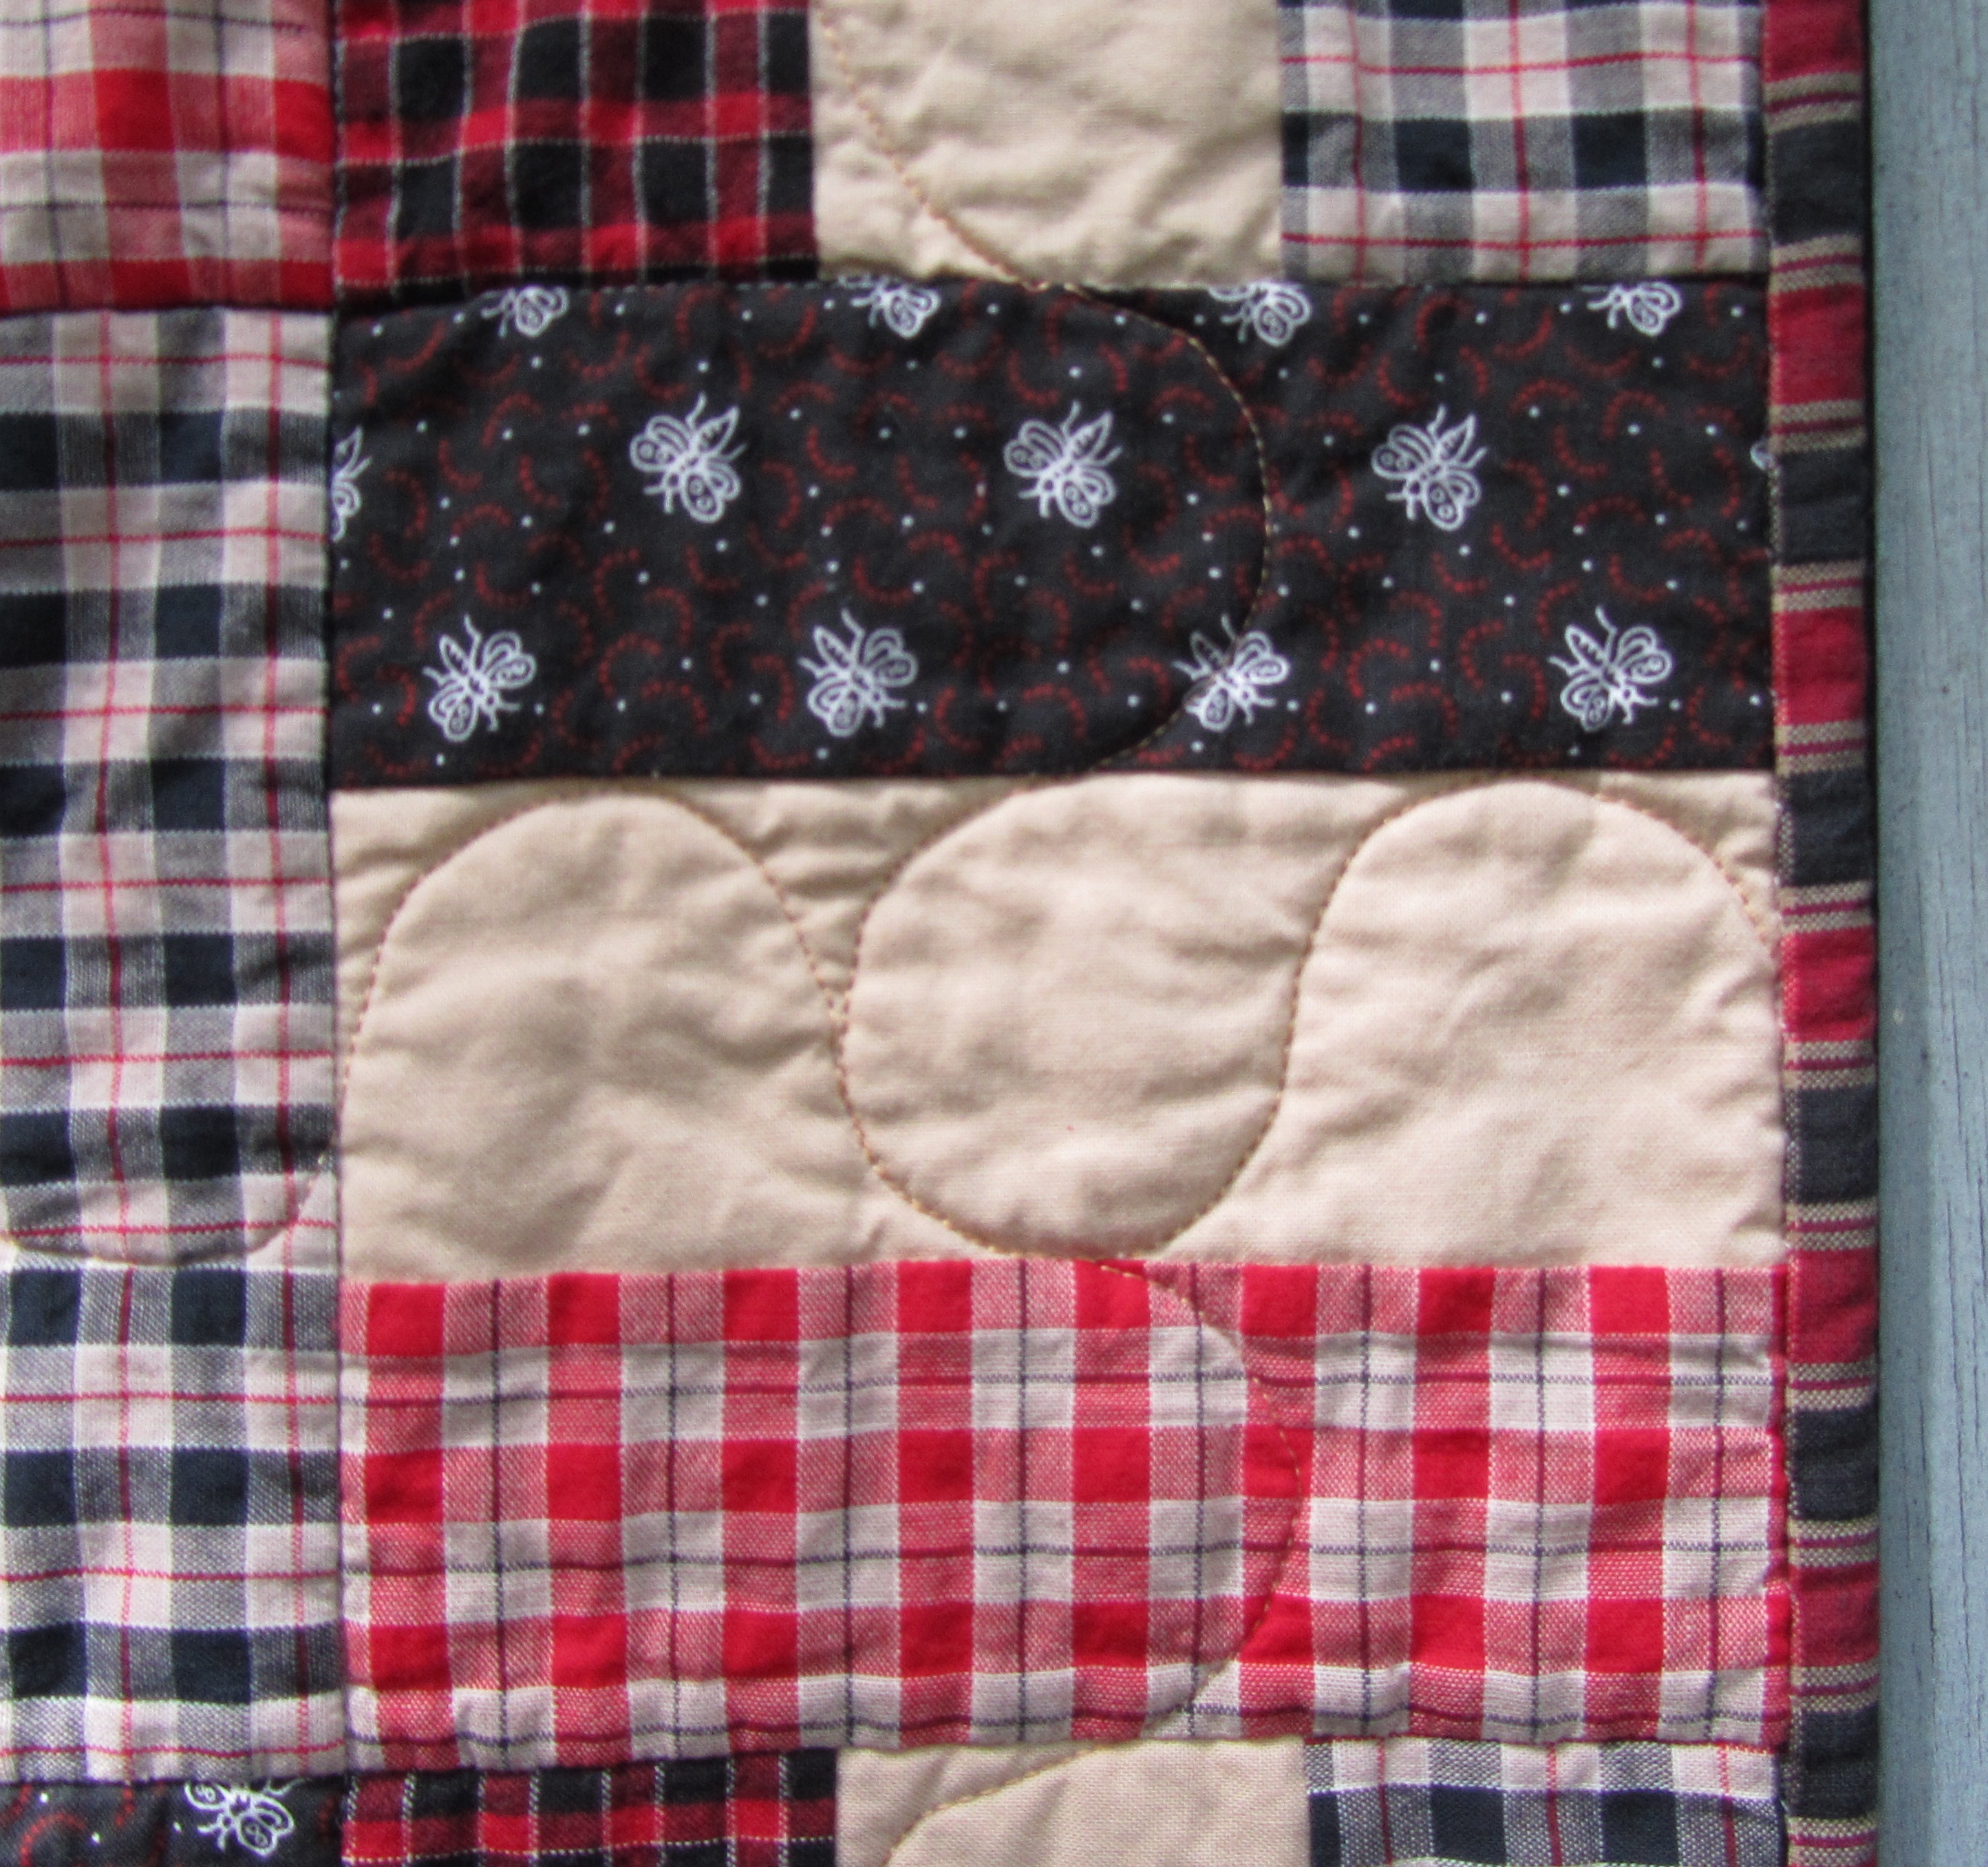
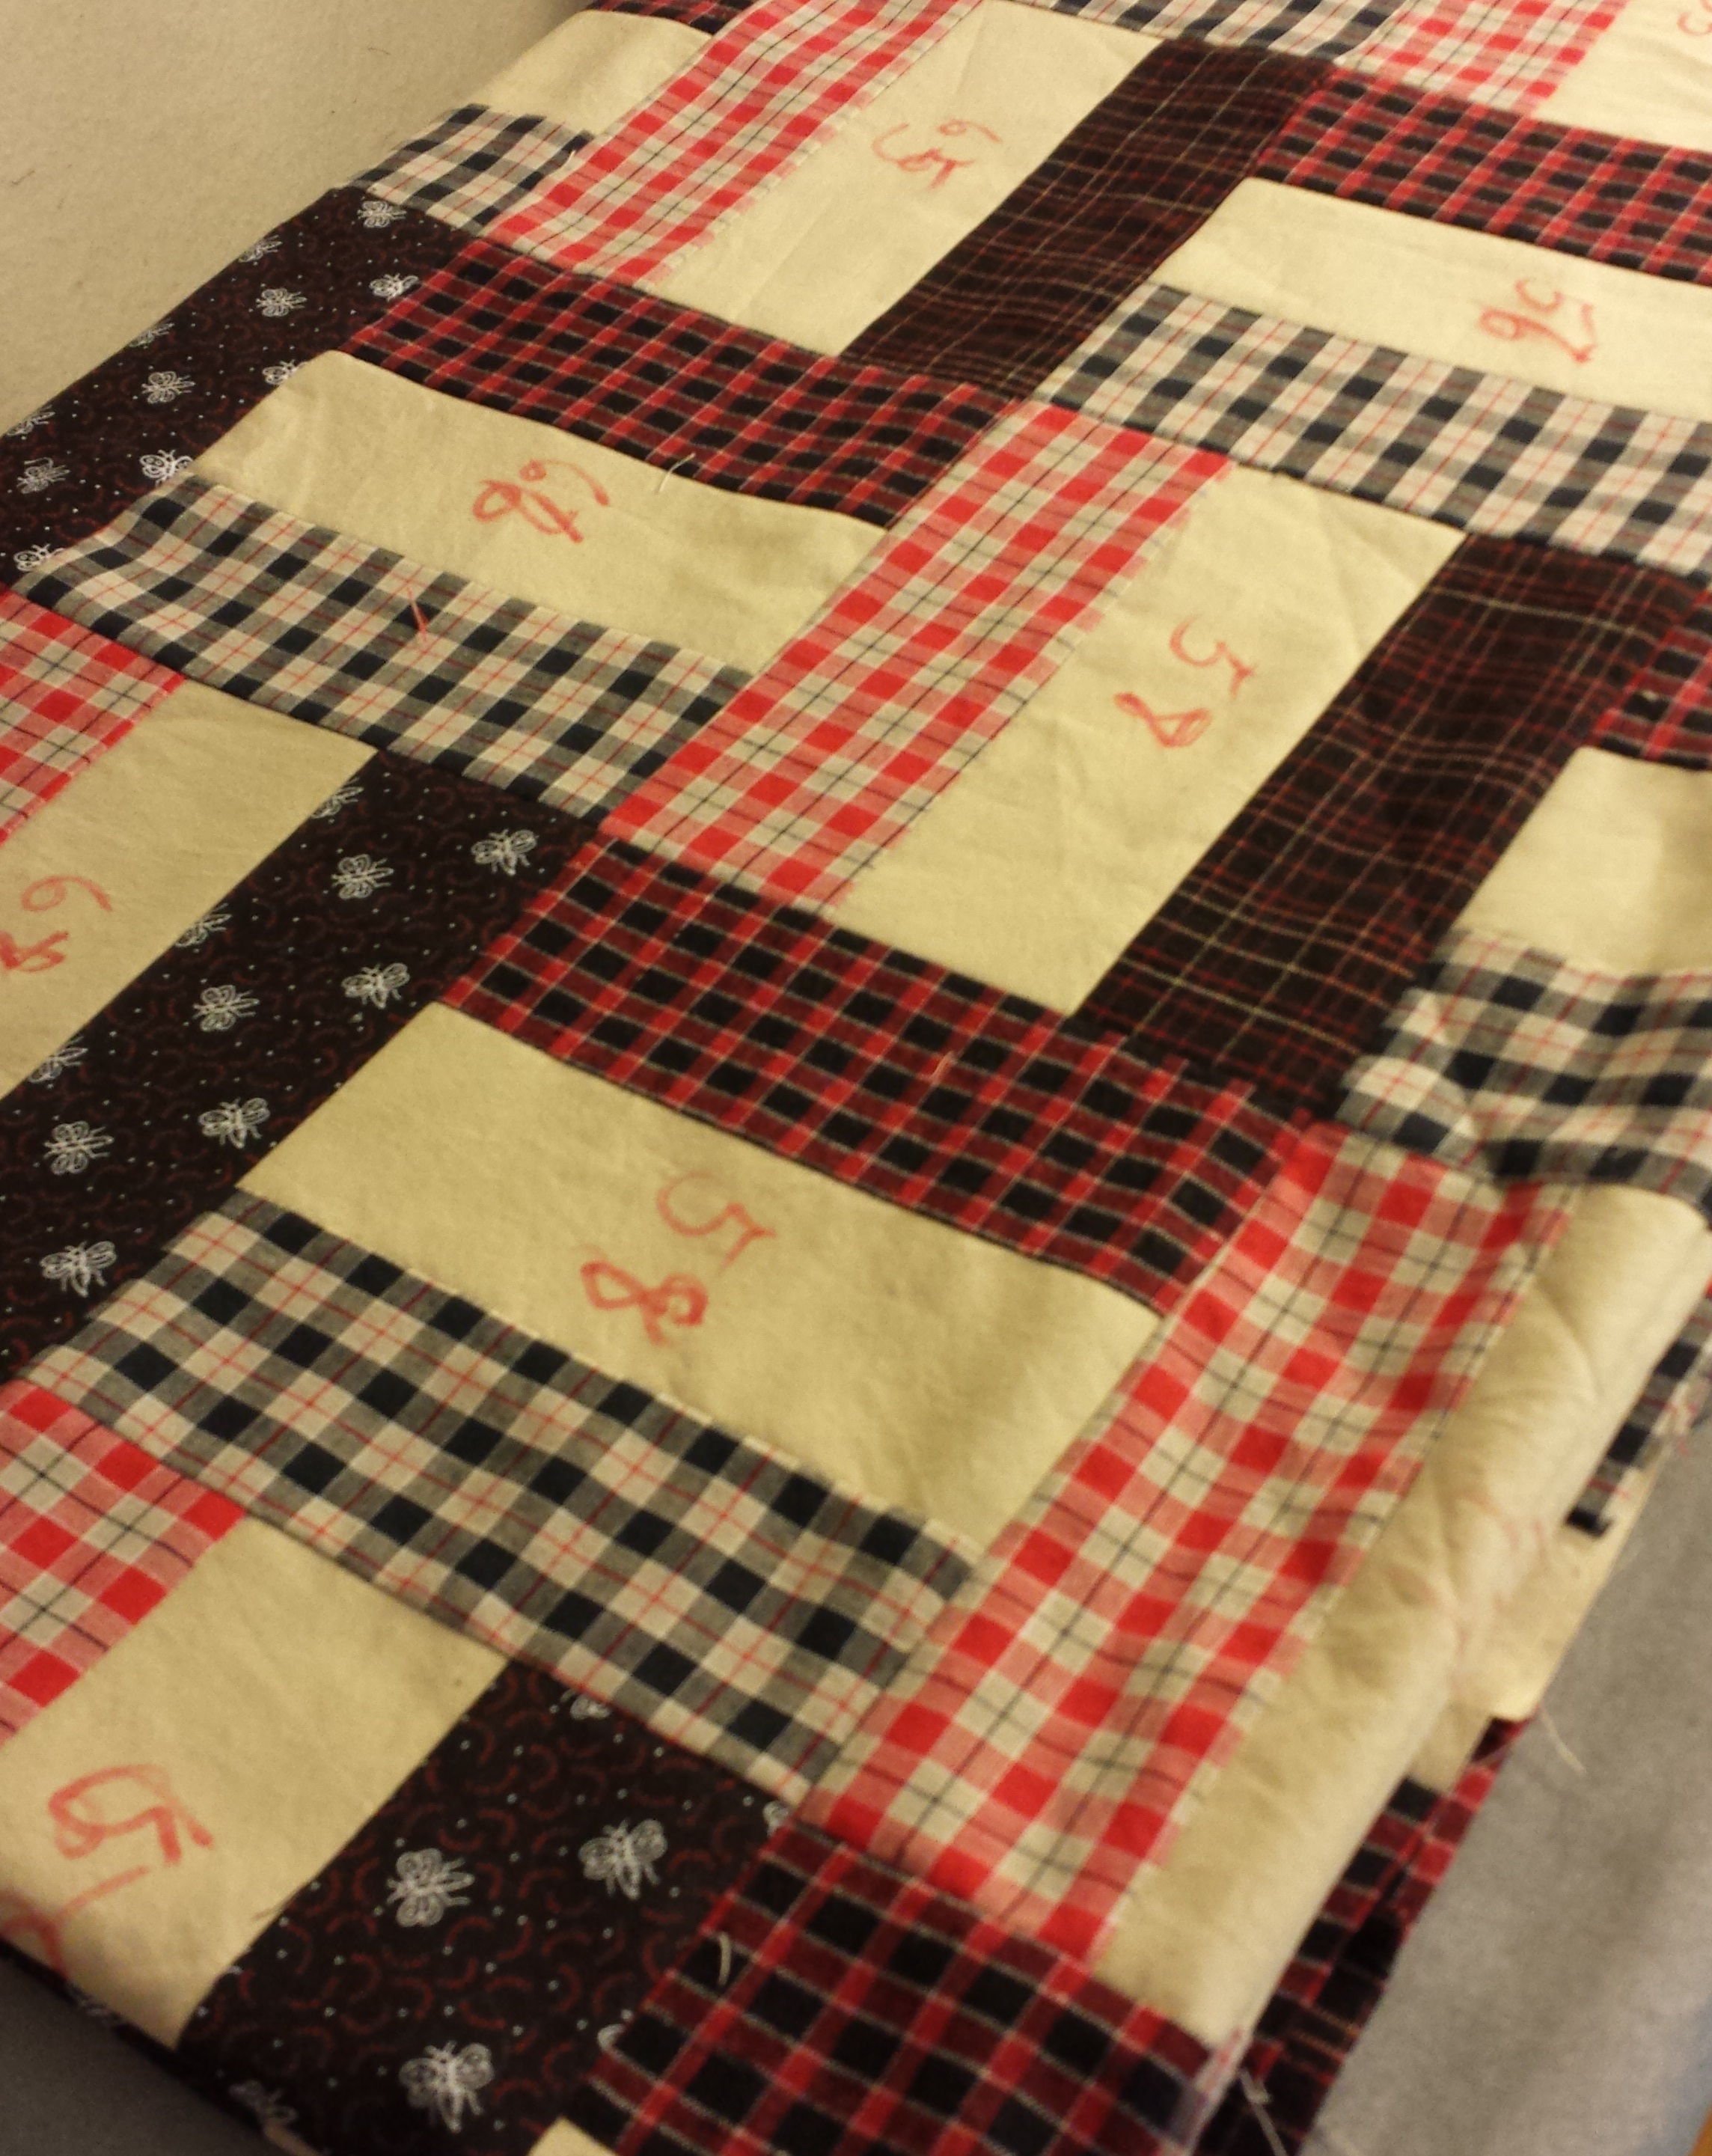
I quickly decided to add khaki Kona to the plaids.  I did that to provide a place for the eye to rest, but it turned out to be a good idea structure-wise.  These woven plaids are very stretchy, and the solid really stabilized the whole top.  By the way, fabrics from long ago were a few inches wider than today’s.  I cut six sets of 6 1/2″ blocks from every set of sewn fabric strips, often with a bit left over to make into a block for the back.


IMG_2091

I also used up included an unusual … mosquito? print fabric, also left from a graduation quilt of the same era.


2014-06-28 14.24.31

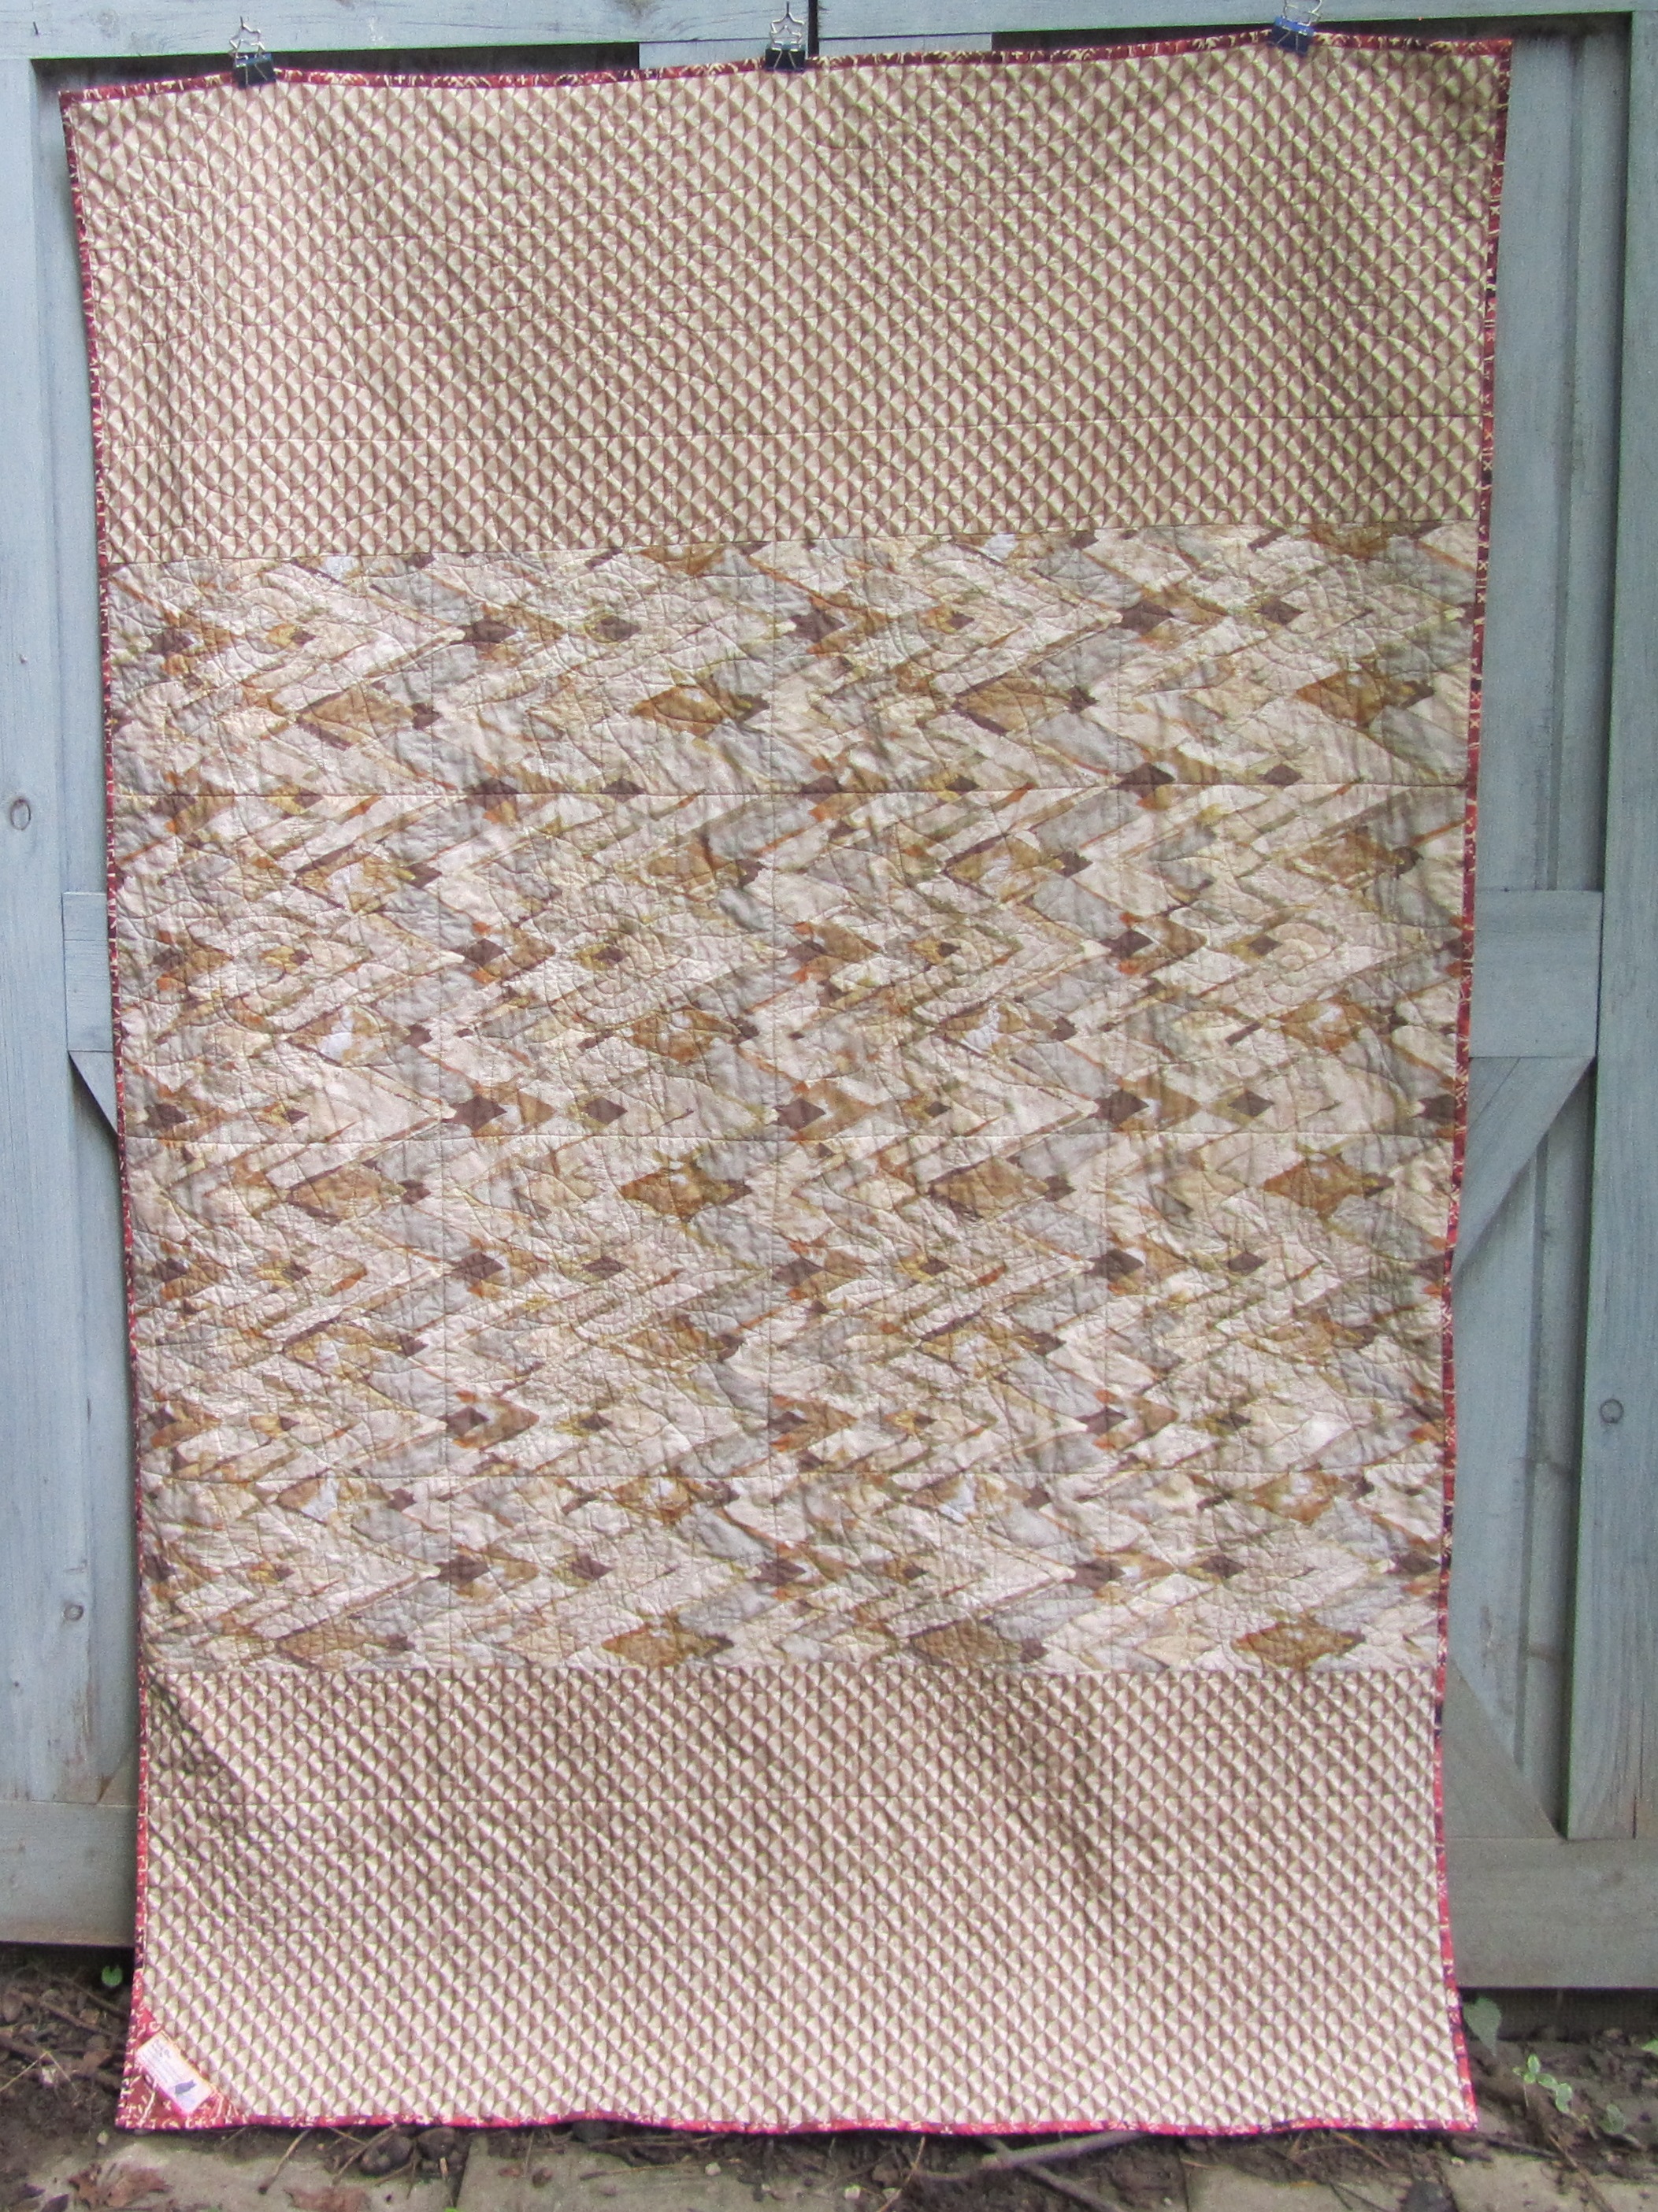
This time I thought I would use the wavy lines, but just down and across the centers of the blocks, and really large.  And, after I found my rhythm, I was really pleased with the way I free-motioned these with no marking.


IMG_2088

The problem came when I turned the quilt and went across the original waves.  It formed these nesting, 3/4 circle things.  Actually, it makes giant puzzle pieces between/across the blocks.  I’m not sure I like it.  I looks vaguely like the quilting on a motel bedspread.


IMG_2078

But, it’s very even, and, with the quilting between blocks, holds the quilt together very well.  I used Superior’s Living Colors poly on top.  I bound it with the last (reasonably stable) bit of plaid.


2014-06-29 16.49.07

So, all and all, a fun couple of weeks and some learning, in the name of a good cause.  See the rest of these Rail Fences at Amanda’s Scrap Basket Quilt Along over at Crazy Mom Quilts.


Leave a comment

Sunday Stash 6/29/14 and Monthly Goals

2014-06-08 19.31.21

Stash:

A great week of finishes!  I finished Beach Quilt VI, and then, this weekend, finished both the Rail Fence quilts for the Scrap Basket Quilt Along.  (I hope to post on those tomorrow.)  Those last two emptied a shallow drawer in my wire baskets that had held all my cowboy and plaid fabric.  Whoot!  Progress!  In good shape to use up 100 yards this year.

This week: +0 yards, -22.5 yards

YTD: +64.75 yards, -133 yards

Net stash used 2014: –68.25 yards


Monthly Goals:

June Goals

1.  Make blocks for Slow Quilt  Yes!  And completed the top!  It’s marinating while I consider batting and quilting.

2.  Donate baby quilts to Project Linus  Yes!  Regular contact seems to have quit;  forced to go to new-to-me quilt shop and dine out afterward, but it’s done!

3.  Commit to a small pouch/bag project and gather supplies.  Sort of .  I’ve decided on box pouches for the kids.  Need to order zippers.

4.  Make something with scraps just for fun.   TWO Rail Fence quilts for Amanda Jean’s Scrap Basket Quilt Along!


July Goals

1.  Make 5-7 box pouches for kids’ Christmas gifts.

2.  Organize stash.

3.  Clean straighten sewing studio.


July goals are not ambitious, are they?  But it’s summer in this part of the world, my studio heats up by early afternoon, and we’ll be gone almost a week in July.  I’ll be happy to accomplish these.


2014 Goals:

I’m very pleased with my progress on these.  I’ve read the books; I’ve been a little experimental with quilting; I tried a new block and used it to make a well-planned, slowly executed top ( it incorporates bold sashing, but not as much as I meant to, so I may do more with that); I’m edging my way into the bag/pouch sewing.  Still need to work on the curved piecing and finish up the other projects.  A good place to be in mid-year.

2014-06-22 12.59.22-1

Beautiful beet mix from the garden.


I’m linking up with Sunday Stash Report at Patchwork Times.


4 Comments

Beach Quilt VI

IMG_2068

This week I finished Beach Quilt VI.  See the other Beach Quilts or links here, if you care.  This wasn’t on my list for this month, but the last one sold quickly, and I was dying to use up these scraps.  And I have just about done that.  I’ll have to go in a different direction with the next one.

IMG_2068 a

I expected to frame the scrap blocks with aqua and khaki solids, but that didn’t work, and I like the low-volume results from these fabrics.  I might like this better than the last one, but I’m not sure.

IMG_2069

The quilting is all free-motion “waves” in Superior’s Living Colors (507) with very little marking.  I think this kind of linear quilting is much harder than working on one area of the quilt at a time.  I studied the quilt for a while, wondering if I would like some kind of motif in each block, but I really like the wave effect, so I bit the bullet.  Every time I reposition my hands, there is the risk of a weird stitch that spoils the smooth lines.  The harder I tried to hold the quilt still as I started up, the worse it was.  I found if I kept my hands lightly on the quilt, or lifted them completely, it worked better.  Good practice, and it turned out well.

IMG_2070

We talked some on Twitter about whether it is necessary to stitch in the ditch to stabilize the quilt before doing more elaborate quilting.  I almost always do.  I started years ago with Harriet Hargrave’s Heirloom Machine Quilting (1995!),  and she told me to stitch between all the blocks first, so I do.  I really think that first, “behind the scenes” quilting gives the quilt structure and allows me to focus on the quilting design without worrying about shifting or wrinkles.  Had I not done this first,  I’m pretty sure this diagonal quilting would have stretched and wonked this quilt into a mess.  I use fine thread that really disappears into the ditch, usually Superior’s Bottom Line (50 wt.).  I guess this is similar to Aurifil’s 50 wt.?  I use my walking foot.  On this one, I went back and free-motioned in the ditch in the corners inside the frames where the wave stitching didn’t catch them.  All this “structural quilting” enabled me to make it look like the only quilting was the widely space groups of waves in the showy thread, yet it’s still all tidy and tight.

IMG_2071

I’ve also used water-soluble thread when I didn’t want to spoil a secondary design with stitches between the blocks.  I did that on Disappearing Pinwheels.  It controlled the puffiness while I quilted, and then didn’t break up those diamonds after it washed out.

IMG_2077

Krissi assisted with this photo shoot.  We’re linking up to Finish It Up Friday at Crazy Mom Quilts.


4 Comments

Design Wall Monday: 6/23/14

2014-06-21 16.12.11

This weekend I put frames around some of the Beach scraps.  There are a few shell fabrics, but by now they are mainly just tan or aqua pieces, and a few whole squares of stripes and ribbons.  I was going to use aqua and khaki in the framing, but the “Azure”, I think it was, didn’t go well with the centers.  This Cream solid and tan print are definitely lower volume than the other quilts, but I like the way the centers stand out.


2014-06-20 16.26.36

I also put the top and bottom together for the plaid Rail Fence for the Scrap Basket Quilt Along.


What are you working on this week?  I’m linking up to Design Wall Monday at Patchwork Times.


6 Comments

Design Wall Monday: 6/16/14

2014-06-12 11.45.47

2014-06-13 14.52.30

These are not exactly “on the wall”; more like works in progress.  I assembled all the blocks from the cowboy fabric into a Rail Fence top for the Scrap Basket Quilt Along, and made a back.  I included extra rail blocks and a few orphan blocks.


Christmas gift bags from a couple of years ago.

Christmas gift bags from a couple of years ago.

I also started making shopping bags from the pile of bird seed sacks in the corner of my studio.  I made some of these a couple of years ago as gifts, and have been saving bags ever since.  My reusable shopping bags are getting a little tattered, so I can use some new ones, but mostly I just want to get rid of some of these bags.  I looked on Etsy to see what others are doing, and found quite a few using these bags.  My favorite is Julia, of One Woman Studio.  Her design sense and color and bag choices really resonate with me.  I also stole a few of her construction techniques.  I’m not going to sell mine (probably).  These are just for my own use, and to keep the pretty bags out of the landfill.

This week's bag

This week’s bag

Nylon web is really the right material for handles, but I’m trying not to buy anything, so my handles are denim cut from old jeans.  Very comfortable for carrying groceries.  I measured my favorite cloth grocery bag to get an idea of size, and cut the front and back 20″ square (from two bags that are too small to use on their own for grocery sacks).  I used a strong poly quilting thread that I have a lot of in a lavender color that I don’t use often.  I tried out some of the stitches on my machine that I usually neglect.  I tried to take advantage of the unique properties of the bags, their body and resistance to fraying, instead of the garment sewing techniques I had used previously.  Lots of flat construction and zigzag-like stitching.  The next will be better, and faster.

I’m also interested in other ideas for using these bags.  Do you have any?


What are you trying this week?

I’m linking up with Design Wall Monday at Patchwork Times.


Leave a comment

Sunday Stash Report: 6/15/14

Happy Father’s Day!  I know I have some male readers.  Why don’t some of you comment and tell how you spent your day?

The Stash

Nothing out this week, but nothing in either!  I made a top and a back this week from the cowboy fabrics, and have all the blocks ready for a plaid top.  I considered quilting the one, just to have a finish, but I am way ahead on the Scrap Basket Quilt Along, and thought I would wait to see if Amanda Jean has any interesting ideas on how to quilt these Rail Fences.

This week: +0 yards, -0 yards

YTD: +64.75 yards, -110.5 yards

Net stash used 2014: -45.75 yards


2014-06-15 09.39.11


The Garden

Yesterday I was thinking about preserving all the cilantro that has loved our cool spring.  I can actually keep a little growing most of the year, between the garden and the greenhouse, but somehow not when I really want it.  I know it can be frozen or frozen as “pesto”, but that requires blanching (easy, but I only had one armfull; didn’t seem worth heating up the water).  Instead, I made Cilantro Salt using these directions.

2014-06-15 09.46.48

This was super easy, and reduced it to a small jar for the fridge.  I also made a smaller jar using dill.  It did seem very salty, but I don’t cook with a lot of salt, so maybe it’s just me.  I reduced the amount of salt with the dill, so we’ll see which I like better.


Hope you have a great day.  I’m linking up with Sunday Stash Report at Patchwork Times.